Compose Parent Communications
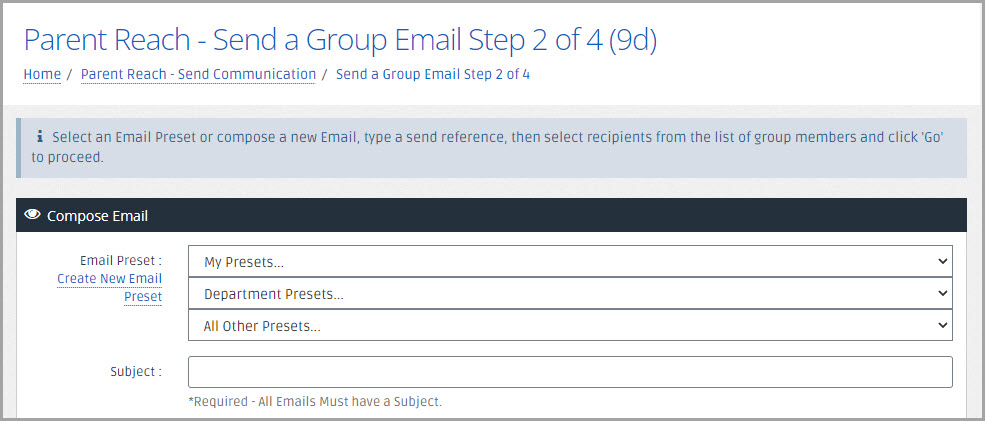
The second step of sending parent communications is to compose the communication content. The Parent Reach Module for IRIS Reach used to send MyEd app messages, texts, or emails to parents and carers for individual or all students. - Send Communication Step 2 of 4 page is displayed labelled according to the type of message being sent.
For each type of communication (message, email, or letter) it is possible to create preset templates that can be used when required. For example, for detentions, vaccinations, sports clubs, etc. The content of a selected template can be edited to meet any specific requirements.
If a preset template has been selected, the content is automatically displayed in The Message, The Email, or The Letter and can be edited.
Select an option from one of the following presets drop-down lists.
My Presets... — templates you have created.
Department Presets... — templates created by another user for your department.
All Other Presets... - templates created by any user.
Alternatively, you can create a new preset. Select Create New Message Preset A list of template messages either provided by IRIS Absence Call or created by your organisation.. For more information, go to Manage Templates.
(Email Only) Enter a Subject (mandatory), which is displayed to recipients.
(Letters Only) Letterhead is selected by default. If you do not want a Letterhead displayed, select Blank Header from the drop-down list, then enter a Letter Title (mandatory).
Enter In-App or Text Messages
Messages can only be sent out by IRIS Reach between the hours of 06:00 am and 23:00 pm.
-
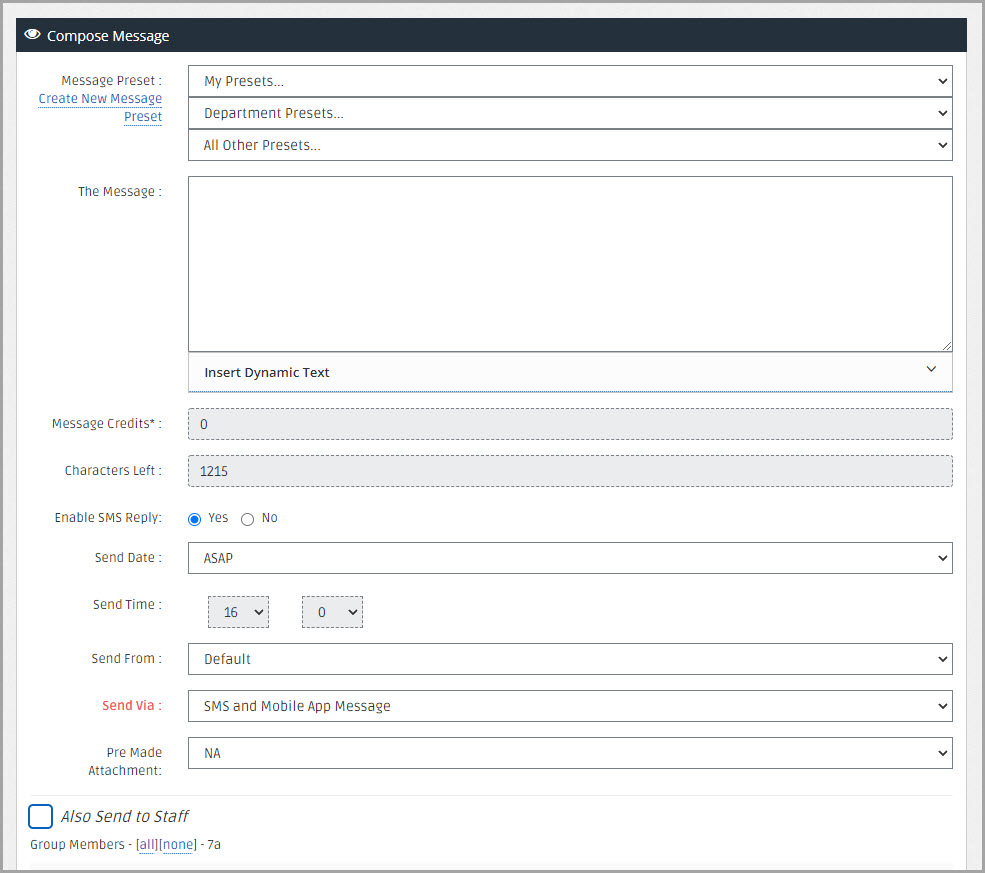
Enter the text you want included in The Message. The message can be a maximum of 9 credits (a total of 1215 characters (135 characters per credit)). Message Credits and Characters Left are automatically updated as you enter text.
We recommend Plain Text is used when creating a message to send out a person A parent, legal guardian, carer, or someone responsible for a student., as special characters, for example £, ', &, % etc. are not supported by some providers.
-
Select Yes or No for Enable SMS Reply depending on whether you want the recipient to be able to reply if sending a text message.
Yes — a warning message is displayed reminding you to add your organisation A school, multi-academy trust (MAT), single academy trust (SAT), club, nursery or organisation that uses the software. name (this is needed as the person could have students at a different organisation).
No — a short version of the organisation name is sent, as specified in the SMS Settings section. For more information, go to Manage Communication Settings.
-
Select a Send Date from the drop-down list. If you select a date from Send Date, select the Send Time.
ASAP is selected by default. If the message needs to be sent immediately, do not change the Send Date. The message is sent as soon as possible (within the next allowable period 06:00 am and 20:50 pm).
-
Select the inbox from which the message should be sent from the Send From drop-down list.
You can only select inboxes for which you have access. For more information, go to Manage Group Permissions.
-
Select the method of delivery from the Send Via drop-down list. The following options are available:
SMS and Mobile App Message — send text messages and In-App messages to the MyEd Name of the application parents and carers use to receive messages sent by schools using IRIS Reach. app (providing the recipient has the app).
Mobile App Message Only — sends messages to recipients who have the MyEd app.
Mobile App Message Only with SMS for those without MyEd — sends In-App messages to the recipients who have the MyEd app, or text messages if they have not got the app.
-
Enter any dynamic text if required. For more information, go to Use Dynamic Text in Communications.
-
If you also want to send the message to staff members, select Also Send to Staff to display a list of staff. Select the staff members or Check All Staff or Uncheck All Staff.
Enter Email Messages
- Enter the details you want included in The Email. Use the formatting toolbar to format the email text as required.
- Enter any dynamic text if required. For more information, go to Use Dynamic Text in Communications.
Enter Letter Messages
- Enter the details you want included in The Letter. Use the formatting toolbar to apply formatting to the letter content.
- You can enter any dynamic text if required. For more information, go to Use Dynamic Text in Communications.
- Select Preview Letter to download a PDF version. Open the PDF to view the letter.
Add Attachments (Email Only)
Files can be attached to an email in IRIS Reach.
Up to 5 files can be attached. Individual files must not be larger than 2 MB. The following file types can be attached - PDF, PPT, PPTX, DOC, DOCX, TXT, JPG, HPEG, GIF, PNG, BMP, XLS or PUB.
- Select Choose File in one of the Attachment fields.
-
Find and select the required file.
To remove an attachment, select Choose File adjacent to the file you want to remove, then Cancel.

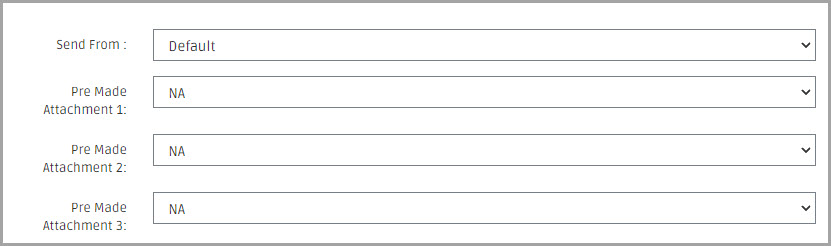
Attach Microsites or Forms
Links to microsites or forms can be inserted into any message, email, or letter. The microsite or form must be created before it can be attached. For more information, go to Create and Edit Forms or Create, Edit, or Delete Microsites
- Select the microsite or form from the Pre Made Attachment 1, 2 or 3 drop-down list.
-
The links are added by inserting either a [LINK1], [LINK2] or [LINK3] dynamic link to reflect the applicable pre made attachment. These are displayed as hyperlinks in the resulting communication.
Select Signature (Letter Only)
When sending letters, you can add a digital signature (a graphic of an applicable signatory). You need to provide the image file and email it to our Support Team so that we can make it available to you. When the signature file has been added, it can be selected from the Signature drop-down list.
If you do not have a signature file, select Blank Not Needed from the Signature drop-down list.
Review Selected Recipients
When the message has been entered and the applicable settings applied, students you selected to send the message to are displayed.
If you intend to contact the person responsible for the student using a different method of communication, you deselect the student to remove them.
Select None or All to deselect/select all the students in the list. A confirmation message is displayed, select OK.
If you have multiple registration groups displayed, select Add All/Remove All to add all/remove all students from the group, . A confirmation window is displayed, select Yes.
If you have multiple year groups displayed and would like to remove an entire year group from this message, select Remove All Year. A confirmation window is displayed, select Yes.
After you have selected the recipients, select Go to review and send the message. For more information, go to Send Communications.