Task types
When creating a task as part of a job, you can choose from a number of different task types. :
| Task type | Description | Can be assigned to |
| Manual task | A simple reminder task | Practice user, Client |
| Send email | Send an email to a client or practice user | Practice user, Senta |
| Send text message | Send an SMS message to a client | Practice user, Senta |
| Send notification | Notify a user | Practice user, Senta |
| Checklist | A to-do list of items to be completed | Practice user |
| Fill in a form | Presents a form for a user or client to fill in | Practice user, Client |
| Yes/no | Answer Yes or No to a question | Practice user |
| Upload documents | Securely upload a document | Practice user, Client |
| Approval | Sign off tasks completed by other users | Practice user |
| Kick off another job | Once completed, this will start another job | Practice user, Senta |
| Generate a Word document | Create a Word a document | Practice user |
| Set a field value | Set the value of a field | Practice user, Senta |
| Call a web url | Send or receive data from an external site using an API | Practice user, Senta |
| Electronic signing | Electronic document signing assigned to clients | Practice user |
| Cancel jobs | Cancel one or more active jobs for a client | Practice user, Senta |
| Add note | Add a pre-written note to a client's record | Practice user, Senta |
Manual task
This is the type of task you'll use most often, and will simply add a button to Mark as complete in a user's Task list. Think of it as a reminder for someone to do something.
Can be assigned to:
-
Practice user
-
Client
Manual task setup
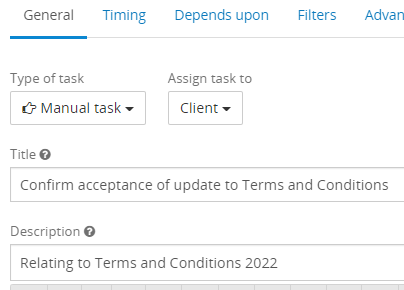
There are no custom tabs when creating this task. On the General tab of the task, choose Manual task as the Type of task and include a Title. You can also include a Description which is recommended if you are assigning this task to a client.
Complete the Manual task
Practice users:
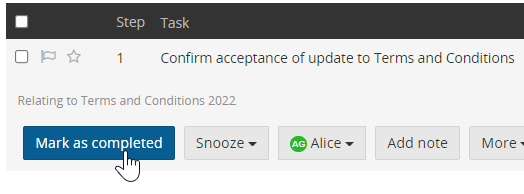
If one of your practice users is completing this task, they just need to select Mark as completed to complete the task.
Clients:
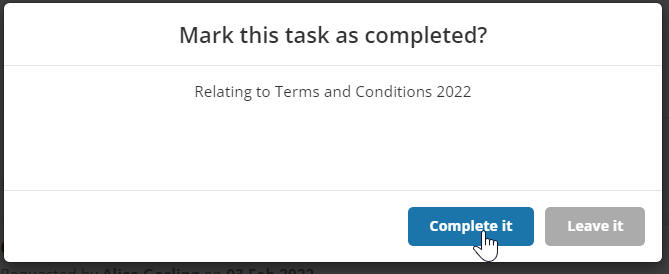
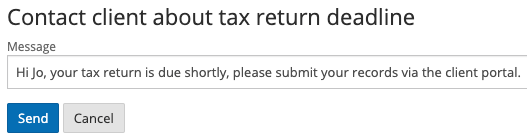
To complete the Manual task, the client selects Complete task.

Upon selecting Complete task, a dialogue box will appear which includes the description and the client can select Complete it to complete the task.
Send email
This task type allows you to create a pre-filled email ready to be sent, complete with any attachments you might want to send. You can use placeholders to auto-fill any information that is stored in your client records or jobs.
Please note: you will need to have your email integration set up to be able to send emails.
Can be assigned to:
-
Practice user
-
Senta
Send email task setup
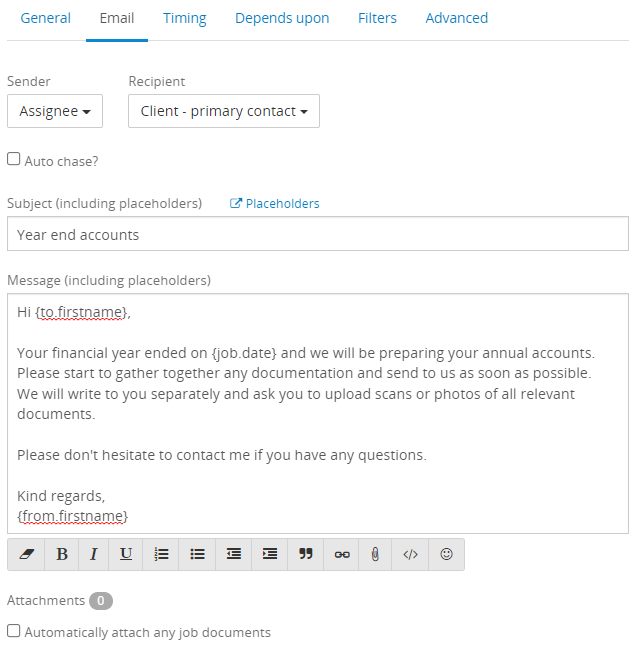
Upon choosing the Send email task type in the General tab, an Email tab will be added to that specific task.
-
Choose the Sender. You can choose to send from the assignee of the task, a specific user or from a user role. If the task assignee is Senta, do not choose Assignee as the Sender.
-
Choose the Recipient. You can choose for a client to receive the email (the primary contact is a default recipient however you can also choose contact roles ; a specific user; or a user role.
-
If you would like to use Auto chase, tick the Auto chase? tick box. For more information on setting up Auto chase, go to our guide.
-
Update the Subject and use placeholders if required.
-
Update the Message. Placeholders can be used here as well as additional formatting found in the toolbar underneath the Message box.
-
Attach document by selecting the paperclip in the toolbar. This is only suitable for generic documents that are not specific to a client. Documents specific to a client can be attached at the point of sending.
-
If you would like any documents uploaded to the live job to automatically attach to this email when sending, tick Automatically attach any job documents.
Complete the Send email task
Practice user:
There are two options for completing a Send email task.
-
Select Send the email - this takes you to the email to make any final changes.
-
Select the arrow icon to open the drop-down menu and select Already done. This will complete the task without sending an email.
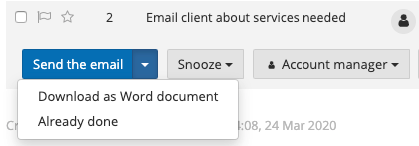
Download as Word document will download a copy of the email however will not complete the task.
After selecting Send the email, if any changes need to be made before sending, you can make these changes at this point. You can also save your changes and return to the email later by selecting Save draft.
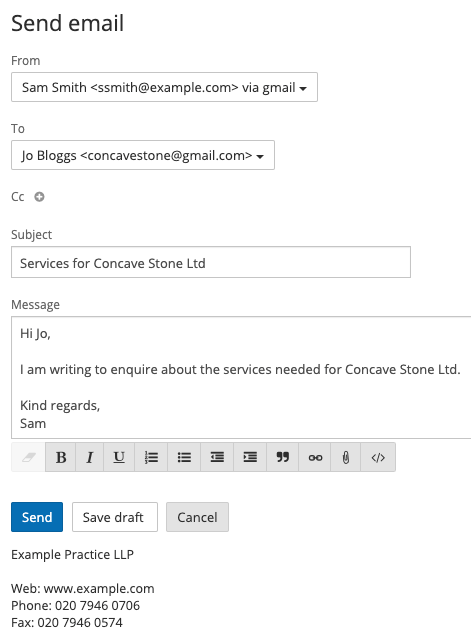
Once you select Send, the email will send to the Practice outbox if this is switched on. If the Practice outbox is not switched on, the email will be sent immediately.
Senta:
If the task is assigned to Senta, as soon as that task reaches its start date, the email will send automatically. The email will queue in the Practice outbox if that option is enabled.
Send text message
This task type allows you to send SMS messages to clients who have a mobile phone number saved in Senta. There is no additional charge for this service. To find out how to set up the Text messaging service, go toSet up text messaging.
Can be assigned to:
-
Practice user
-
Senta*
Send text message task setup
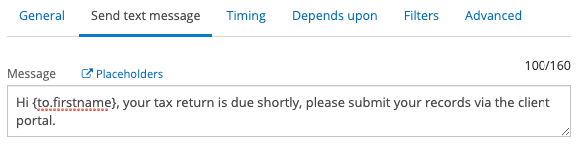
The Send text message tab includes an area where you can write a message to your client of up to 160 characters. You can use placeholders to pull through specific information about the client you are contacting.
When using this task type, you can only text the primary contact of your client.
Complete the Send text message task
Practice user:
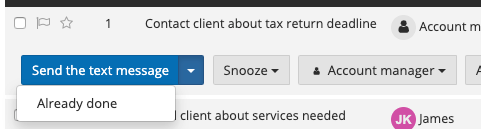
There are two options for completing a Send text message task.
-
Select Send the text message - this takes you to the text message to make any final changes.
-
Select the arrow icon to open the drop-down menu and select Already done. This will complete the task without sending the text message.
Once you have made your changes, click Send to immediately send the text message from Senta.
Senta*:
If the task is assigned to Senta, as soon as that Task reaches its start date, the text message will be sent to the primary contact of the client.
*Please note: Senta recalculates Task statuses at around 3am each day. Any text message Tasks assigned to Senta will be created and sent out to clients around this time.
Send notification
This task type will send a notification to a practice user's Notification globe.
Can be assigned to:
-
Practice user
-
Senta
Send notification task setup
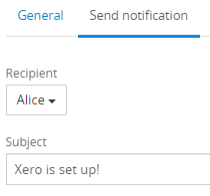
Under the Send notification tab in the task:
-
Choose the Recipient. This can be a specific user or user role.
-
Enter the Subject and include placeholders if you wish to pull through information relating to the client. The Subject will show in the user's Notification globe when the Task is completed.
Complete the Send notification Task
Practice user:
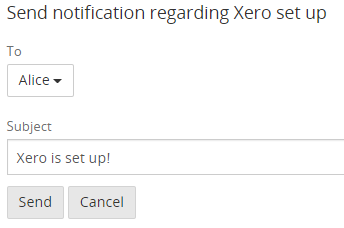
There are two options for completing a Send notification Task.
-
Select Send the notification - this takes you to the notification to make any final changes.
-
Select the arrow icon to open the drop-down menu and select Already done. This will complete the task without sending the notification.

Once you have made your changes, click Send to immediately send the notification to the user recipient.
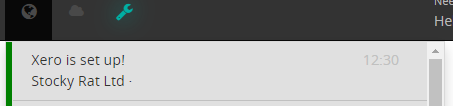
This is how the user will see their notification:
Senta:
If the task is assigned to Senta, as soon as that task reaches its start date, the notification will be sent to the designated recipient.
Checklist
This task type allows you to create a checklist of items to be completed.
Can be assigned to:
-
Practice user
Checklist task setup
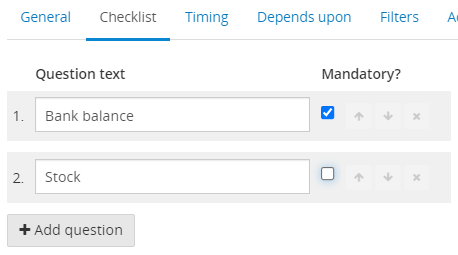
Under the Checklist tab:
-
Enter text into the Question text fields to create your checklist items.
-
To add as more items select Add question.
-
If you require the user to tick a specific item before completing the task, tick the box to indicate that it is Mandatory.
-
To re-order the items, use the up and down arrows.
-
To remove an item select the cross.
Complete the Checklist task
When the task is running, any mandatory items will have a * marked at the end. These items will need to be ticked before completing the task. Whereas, non-mandatory checklist items can be left unticked.
Once done, you can either click Mark as completed, or Finish later to save progress so far without completing the task.
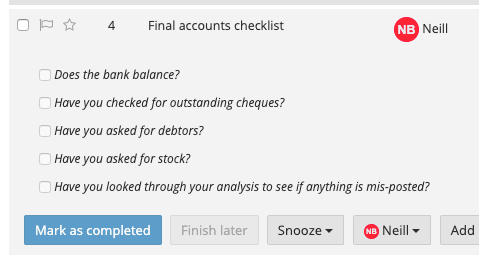
The Checklist task can only be completed by the task assignee.
Fill in a form
This task type presents the user with a form to fill in. You can select from any of the forms stored in Senta.
Can be assigned to:
-
Practice user
-
Client
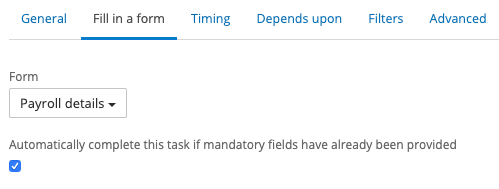
Fill in a form task setup
The Fill in a form tab will allow you to choose which form to fill in.
There is also an option to automatically complete the task if data has been provided in all mandatory fields. For example, if a user had already entered this information elsewhere (via another form or through an import), Senta will automatically complete this task for you.
Complete the Fill in a form task
Practice user:
On the live task in the job, select Fill in form to be taken to associated form.

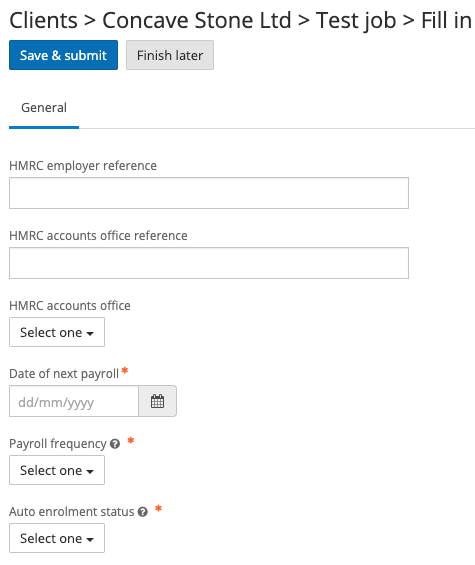
If you start entering data on the form however wish to submit the completed form later, select Finish later.
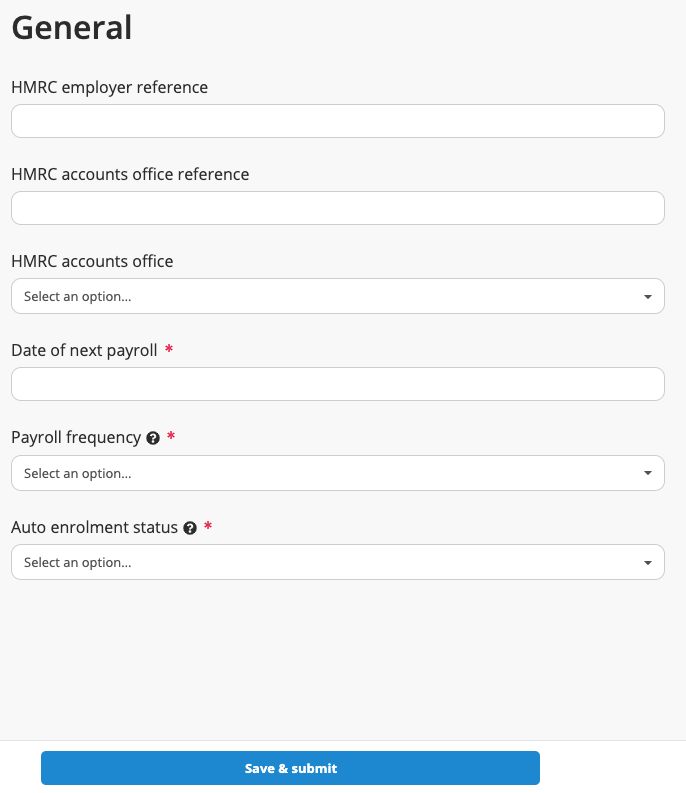
To submit the form and complete the task, ensure that data has been entered into the mandatory fields (indicated by *) and select Save & submit.
Once the form has been submitted, the completed data will be added to a tab on the job.

The tab will add to the client record if the Fill in a form task is included in a one-off job and the form has been set up to show on the client record .
Client:
The Fill in a form task assigned to a client, will show in the Things you must do area in the client portal where they can select Fill in form to be taken to the form.

The client must enter data into the mandatory fields (indicated by *) before selecting Save & submit.
Once the client has submitted the form, this data will show under the form tab in the job.
Yes/no
This task type allows you to answer Yes or No to a question as part of a job.
Can be assigned to:
-
Practice user
Yes/no task type setup
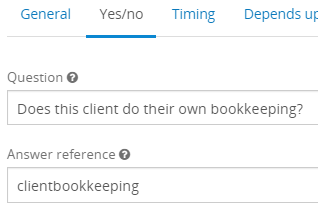
Under the Yes/no tab, enter the question in the Question text box.
If you would like to store the answer within a field reference, enter a field reference in the Answer reference text box. This allows you to use the answer within a placeholder elsewhere in the job.
Complete the Yes/no task
In the live job, the question will be displayed at the bottom of the task where you can select Yes or No.
Upload documents
This task type prompts either the practice user or client to securely upload documents.
Can be assigned to:
-
Practice user
-
Client
Upload documents task setup
The Upload documents tab will includes a text area to enter instructions for the client or user.
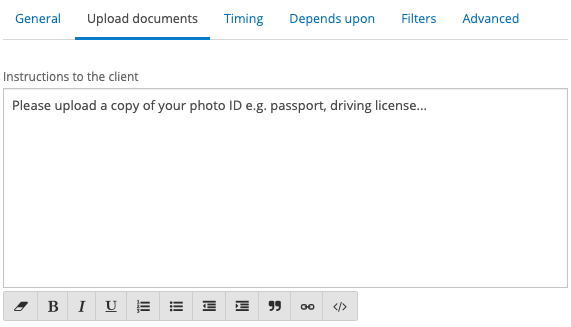
For the client, these instructions appear in the client portal and not in the accompanying notification email.
Complete the Upload documents task
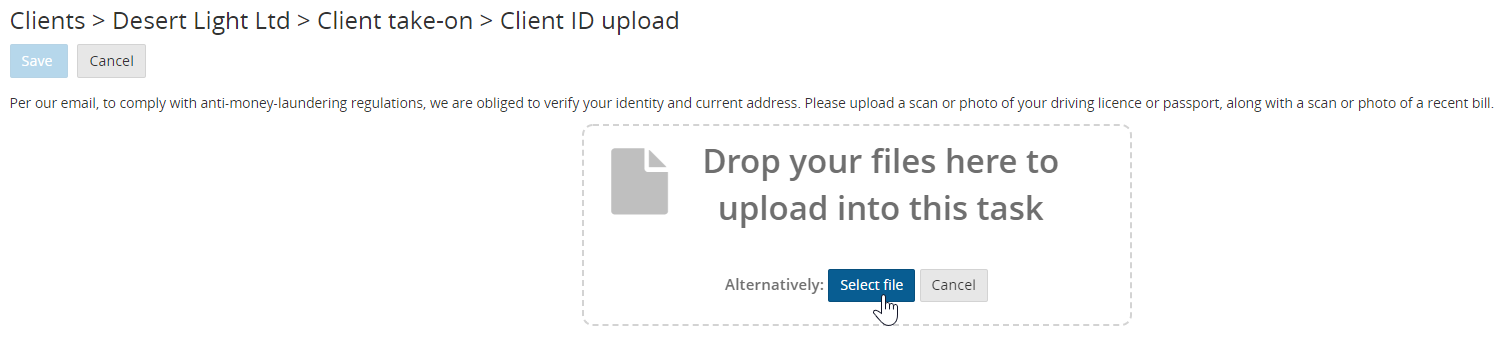
Practice user:
On the live task, select Upload to be taken to a page to upload documents/files.
To upload files, select Select file or drag files from your device onto the page.
Once files have been uploaded, Senta will ask you to set the visibility of these. See our guide on Document visibility to find out more about the visibility options.
To complete the task, select Save.
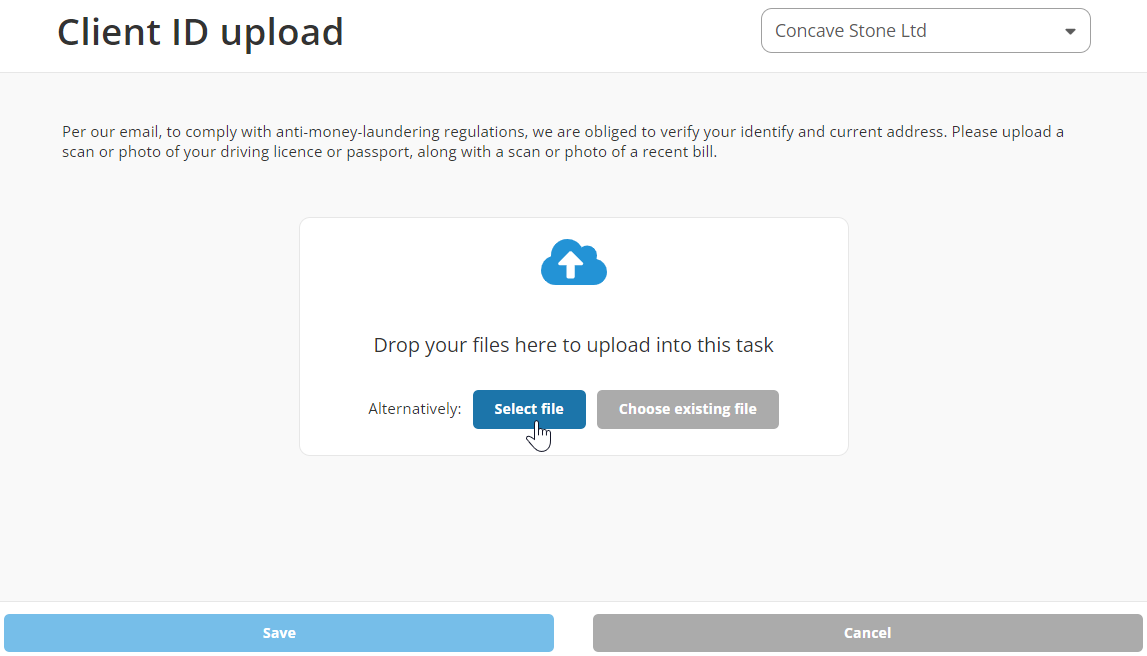
Client:
Once the Upload documents task has become Ready for the client, this will be available to complete in their client portal. A notification email will be generated to inform the client of the available task.
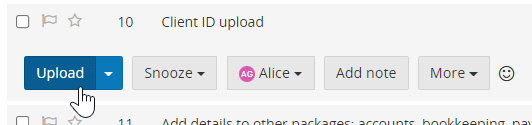
On the task in the Things you must do area, the client can select Upload to be taken to the upload area.

The client can upload files, by selecting Select file or drag files from their device onto the page. They can provide a note to accompany these files.
Once finished, the client selects Save which will complete the task and notify their Account manager.
Approval
This task type allows other tasks to be signed off by someone in the practice. This can be useful for managing workloads within your practice, or if you have new members of staff who require some overseeing of their work before filing or sending to a client.
Can be assigned to:
-
Practice user
Approval task setup
Under the Tasks to approve tab you can choose one or several previous tasks from that job that need to be approved.
Complete the Approval task
Practice user:
When you are working on a live job, the Approval task will remain blocked until you have completed the task that needs to be approved. Once the previous task has been approved, you will have the option to Approve or Reject.
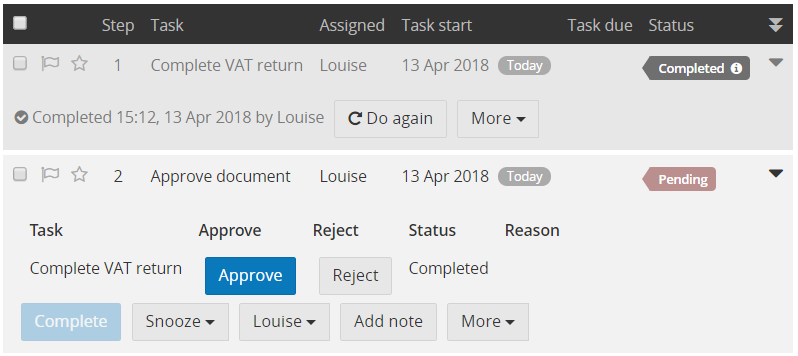
To approve the task select Approve and then Complete. This will complete the task.
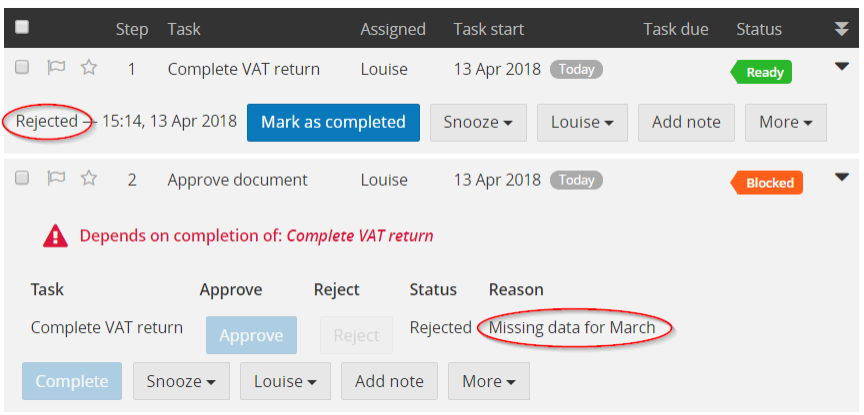
To reject the task, select Reject. A dialogue box to write in the reason for rejection will be available as well as the option to choose who to re-assign the previous task to. Once you have completed this, select Reject.
Once the previous Task is rejected, it will uncomplete and appear in the assigned user's task list. The reason for rejection will be listed on the Approval task and the rejected task will have a note to inform the user that it was rejected.
Kick off another job
This is a really useful task type which starts another job.
Can be assigned to:
-
Practice user
-
Senta
Kick off another job task setup
Under the Kick off another job tab, choose the job you would like to kick off from the list of jobs.
There are then 4 options to choose from, to determine what the new job's job date will be set as when it kicks off:
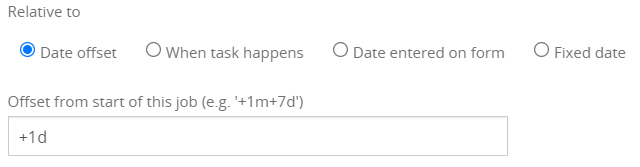
Date offset
The job date for the new job can be set relative to the current job's job date using a Date offset.
Add a Date offset to the text box. For example, if the current job date is 31 December 2021 and we enter +1d, the job date of the new job will be 1 January 2022.
When task happens
The job date for the new job will be the date in which the new job kicked off. For example, if the Kick off another job task completes on 1 March 2022, the new job will kick off on the same day with the job date of 1 March 2022.
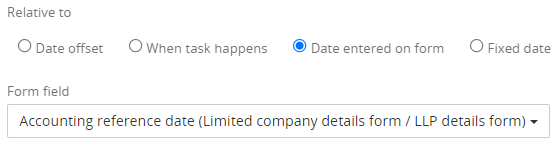
Date entered on form
The job date for the new job will use a date entered in a pre-existing form field. For example, if my client's Accounting reference date is 31 January 2021, the job date of the new job will be 31 January 2022.
Choose a date field from the Form field list. This will include all date fields stored in your forms.
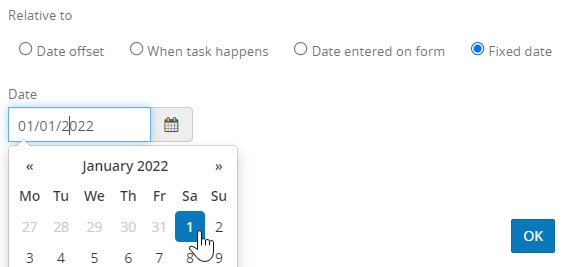
Fixed date
The job date for the new job will use the date you enter. For example, if you select 1 January 2022 as your Fixed date, this will be the job date of the new job.
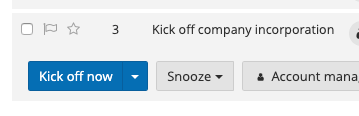
Complete the Kick off another job task
Practice user:
To complete this task as the user, select Kick off now on the live task.
Senta:
If the task is assigned to Senta, as soon as the task reaches its start date, the new job will be kicked off.
Generate a Word document
This task type allows you to create a Word document from a template. You can use placeholders to pull data in from your clients' page, just like when sending an email through Senta. When you select a sender or recipient, this will allow Senta to pull details such as first name, last name etc. using placeholders.
Can be assigned to :
-
Practice user
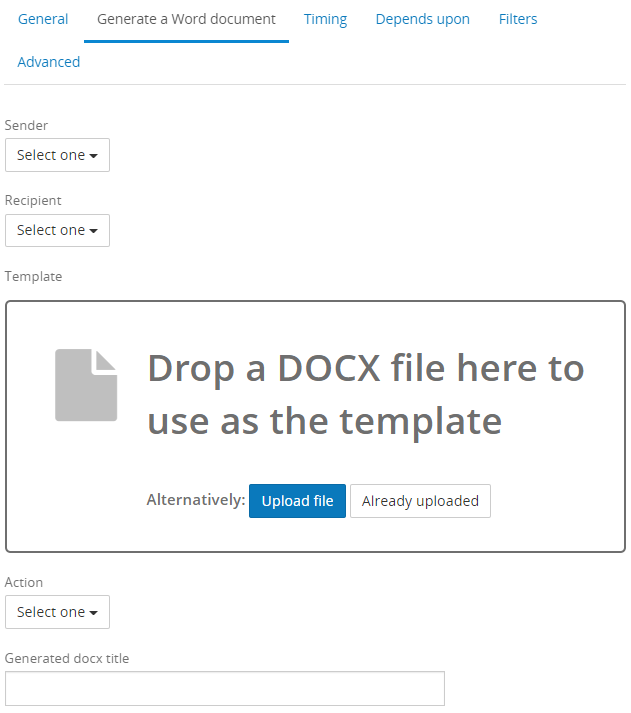
Generate a Word document task setup
Under the Generate a Word document tab, select the Sender and Recipient and add your letter template. You can choose to upload the DOCX file from your device or choose a file you have already uploaded to Practice documents.
Choose between three options:
-
Download as docx - the task will download the document to your device
-
Generate and store a docx - the task will create a Word document and store it against the job for you
-
Generate and store a pdf - the task will create a PDF from the uploaded doc, and store it against the job for you
If you would like your generated document to store as a PDF and to keep the formatting from your DOCX file, we recommend using Download as docx and then converting this to PDF outside of Senta.
If you would like your document to generate with a different document title, add this to Generated docx title.
Complete the Generate a Word document task
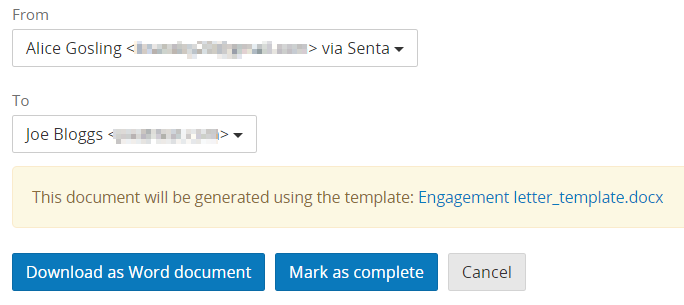
Practice user:
When completing the task, select Generate Word document:

Select Download as Word document and then Mark as complete.
You will need to select Download as Word document regardless of the Action chosen during setup.
Set a field value
This task type allows you to quickly change a pre-determined value on a client record. For example, you could use this task type to change a company's State field from "Prospect" to "Client" once they confirm they will be going ahead with you.
Can be assigned to:
-
Practice user
-
Senta
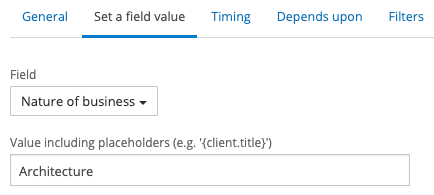
Set a field value task setup
Under the Set a field value tab choose the Field to be updated, and the Value you want to set the field to.
Any field type can be updated, and if placeholders and date offsets can be included, this will be clear in the Value heading:
You can also set a field to update to be blank, by leaving the value empty, or setting the lookup to Select one.
This is not possible for date fields.
Complete the Set a field value task
Practice user:
To complete the task, click Set [field name] to [value].
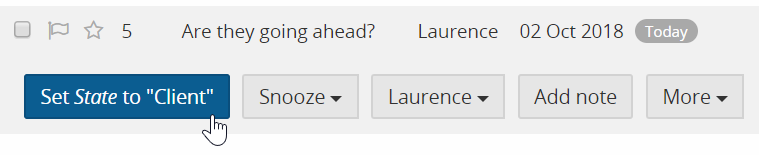
The field will then update to the new value.
Senta:
If the task is assigned to Senta, as soon as that task reaches its start date, the field data will automatically update.
Call a web url
This task type is used to send and receive data to and from external sites, using an API.
Can be assigned to:
-
Practice user
-
Senta
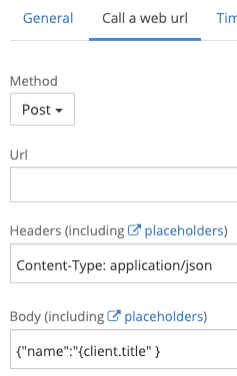
Call a web url task setup
The Call a web url tab includes fields where you can choose between GET and POST methods, and enter the API URL for the site you wish to access. Enter the API in the Body text box.
Complete the Call a web url task
Practice user:
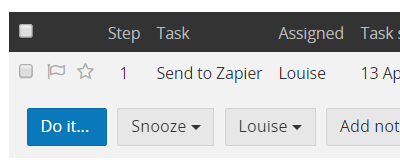
To complete the task, select Do it...
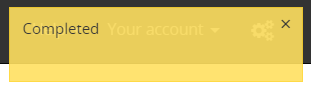
If it is successful, you will see a Completed message at the top right of the screen.
Senta:
If the task is assigned to Senta, as soon as that task reaches its start date, Senta will automatically call the web URL.
Electronic signing
The Electronic signing task allows you to send PDF documents to clients to be signed in the portal.
Can be assigned to:
-
Practice user
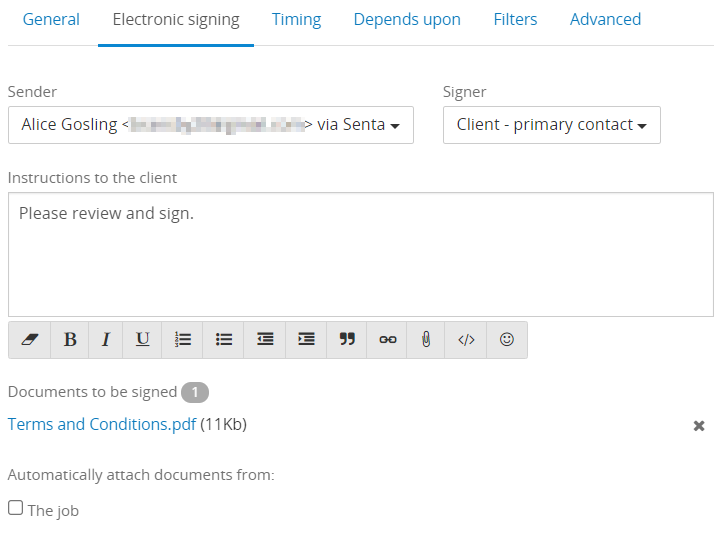
Electronic signing task setup
Under the Electronic signing tab select the Sender and Signer, and enter instructions to the client. The Sender can be an Account manager, custom user role, the same as the assignee, or a specific practice user.
You can attach a document as part of the template, or attach it when you are completing the task. You can also choose to automatically have any job documents attach to this task for the client to sign.
Complete the Electronic signing task
Practice user:
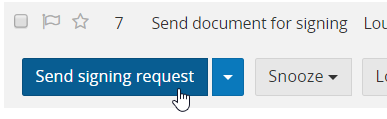
When viewing the task, select Send signing request.
This will take you to a page where you can edit the instructions to the client, and add documents to sign if you have not done so already.
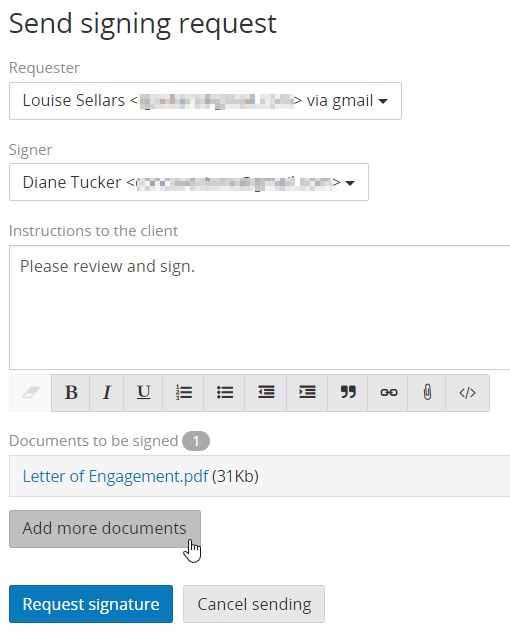
Select Request signature to send the request to your client's portal. An automated email notifying your client about the signing task will also be created.
Cancel jobs
The Cancel jobs task allows you to cancel one or more live jobs (with the job status of Ready, Overdue or Pending) for a client. This can be useful as a time saving step, for example if you were to create a "Leaving client" job, you could set the first task to be "Cancel all scheduled jobs".
Can be assigned to:
-
Practice user
-
Senta
Cancel jobs task setup
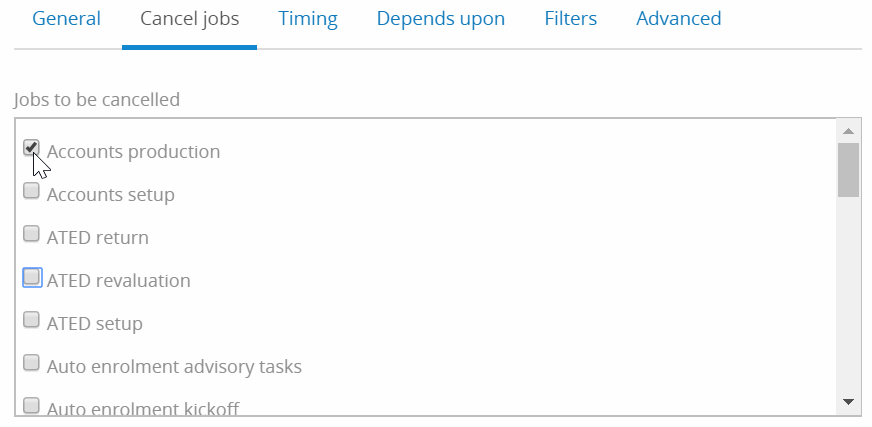
From the Cancel jobs tab you have the option to choose which jobs to cancel for the client. You can select as many or as few as you need.
Complete the Cancel jobs task
Practice user:
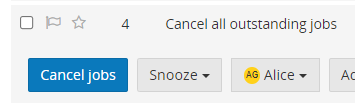
When completing the task, select Cancel jobs and all of those jobs will be cancelled at the same time.
Senta:
If the task is assigned to Senta, as soon as that task reaches its start date, Senta will automatically cancel the selected jobs.
Add note
You can use the Add note task to quickly add a pre-written note to the client.
Can be assigned to:
-
Practice user
-
Senta
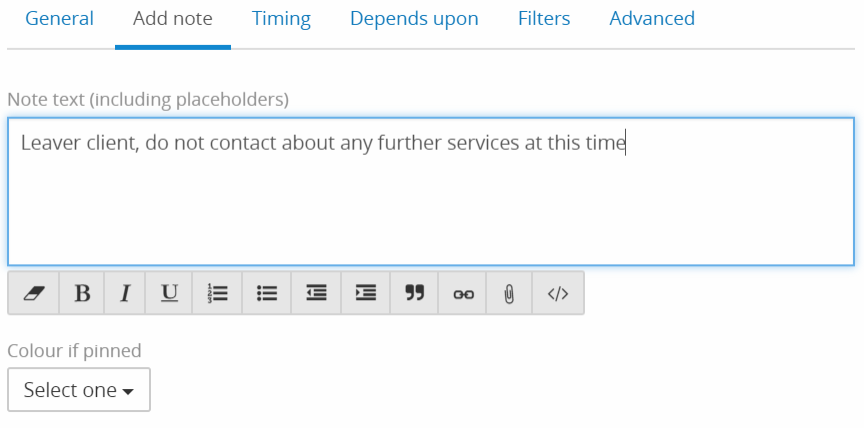
Add note task setup
On the Add note tab you have the option to write the text of the note, including placeholders.
You can also choose the colour of the note when it is pinned. By selecting a colour, in the task setup, this will cause the note to pin automatically when the Add note task is completed. If you do not want the note to pin automatically, leave this as Select one.
Complete the Add note task
Practice user:
To complete the task select Add note:

You will be able to edit your note further if required before saving. Once saved, the note will be added to the Notes tab on the job and client record.
For more information on adding notes, go toAdd client notes
Senta:
If the task is assigned to Senta, as soon as that task reaches its start date, Senta will automatically add the note.