Set Up Recurring Text Messages
In IRIS Reach you can set up recurring text messages, which are automatically sent to a person A parent, legal guardian, carer, or someone responsible for a student., for example, to remind them about a day of the week that they need to make payments.
- Select Parent Reach Module for IRIS Reach used to send MyEd app messages, texts, or emails to parents and carers for individual or all students. > Send Communication.
- The Parent Reach - Send Communication page is displayed. Select Send a Group Message.
-
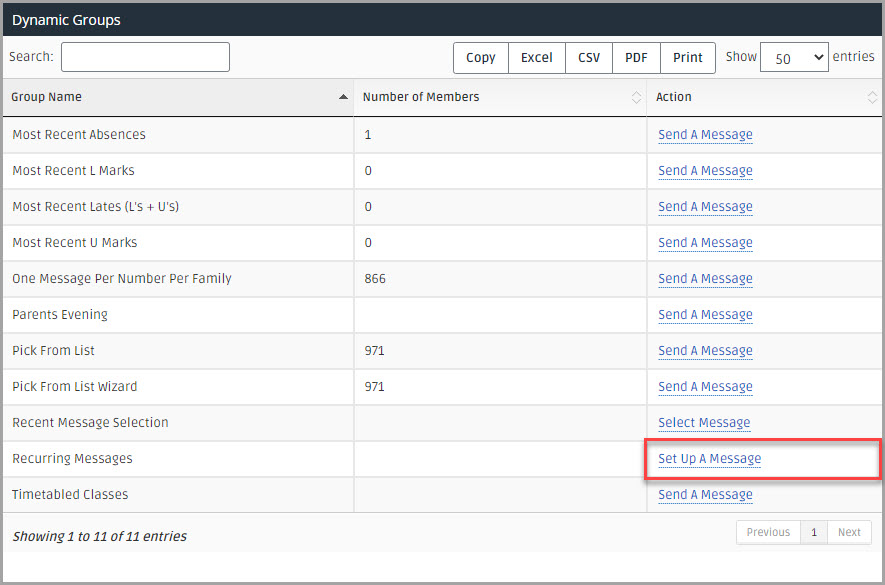
The Parent Reach - Send a Group Message Step 1 of 4 page is displayed. From Dynamic Groups, select Set Up A Message next to Recurring Messages in Group Name.
-
The Parent Reach - Recurring Messages page is displayed. You can either create a new message or manage an existing message.
Create a Recurring Message
-
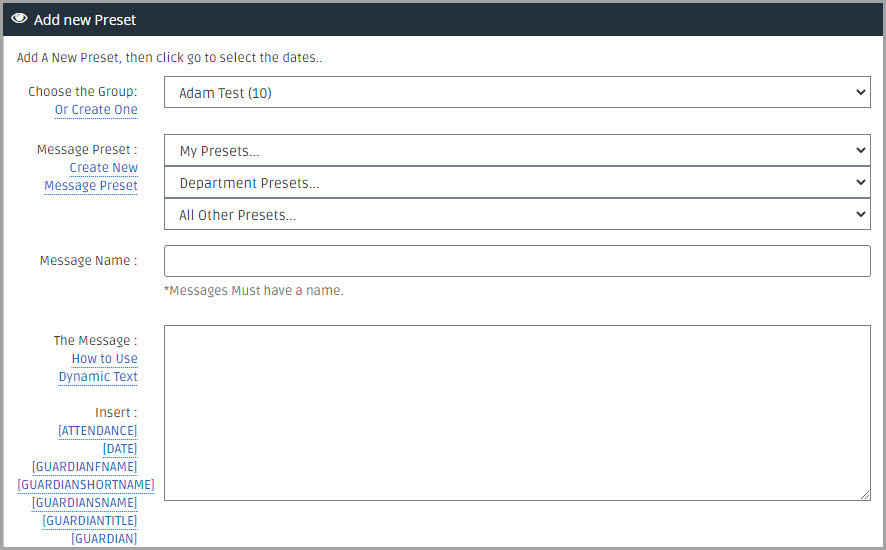
In Add new Preset, select the required group from the Choose the Group drop-down list, e.g., Breakfast Club. The number of group members is displayed next to the group name.
If the required group is not listed or you want to create a new group, select Or Create One. For more information, go to Add, Edit and Delete Groups.
-
Select a message to send from the required Message Preset A list of template messages either provided by IRIS Absence Call or created by your organisation. drop-down list. The content of the preset message is displayed The Message, which can be edited as required. Alternatively, to create a new message, enter a Message Name, then enter the required content in The Message.
We recommend you use plain text when composing a message to send, as characters, such as £, ', &, and % may not be supported by all devices.
If you want to create a new message preset template, select Create New Message Preset. For more information, go to Manage Parent Reach Communication Templates.
-
If you want to insert any dynamic text fields, e.g., [STUDENTFNAME], position the cursor at the point within The Message the text should be displayed, then select the required option from Insert. For more information, go to Use Dynamic Text in Communications.
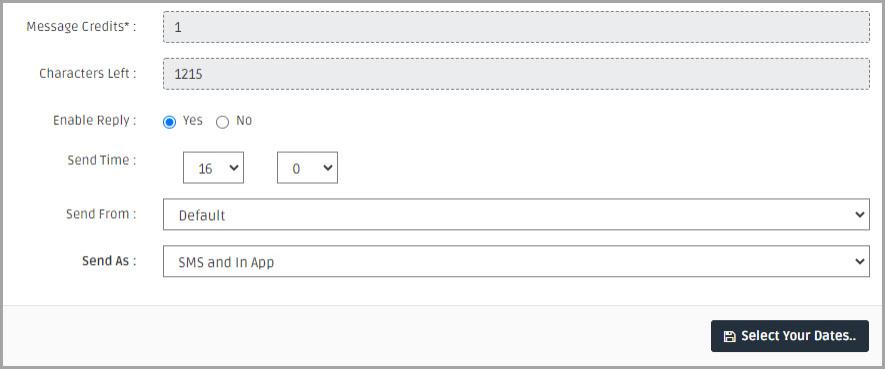
- The text message can be a maximum of 3 credits (total of 405 characters, 135 characters per credit). Message Credits and Characters Left are automatically updated as you enter the message details.
-
Select Yes or No for Enable Reply, to determine if a person can respond to the message.
If you select Yes, a message is displayed to ensure you have added your organisation A school, multi-academy trust (MAT), single academy trust (SAT), club, nursery or organisation that uses the software. name to the message (as a person could have students at a different organisation). If you select No, the IRIS Reach automatically adds a shortened version of the organisationname, as specified in SMS Settings. For more information, go to Manage Communication Settings.
- Select the Send Time for the message from the drop-down lists.
-
Select the inbox from which the message is to be sent from the Send From drop-down list.
Only inboxes you have permission to view are displayed.
-
Select how the message should be sent from the Send As drop-down list. The following options are available:
SMS and Mobile App Message — sends text messages and in-app messages to the MyEd Name of the application parents and carers use to receive messages sent by schools using IRIS Reach. app (if the person has downloaded the app).
Mobile App Message Only — sends a message only to a person if they have downloaded the MyEd app.
Mobile App Message Only with SMS for those without MyEd — send message to a person if they have downloaded the MyEd app and as a text message to those who have not.
-
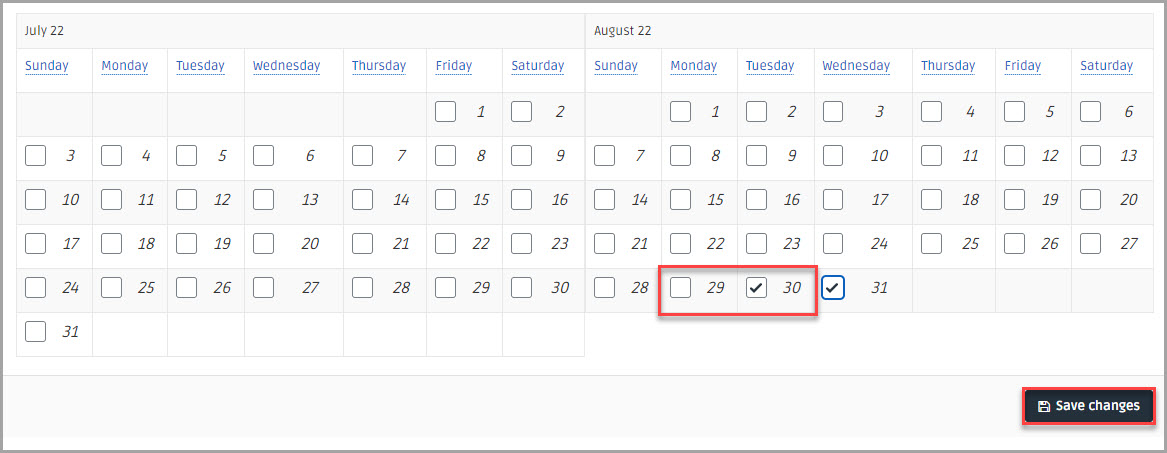
Select Select Your Dates...
-
The Parent Reach - Set Recurring Dates page is displayed. Select dates on which you want the message to be sent, then select Save Changes.
-
The Parent Reach - Recurring Messages page with the new message displayed in the Recurring Messages is displayed.
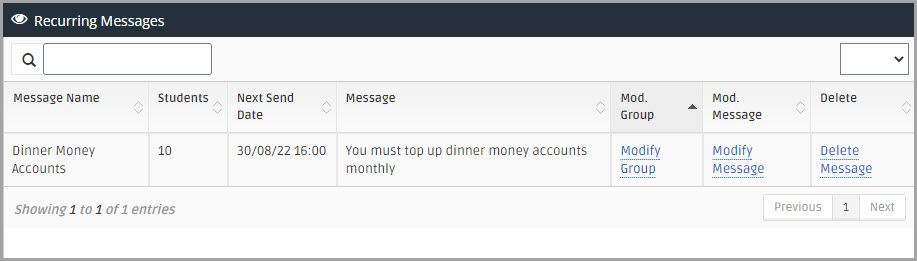
Manage Recurring Messages
Recurring Messages displays the Message Name, the number of Students the message is being sent about, the Next Send Date, with a preview of the Message.
For each Recurring Messages you can:
Modify Group — select next to the Message Name to edit the students in the group. For more information, go to Manage Custom Groups.
Modify Message — select next to the Message Name to edit the existing recurring message.
Delete Message — select next to the Message Name to delete the recurring message. A warning message is displayed, select OK to confirm.