Set Up SIMS Link
The SIMS Autolink automatically transfers student and staff data from SIMS into IRIS ParentMail.
The link must be installed by an IT Technician from your organisation before it can be activated. If you are locally hosted for SIMS (you have a SIMS server that runs overnight within your organisation), you must make sure the software is installed directly onto the SIMS Server and not on a local machine. If you are centrally hosted for SIMS (your SIMS server is hosted elsewhere) you need to log a request an Open VPN Connector program from the host of your SIMS system. This program must be installed on your computer, then an IT Technician from your organisation can install the SIMS Autolink on your computer. For more information, go to Install SIMS Auto Link.
If you are hosted with SCOMIS, request your SIMS credentials from SCOMIS. If you are unsure about your Server setup, check with your organisation IT department.
When you are setting up the SIMS Autolink, the following must be completed:
- Login details for IRIS ParentMail are provided by your organisation.
- Create a SIMS user with Third Party Reporting, Personnel Officer, and Admin Assistant IRIS ParentMail permissions.
- Confirm with the organisation what reports they want to add (for example, they might not want to add staff in IRIS ParentMail).
- If adding staff to IRIS ParentMail, download, save and use the PMX2 Staff Export report to add to the SIMS Autolink (you are unable to open the file).
When the Autolink updates from SIMS, the following is not changed:
- Users are not deleted automatically from IRIS ParentMail. This includes leavers, any person responsible for students, and staff. For more information, go to Remove Users.
- The Autolink does not update contact details (email address and mobile numbers) for Connected users as they have confirmed the details when they registered. Changes to contact details must be made manually by your organisation, which the user must approve within 7 days of the change being made or the details remain unchanged, or the user can change their contact details in the app or online portal.
Install SIMS Autolink
-
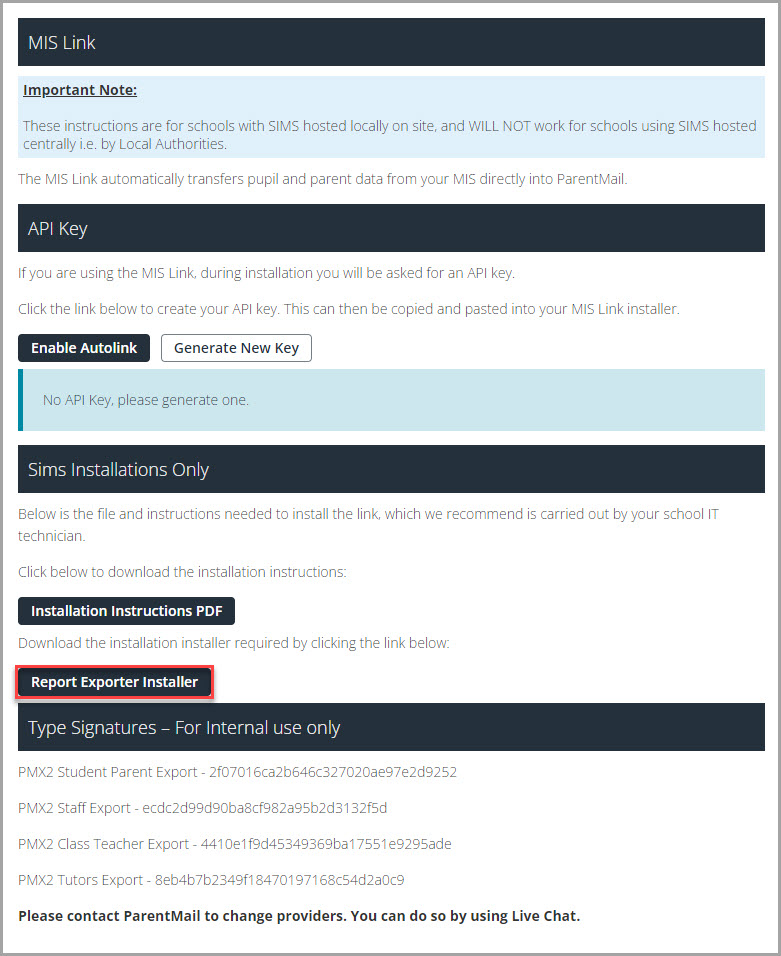
In IRIS ParentMail, select Settings > MIS Link.
If Settings is not displayed, you do not have the Manage Settings permission. For more information, go to Manage User Permissions. If you can access Settings but a blank page is displayed when you select MIS Link, you need the MIS Integration Permission. Fore more information, go to Activate MIS Integration Permissions.
-
Select MIS Link from the drop-down list.
For detailed information about installing the MIS Link and further help, go to Install SIMS Auto Link.
-
Select Report Exporter Installer to download the installation installer.
-
From the MIS Link page you can:
- Disable Autolink — select if you want to stop the overnight syncing.
- Generate New Key — select to reset the API Key for IRIS ParentMail SIMS configuration manager, if required.
The system produces a rejected records report with reasons why any data could not be imported. For more information, go to Run Rejected Records Reports .
- Parents and Students Rejected Records Report
- Staff Rejected Records Report
- Parents' Evening Rejected Records Report
If the SIMS Autolink has not synced the data, there are a number of reasons why the SIMS Autolink did not connect. For more information, go to Troubleshoot SIMS Link.
If you are still experiencing issues with the Autolink, log a support ticket (a Service Cloud account is required) and include a copy of the log file (typically found in C:\logs\parentmailreportexporter) or select Live Chat to contact the Technical Support Team.