Creating a User Account
A user account must be created for any employees, approvers, finance managers, and administrators for whom you want to provide access to IRIS Expenses. User details for accounts are determined by the users set up on the Users ledger in PS Accounting.
Users who require an account for IRIS Expenses must be set up as a user on PS Accounting/IRIS Financials and be assigned a licence for IRIS Expenses. For more information, see How to - Add a New User to a User Group on our Knowledge Base (for v2, v4, v6) or Adding Users to a User Group (for v7+) and Managing IRIS Expenses Licences.
You may want to create accounts for the following types of user:
- Employee - to enter the details for expense claims.
- Approver - approve submitted expense claims from employees.
- Finance Administrator/Manager - to post approved expense claim documents to PS Accounting/IRIS Financials for payment.
- Administrator - to manage and administer the IRIS Expensessoftware for your establishment/organisation.
- select Options, then select Settings from the menu.
- Select User Matrix from the Expenses menu, then select Add New User.
 If you are unsure if the user has already been set up in IRIS Expenses, you can search for a user to check if an account has previously been created. Enter the user's ID in the Search field, as shown in the following graphic.
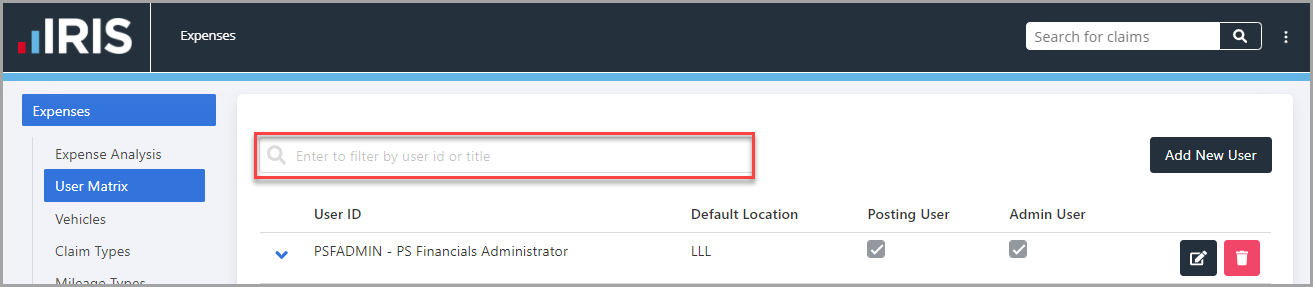
- The Add User panel is displayed. Select the user from the User ID drop-down list, then select the default location for the user from the Default Location drop-down list, which determines the default location to which new claim groups are set.
- If the user is an administrator or finance administrator/manager, you need to select the type of user access required. Please select from the following options:
Posting User - select for finance administrators/managers who are responsible for posting accepted claim documents to PS Accounting/IRIS Financials.
Admin User - select for administrators of the IRIS Expenses software. - To add the user account, select Save.

- Next, you need to configure location settings for the user account, which determines where their expenses are recorded in PS Accounting/IRIS Financials. The user account is displayed in the User Matrix panel, select the arrow icon adjacent to the User ID.The user account is displayed at the bottom of the User Matrix. If you are unable to see the details of the added user, select the Page Number button or use the next and previous Arrow buttons at the bottom of the list.

- The Location Settings panel is displayed. select Add Location.

-
The Add Location panel is displayed. Select an option from the drop-down list for the following options:
Balance Sheet Location - select the location for balance sheet to which the users expenses are to be posted.
Expense Nominal - is set to 9560 - Expenses Control Account by default. If expenses for the user are to be posted to another expense control nominal, select the required nominal from the drop-down list.
Staff Account - select the account on the Staff Accounts ledger to which the user's expenses are to be posted.
Default Ledger - (optional) select the ledger to which expenses for the user are to be posted if the claim type selected links to the ledger. The default ledger is used to automatically populate the account information for the claim.
Default Account - (optional) select the account to which expenses for the user are to be posted if the claim type selected links to the default ledger. - select Save to confirm your selections.

- If you want to specify default Detail Analysis Fields to be populated when submitting a claim, in the Location Settings panel, select Add Analysis.

- The Analysis Fields panel is displayed. Select the required analysis field from the first field drop-down list, then select the Search icon in the second field to select the required option from the Select an item window. select Save to confirm your selections.
To add additional default analysis fields, select the Expand (+) button adjacent to the selection fields.