Processing a VAT Return
This topic assumes that:
-
you have read Preparing for a VAT Return
-
the VAT period has been checked against the VAT 126 or VAT 100 report
-
you are happy to proceed with posting the VAT return
A VAT Transfer document transfers the balances from the VAT input and VAT output nominals into the VAT control account. This balances the applicable VAT account to zero so that it can be closed and submitted to HMRC.
This topic explains how to manually post a VAT Return. For information about using the automatic Consolidated VAT Return, please see the Processing a Consolidated VAT Return topic.
To process a VAT Transfer document:
- Go to Options > Document Input and select the VAT Transfer document for the applicable location (__VT).
- Enter the applicable Document Date and Document Period for the VAT account. This is usually the last day of the accounting period.
- Click the OK button. The VAT Transfer document will display.
-
Double-click in the VAT Period field and select the applicable VAT account.
Even if the VAT Period field is populated with the applicable period when the document initially displays on the screen, you will still need to double-click in the field and re-select the applicable period for the values to be displayed.
- The boxes on the VAT Transfer document will populate with the applicable figures from the VAT account. These figures should have already been checked as part of the VAT preparation process. However a final check can still be made if required.
-
If you have any adjustments to make such as partial-exemption, these should be entered in the Adjustment and Adjustment Value fields.
Any partial-exemption calculation would need to be processed outside of PS Accounting.
- Press F5 to post the VAT Transfer document.
-
Repeat for any other locations.
- The final part of the process is to allocate and close the VAT account. Go to Masters > Accounts.
- The List of Ledgers window is displayed. Double-click on VAT Accounts.
- The list of VAT Accounts is displayed. Click on the applicable VAT account you are submitting the return and click on the Tax tab.
- Click the Allocate tick box and then click the Apply button. This will only be available if all VAT Transfer documents have been posted and the balance on the account is zero.
This will allocate the VAT Transfer documents with the individual documents making up the VAT return. Click on the Details tab and all lines should be allocated (cream in colour) as shown in the following graphic.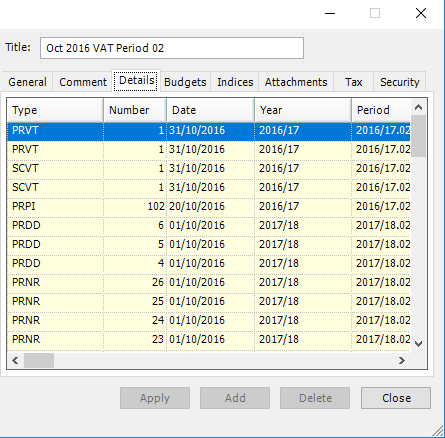
- Click on the Tax tab again and click the Close box. The Close box will only be available if the balance on the VAT account is zero and the documents have been allocated.
-
The VAT return can now be submitted to HMRC via their online gateway.
Please ensure you have printed the VAT 120 or VAT 126 report for the closed VAT period/quarter.