Cancelling Items or Documents
The cancel function is used for a variety of reasons where you want to prevent an item or document being progressed further in the purchasing cycle. Cancelling is used to cancel an item or order and can only be used where the full quantity of an item or document is no longer required, i.e. cancelling should not be used to amend the quantities within an order. The write off function should be used where quantities need to be amended.
If you are unsure whether to write off or cancel, refer to When to Write off and When to Cancel.
Cancelling should be used where:
-
a supplier is unable to supply a specific item or order.
-
an order has been placed with an incorrect supplier or where a better price has been identified with another supplier.
-
incorrect items have been delivered and are to be returned.
-
items are broken or damaged and the full quantity of the items are being returned.
-
a non-order invoice has been raised directly in IRIS Financials and therefore the other IRIS Financials Purchasing documents are no longer required.
-
the item is no longer available.
-
the item is no longer required (for example, the supplier is unable to deliver in time).
Documents can be cancelled at any stage of the purchasing process.
In a previous version of IRIS Purchasing, it was possible to cancel all other documents associated with the purchase. This has now been changed enabling you to cancel individual documents so that earlier documents can be edited and progressed again. For example, if you cancel a purchase order, the requisition can then be edited, re-authorised, and progressed to the purchase order stage again.
- From the Home screen, select Document Search.
- The Search Criteria window displays. Enter your required search criteria in the top section, then select Search. For more information, refer to Searching for and Managing Documents.
-
Select the View Document icon adjacent to the required document in the Search Results panel to open it.
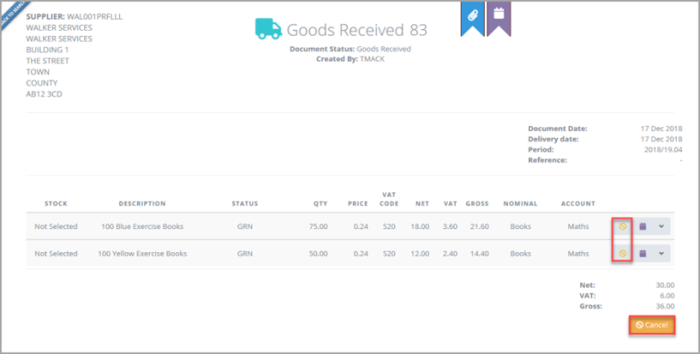
- To cancel a specific item (for example, you were told all the exercise books had arrived, but in fact only the blue ones were delivered), select the Cancel icon adjacent to the required item. To cancel the whole document (for example, if incorrect items had been sent), select Cancel at the bottom of the document.
- A window is displayed prompting for the reason the item/document is being cancelled (mandatory). Select the down-arrow in Reasons.
-
Select the reasons the item or document is being cancelled from the drop-down list.
The reasons displayed can be amended by your System Administrator and may therefore be different to those listed in the following graphic.
- You must also add an explanation in Rejection Comments.
- Select Confirm to complete the cancellation. Either of the applicable messages are displayed.
The selected document displays.
When cancelling a document, the internal links to related documents are broken. We therefore recommend taking note of any related documents before cancelling, if required. This is achieved by selecting the View Events icon at the top of the document, then selecting the Links tab. A good idea is to write the document numbers in Rejection Comments (as shown in the following step).