Take a register
The Attendance wizard must be enabled before this feature can be used. Attendance > Configuration > Register Settings > Use School Registration.
Your register may take longer to load depending on the Navigation Settings configured on the Registration module.
When multi divisional timetables are in use; staff can only view the registers for the divisions that they are assigned to.
To take a register, follow the steps below:
- Open the Attendance heading in the wizard bar on the right of your desktop and select the Take a Register wizard
- Use the fields displayed to select the registration period you want to work with:
- Select Go to displayed your selected register:
-
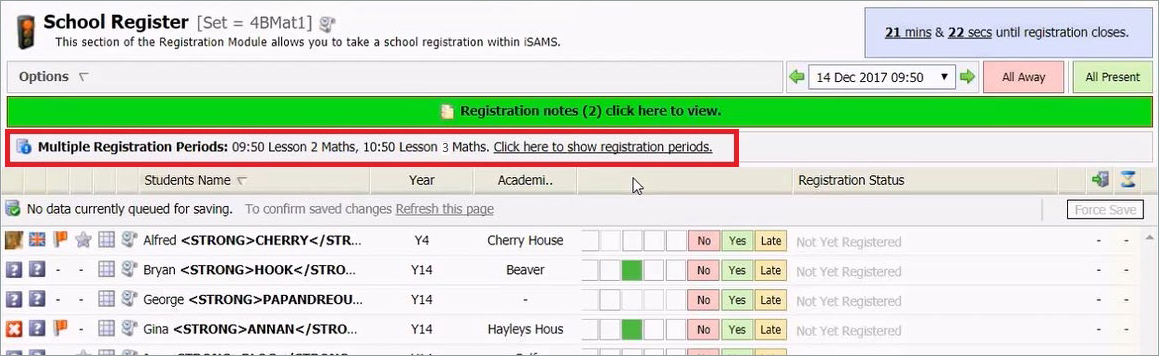
If multiple registration periods have been identified, an alert is displayed above the students listed in the register. This enables you to take a single register for periods which share the same set, room, teacher and day:
- Select the link labelled Select here to show registration periods to view the lessons which will be automatically registered if you choose to continue.
- Each lesson identified lesson is displayed:
- Use the checkboxes on the left to select the lessons that you want to work with. These are all selected by default.
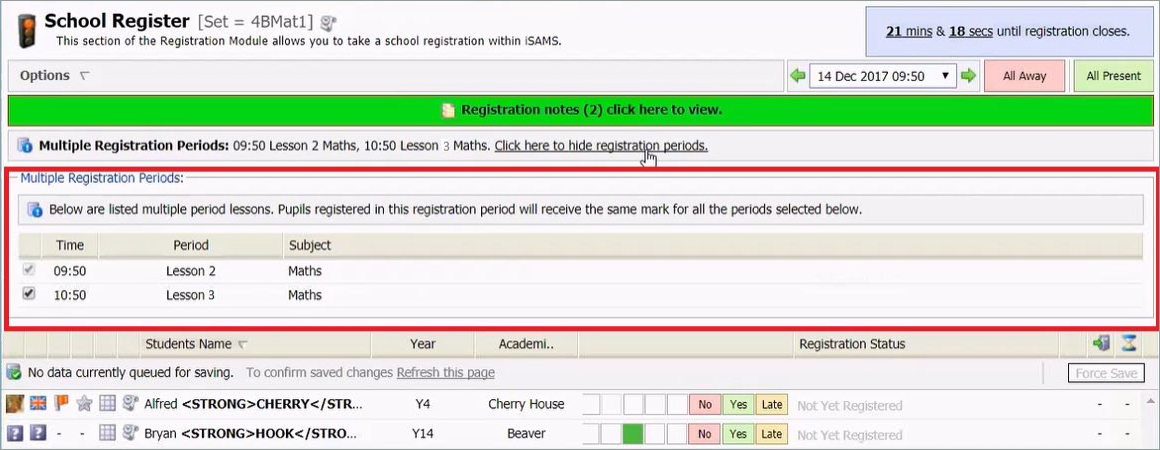
-
Work your way down the register, marking student attendance. Either:
- Use the Yes/No/Late marker buttons to indicate a student's registration status.
- Use the drop-down list to record the student's lateness, if your school uses this. or
- Select All Away or All Present from the quick registration buttons and confirm Yes when prompted.
- If you have already registered some students, you will be asked to Set All students or only Set Un-registered students.
- Add an absence/presence reason from the drop-down list, if your school uses these.
- Select the green plus icon to add a note against the student's registration status, this is optional.
- Select the ALERT button to send a Registration Alert, this is optional.
- Select Force Save if Ed:gen has not saved the register automatically.
You may not see this screen if you have limited access to the
Registration Manager module. You will open
in the registration period available for you to use.

Registration times will be listed by school division in the drop-down list if this feature is available in your version of Ed:gen.
For the lessons that remain selected, the details entered will be copied across. The results for each period will be identical.
The only exception to this is if a student is late to the first lesson; in which case they will only be marked as late to that first lesson, and not to the subsequent ones.
You will only have a limited amount of time in which to take the register. This is set when registration times are configured. If you have full access rights you will be able to view and edit registers outside of these times.