Contact students' teachers
Use the Contact Students' Teachers wizard in the wizard bar to quickly send an e-mail to staff and teachers linked to a student or group of students.
Both Student Manager and HR Manager wizard permissions are required to access this.
To use the Contact Students' Teachers wizard:
- Open the Student/Pupil Manager heading in the wizard bar on the right of your desktop and select Contact Students' Teachers. The Contact Students' Teachers wizard is displayed in a popup window.
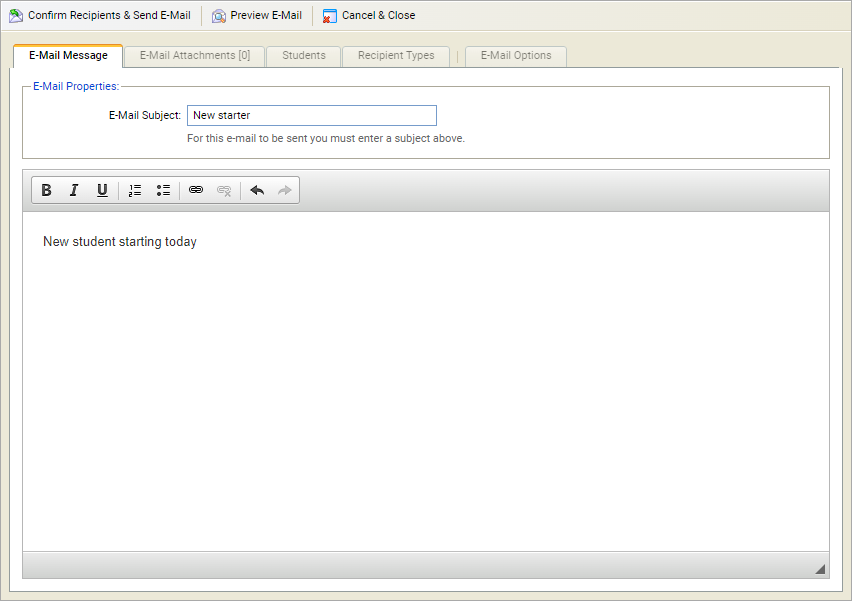
- Select the E-Mail Message tab:
- Enter an E-Mail Subject in the field available.
- Enter an e-mail message. Use the formatting tools if necessary and add links if needed.
-
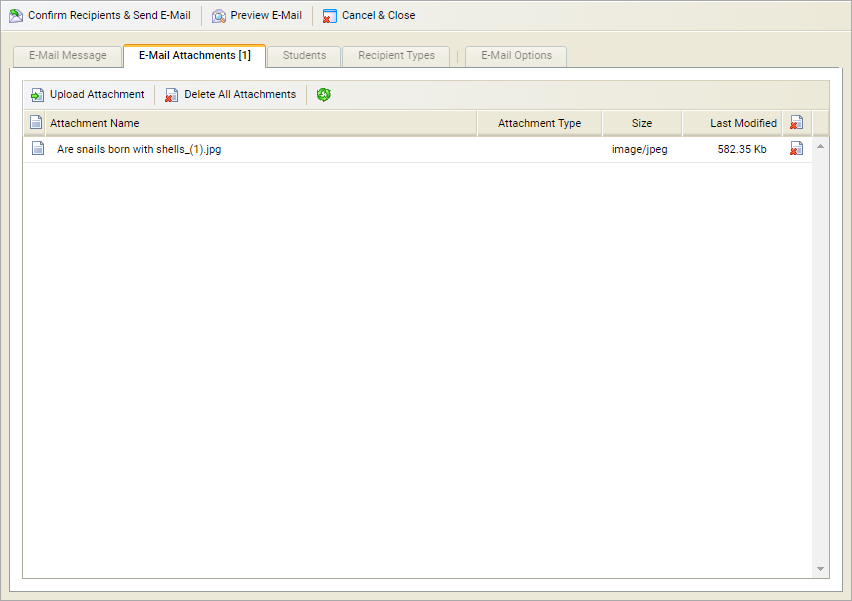
Select the E-Mail Attachments tab if you want to add any
attachments to the e-mail:
- Select Upload Attachment and select Choose File in the popup displayed.
- Select the file you want to attach to the e-mail.
- Select Upload Attachment. The attachment is displayed in the E-Mail Attachments tab:
-
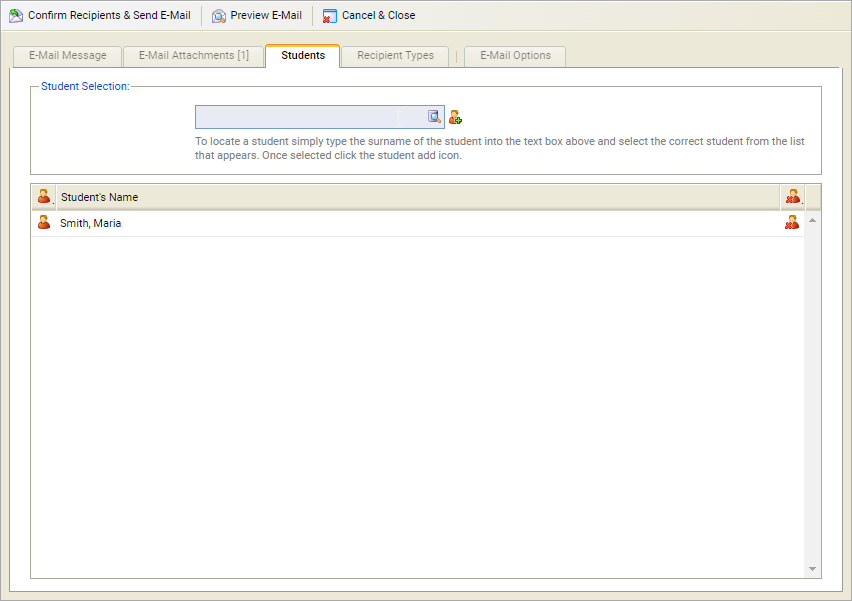
Select the Students tab and list the students whose teachers
you want to send the e-mail to:
- Start entering the student's name in the Student Selection field (forename or surname):
- Select the student from the list displayed.
- Select to add the selected student to the list.
- Repeat this process for each student you want to add to the list.
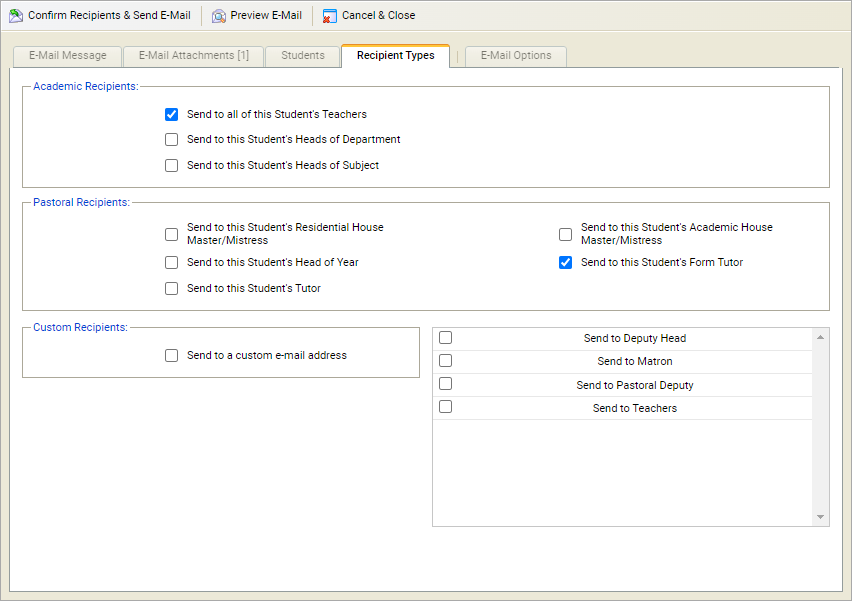
- Select the Recipient Types tab and select the recipients for the e-mail (defaults may have been set in Email Manager > CPT Wizard Configuration):
- Use the checkboxes in the Academic Recipients section to send the e-mail to selected academic recipients, such as a student's teachers.
- Use the checkboxes in the Pastoral Recipients section to send the e-mail to selected pastoral recipients, such as a student's form tutor.
- Check the box in the Custom Recipients section and enter a recipient address in the field displayed. This is useful if you want the e-mail to be sent to a central administrator.
- Use the checkboxes in the bottom right of the tab to send the e-mail to specifically selected recipients, such as the Head's PA.
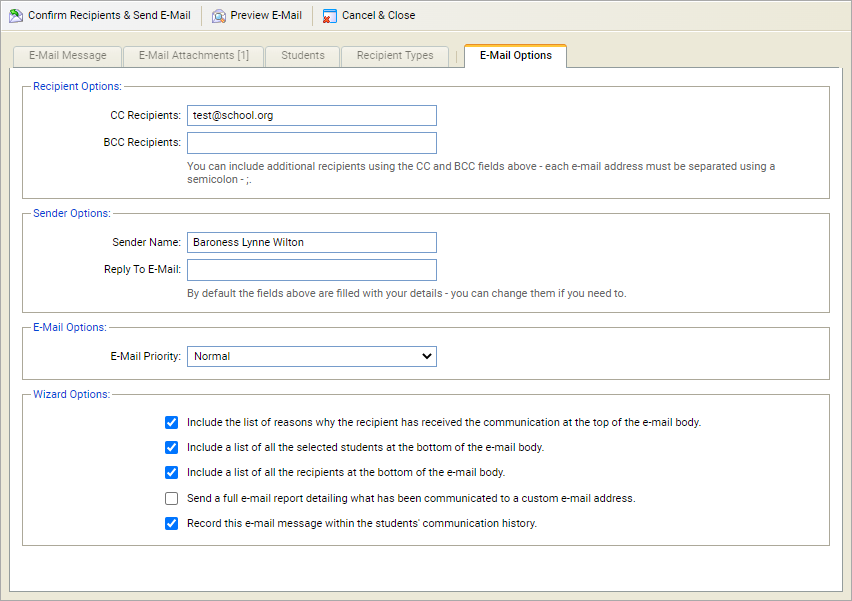
- Select the E-Mail Options tab and set who is to be copied into the e-mail. Also amend the sender if required and set additional options for the e-mail, such as whether to include the e-mail in each student's communication history (defaults may have been set in Email Manager > CPT Wizard Configuration):
-
Complete the Recipient Options section,
as required:
- CC Recipients. Enter the e-mail address of the recipient who is to receive a copy of the e-mail. Any e-mail address entered here remains visible for all recipients.
- BCC Recipients. Enter the e-mail address of the recipient who is to receive a blind copy of the e-mail. Any e-mail address entered here is hidden from other recipients.
-
Complete the Sender Options section, as
required:
- Sender Name. Enter the name that recipients view the e-mail as being sent from. This defaults to your name unless a default has been set.
- Reply To E-Mail. Enter the e-mail address that replies are sent to. You may prefer all replies to be sent to a central administrator.
- Use the E-Mail Options drop-down menu to set the E-Mail Priority.
- Use the checkboxes in the Wizard Options section to include or log information on the e-mail. For example, send an e-mail report to a recipient and enter their e-mail address in the field displayed.
- Select Preview E-Mail in the window header and review the e-mail before sending it.
- Select Close Window and make any amendments necessary.
- When you are ready to send the e-mail select Confirm Recipients & Send E-Mail in the window header. The Recipient Teachers list is displayed.
- Use the checkboxes to remove any recipients from the list if necessary.
- Select Confirm Recipients &Send E-Mail. A confirmation message is displayed.
- Select Close The Wizard.