Assign Out of School
The Attendance wizard must be enabled before this feature can be used. Attendance > Configuration > Out of School Settings > Show Out of School.
To mark a student out of school, follow the steps below:
- Open the Attendance heading in the wizard bar on the right of your desktop and select the Assign Out of School wizard.
-
Use the filter and search functions to select the information you want to view:
Filter Use to filter student registration records by... School Structure Your school structure, such as year group and academic house.
Use these filters, for example, to display Year 10 students from a selected house.
Pastoral Student tutors, such as form tutor and year group tutor.
Select to display an absent tutor's students. The attendance for all of this tutor's students can then be marked on the records displayed.
Academic The academic set up of your school, such as subject and set.
Use these filters, for example, to display students who study art in the top set.
Group Groups of students. These are custom groups which are set up in the Pupil Manager module. Choose from shared groups or your own custom groups.
This is useful if you want to check the registration for a preselected group of students, such as a school trip group.
Search Surname. Select an individual student's registration records to be displayed.
Select the refresh icon in the header to remove the filters applied to records.
This is an example of the list displayed:
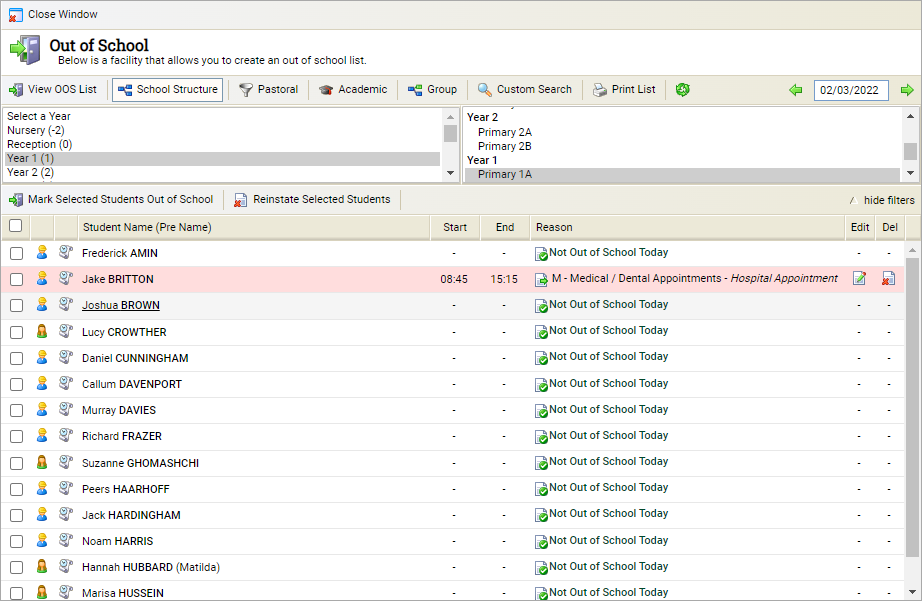
- Select hide filters to increase the list display area.
- Either:
- Use the checkbox against each registration record to select students individually. or
- Use the checkbox in the registration list header to select all the students listed.
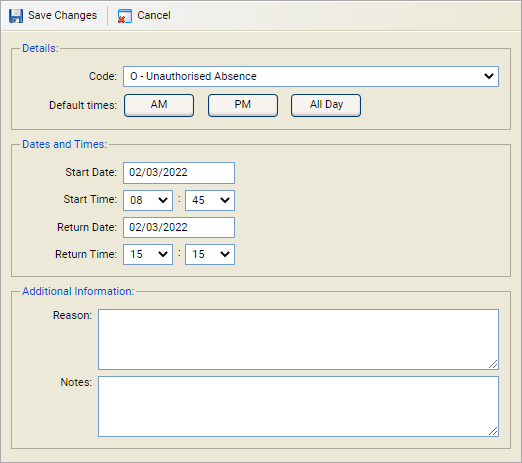
- Select Mark Selected Students Out of School. This is an example of the window displayed:
-
Complete the Details section of the window, as required:
Field Explanation Code Use the drop-down list select an Absence Code.
Default times Use the buttons to select the registration periods affected by the Out of School entry. Your selection can be customised in the Dates and Times section.
-
Complete the Dates and Times section of the window, as required:
Field Explanation Start Date Select a date to start the Out of School entry.
Start Time Use the drop-down lists to enter the Start Time for the Out of School entry. Keep this entry as accurate as possible to prevent conflicts on the register.
Return Date Select a date to end the Out of School entry.
Return Time Use the drop-down lists to enter the end time for the Out of School entry.
- Complete the Additional Information section of the window, as required:
- Select Save Changes.
| Field | Explanation |
|---|---|
| Reason |
Free type a detailed reason for the Out of School entry, this is optional. This is displayed in the registration period when a register is taken. |
| Notes | Free type additional notes on the Out of School entry, this is optional. This note can only be viewed in the Out of School tab. |
The Registration module is set up to display Additional information for Out of School entries in the Configuration tab.