Add entry to Daily Bulletin
Use the Add Entry to Daily Bulletin wizard in the wizard bar to create a new bulletin item.
Depending on your privileges and the settings in Daily Bulletin > Configuration > Daily Bulletin Author & Authorisation Options, the bulletin item you create may need to be authorised by a Bulletin Administrator before it is posted, or it may be posted immediately without requiring authorisation.
To create a new bulletin item:
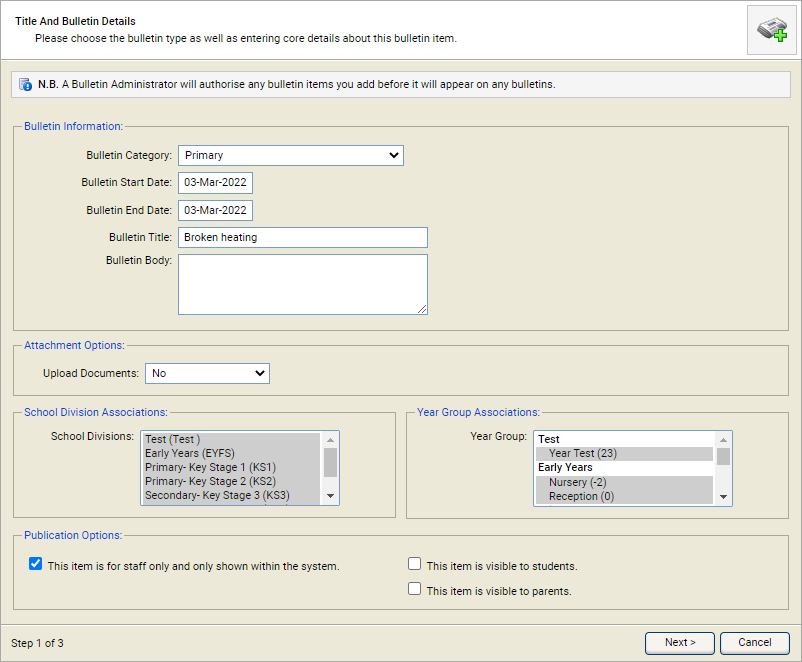
- Open the Daily Bulletin wizard heading in the wizard bar on the right of your desktop and select the Add Entry to Daily Bulletin wizard. Step 1 of the wizard is displayed in a popup window. This step prompts you for the content of the item and other general details:
-
Complete the Bulletin Information section:
Field Explanation Bulletin Category The category this bulletin item is assigned to. The category you choose determines the order in which it appears in the daily bulletin.
Your Ed:gen Administrator chooses whether or not your school will categorise bulletins when you first start using Ed:gen.
If your school does categorise bulletins, you must choose a category here before proceeding to the next step of the wizard. The categories available to choose are also defined by your Ed:gen Administrator.
If you don't categorise bulletins, 'No Category' is displayed here; you cannot change this setting.
Bulletin Start Date, Bulletin End Date The dates between which the bulletin will be visible on the bulletin list.
To the right of these fields a warning is displayed if you have missed the submission deadline for the start date selected. In this case, you must select a later date; you cannot proceed to the next step of the wizard until the date you have selected complies with the submission deadline.
The use of submission deadlines, and the cut-off time that applies, is determined by your Ed:gen Administrator when you first start using Ed:gen.
Bulletin Title The title of your bulletin item.
Bulletin Body The content of your bulletin.
- Select 'Yes' in the Attachment Options section if you want to attach documents or other files to your bulletin items. You are prompted to choose the files you want to attach when you move on to the next wizard step. The availability of this facility is determined by your Ed:gen Administrator.
-
Use the Year Group and
School Division Associations sections to select the year
groups and the school divisions that this bulletin item will be posted to.
You may want to use these options, for example, if you wanted to post a bulletin item
to your prep school only, sixth formers only, or just particular year groups.
The use of year groups and school divisions is determined by your Ed:gen Administrator. Depending on your configuration:
- One or both of these items may be available for you to select.
- You may be able to select just one of each type.
- You may be able to make multiple selections.
-
Selecting the items individually. To do this, select the first item
you require, hold down the Ctrl key, and
select the other items.
or - Selecting a range of items. To do this, select the first item in the range, hold down the Shift key, and select the last item in the range.
-
Use the Publication Options section to choose
how the bulletin item is published. You can choose:
- To mark this bulletin item as high priority. High priority items appear at the top of the list and are highlighted red to draw attention.
- To mark the bulletin item as being for staff only. The item will only be visible from within the Ed:gen system, meaning that it will only be accessible by staff members.
- Whether this item is to be posted on the Digital Signage Network, Student Portal, Parent Portal and/or the Alumni Portal.
- Select Next >.
- Before you move onto the next step of the wizard, Ed:gen spell checks the Bulletin Title and Bulletin Body you have entered. The Spell Check window is displayed indicating whether any words have been identified as potential errors; if errors are found, you can correct them in the same way as when spell checking a document in a word processor.
- You are then taken to the next step of the wizard. If you opted to include attachments with your bulletin item (see above), this is Step 2: Choose files to attach to the item. If you're not including attachments, you skip straight to Step 3: Enter author information.
Step 2: Choose files to attach to the item
If you indicated at Step 1 of the wizard that you want to include attachments with your bulletin item, the Relevant Documents and Files - Optional window is displayed for you to select the attachments:
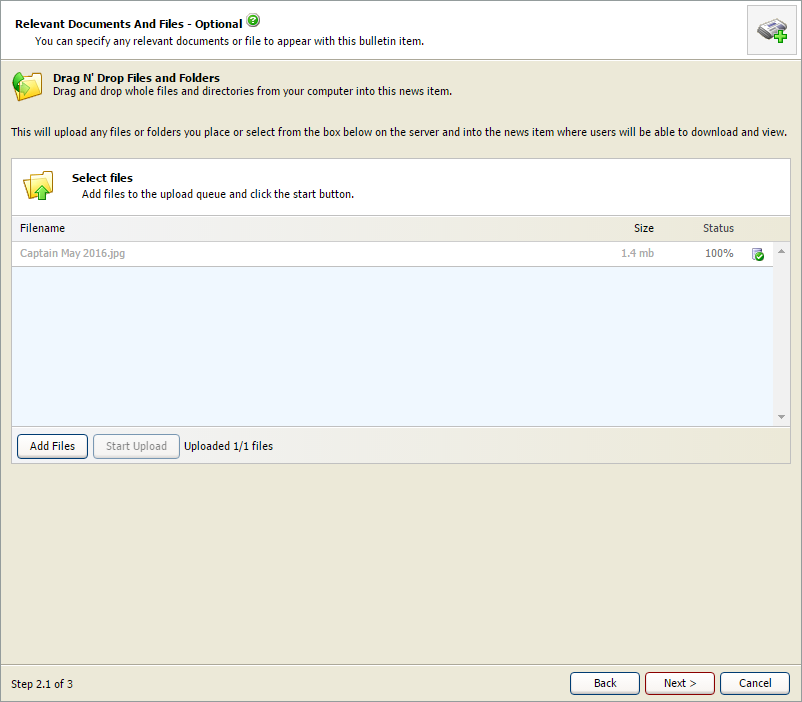
- Select Add Files and select the files that you want to attach from your computer. The file is listed in the wizard.
- Select Start Upload to upload the file.
- Select Next > to move on to Step 3: Enter author information.
Step 3: Enter author information
The final step involves providing some information about yourself as the bulletin author:
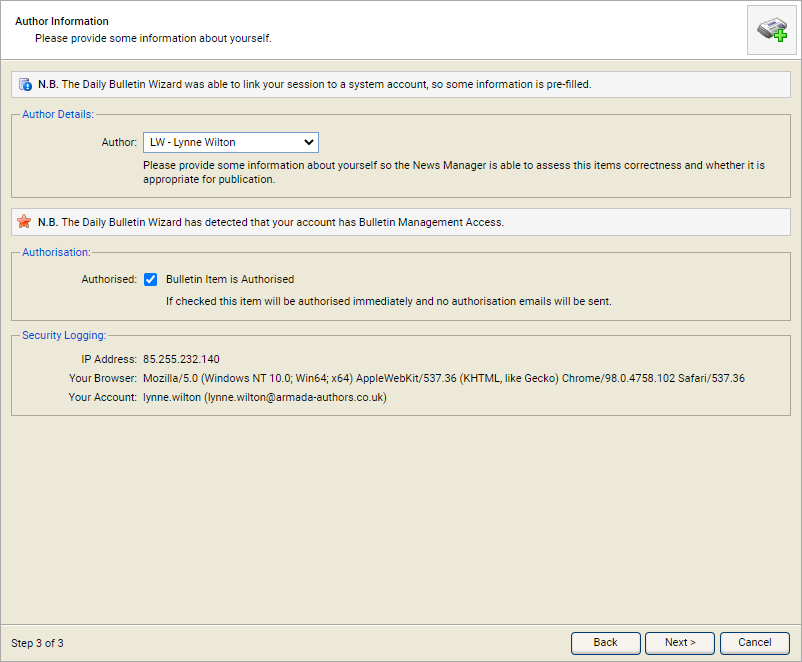
- Update the Author Details section if you need to. These fields are pre-populated with details from your user account.
- Use the Authorisation section to indicate whether this bulletin item needs to be authorised before it is posted on the Daily Bulletin. If your Ed:gen privileges let you authorise bulletin items, the item is authorised by default, i.e. this box is checked. You may want to uncheck this, for example, if you want the bulletin item to be authorised by another user. If you don't have permission to authorise bulletin items, this box is unchecked. Another user with privileges to authorise bulletin items must authorise this bulletin item before it is posted on a daily bulletin.
-
The Security Logging section shows various details about the author of each bulletin item. These are logged for security and troubleshooting purposes:
Field Explanation IP Address The IP address of the computer used to create the bulletin item.
Your Browser Details about the browser you are currently using to access Ed:gen.
Your Account Your Ed:gen user account name.
You cannot change any of these details. They are shown here for information purposes only. The details are not published as part of the bulletin. They can only be accessed by your Ed:gen Administrator.
- Select Next > to complete the process. A screen is displayed confirming successful creation of the bulletin item:
-
You receive two emails:
- Email 1: Confirms the details contained in your bulletin item.
- Email 2: Notifies you when the item has been successfully authorized (if authorisation is required).
The emails that are sent depend on your Daily Bulletin > Configuration > Daily Bulletin Author & Authorisation Options.
-
Select Finish to close the wizard window.
