Student school details
Once you have opened a student record in the Pupil Manager module, use the School tab to view and manage a student's allocated current and future year group, form, house and tutor. Any Custom Student/Pupil Groups that the student is linked to are also listed in the School tab.
This tab may contain Custom Fields.
Click the add icon next to a field to add a new option to a drop-down list.
Use the AutoComplete checkbox in the top of the screen for fields to capitalise automatically as you complete them. Uncheck the AutoComplete box to override automatic capitalisation.
To amend a student's school details, follow the steps below:
- In the Pupil Manager module, select a student records tab.
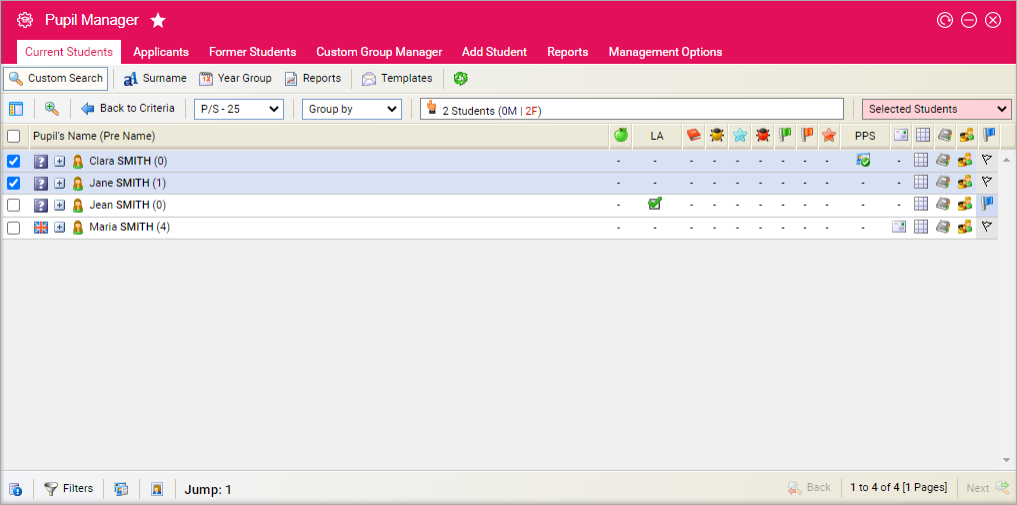
- Use your preferred search method to find the student records that you want to work with. The Student/Pupil Records List is displayed:
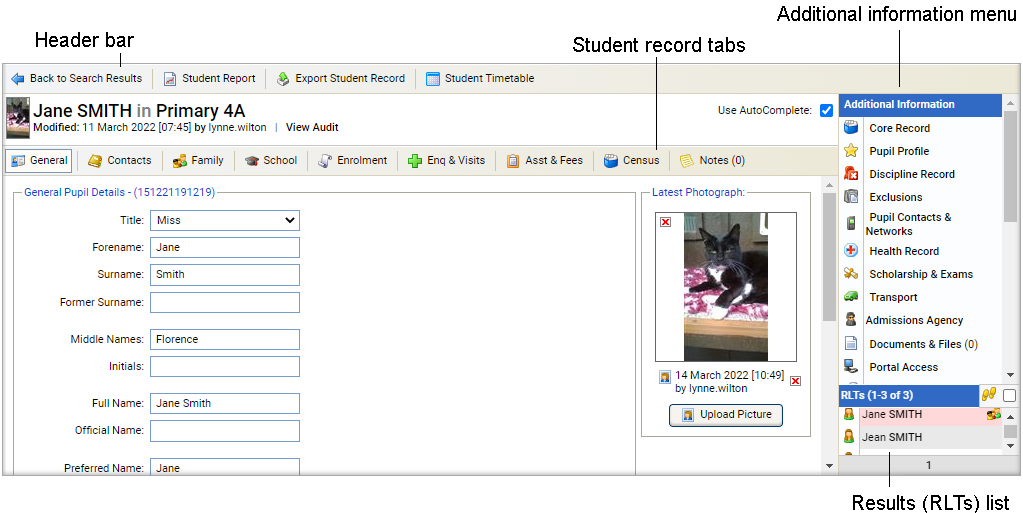
- Click on a student's name to display their record:
- Select the School tab:
-
Complete the Current School Details section:
Field Explanation Year Group Select the current year group for the student. Form Select a form group for the student. Academic House Select an Academic House for the student. Residential House Select a Residential House, if required. Tutor Select a Personal Tutor for the student. Status Select the student's boarding status from the drop-down list. Peg Number
Enter the student's classroom or changing room peg number. System Status Select the student's school status to reflect whether they are an applicant, a current student or a former student. This determines which student record tab the student record is listed under. -
Click Update Data to save the new data.
-
Complete the Future School Details section:
Field Explanation Next Year's Form Select the form group that the student will join in the next academic year. Next Year's Residential House Select the Residential House that the student will join in the next academic year. Next Year's Academic House Select the Academic House that the student will join in the next academic year. -
Click Update Data to save the new data.
-
Use the information listed in the Custom Group Membership section to view the Custom Student/Pupil Groups that the student is linked to. Only shared groups or groups which you have created are listed:
Column Explanation 
Yes in this column indicates that the Custom Student/Pupil Group has been deleted in the Custom Group Manager. 
Yes in this column indicates that the student has been removed from the Custom Student/Pupil Group in the Custom Group Manager. 
- Click this icon to delete the Custom Student/Pupil Group from the list displayed. This is a useful housekeeping tool. You are prompted Are you sure you want to delete this Item?
- Select Yes. The Custom Student/Pupil Group is removed from the list. You can reinstate a student back into a Custom Student/Pupil Group from the Custom Group Manager.