Module Entities
Use the Configuration tab in the Curriculum Manager module to manage entities. You can select which entities are linked to different areas of the module and how they are used. Entity settings can be configured for each programme in the module.
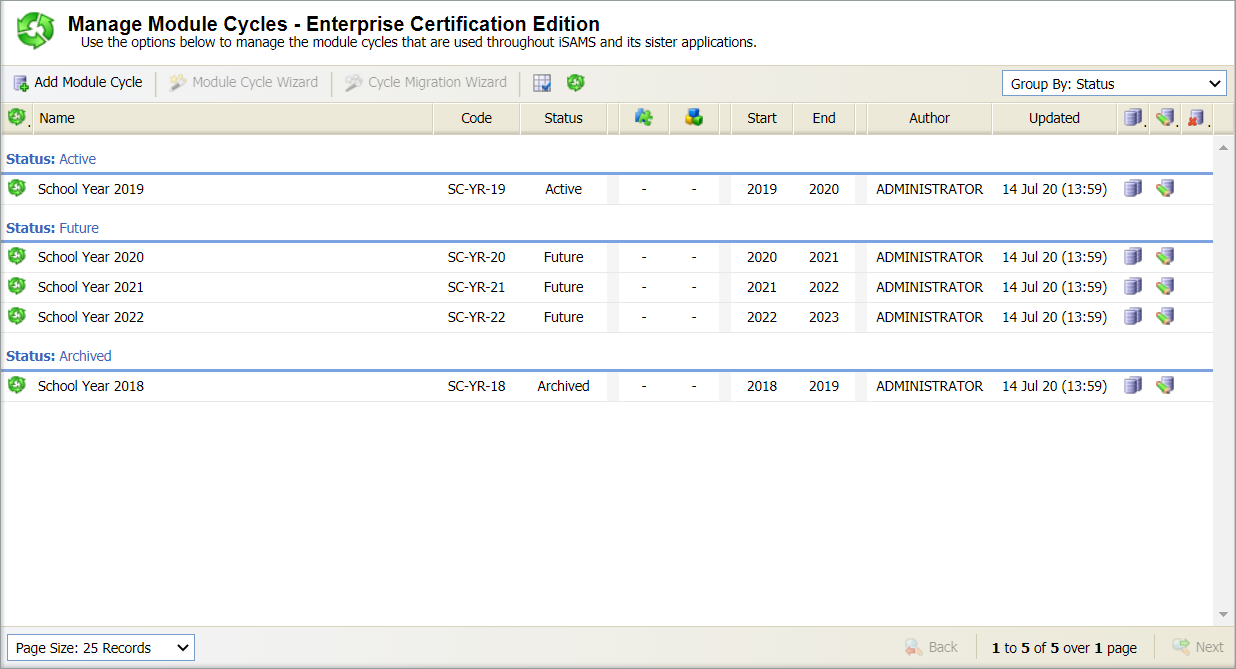
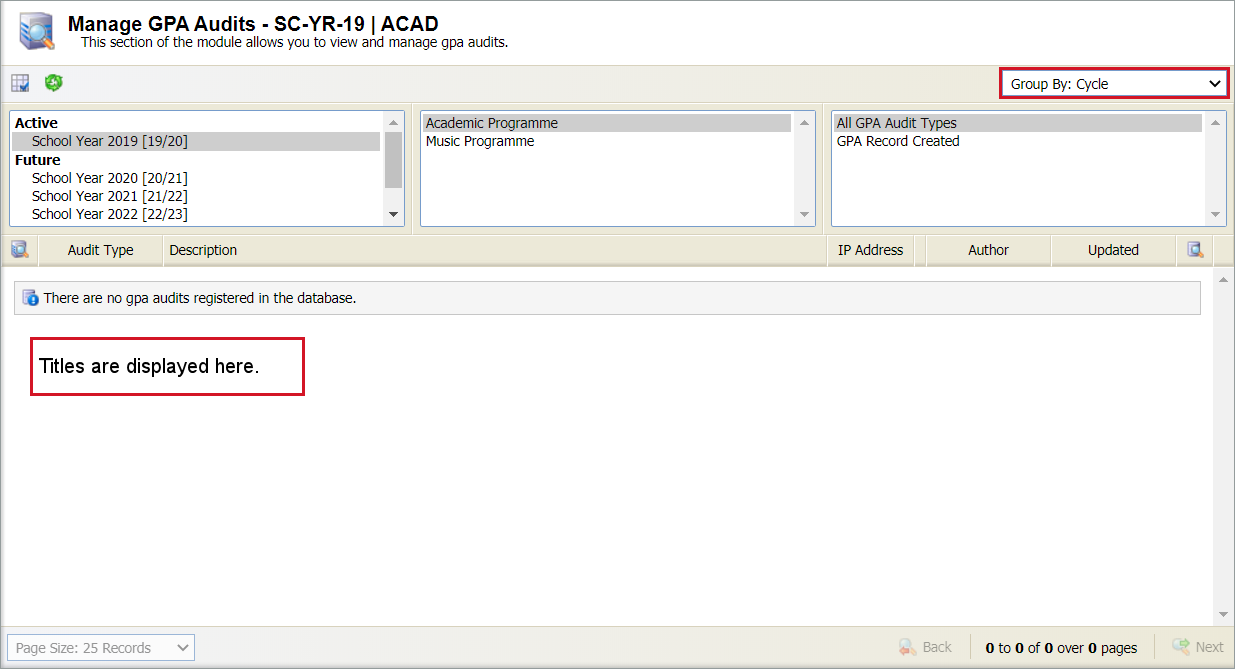
For example, for cycles choose to display 'Name' and 'Code' as titles and 'Classes' as an image. In this example, each of the selected entities is shown when working in Manage Module Cycles as shown below. Other entities are also displayed in this example, including the 'Group By: Status' shown in the top right:
To manage module entities, follow the steps below:
- Open the Curriculum Manager and select the Configuration tab.
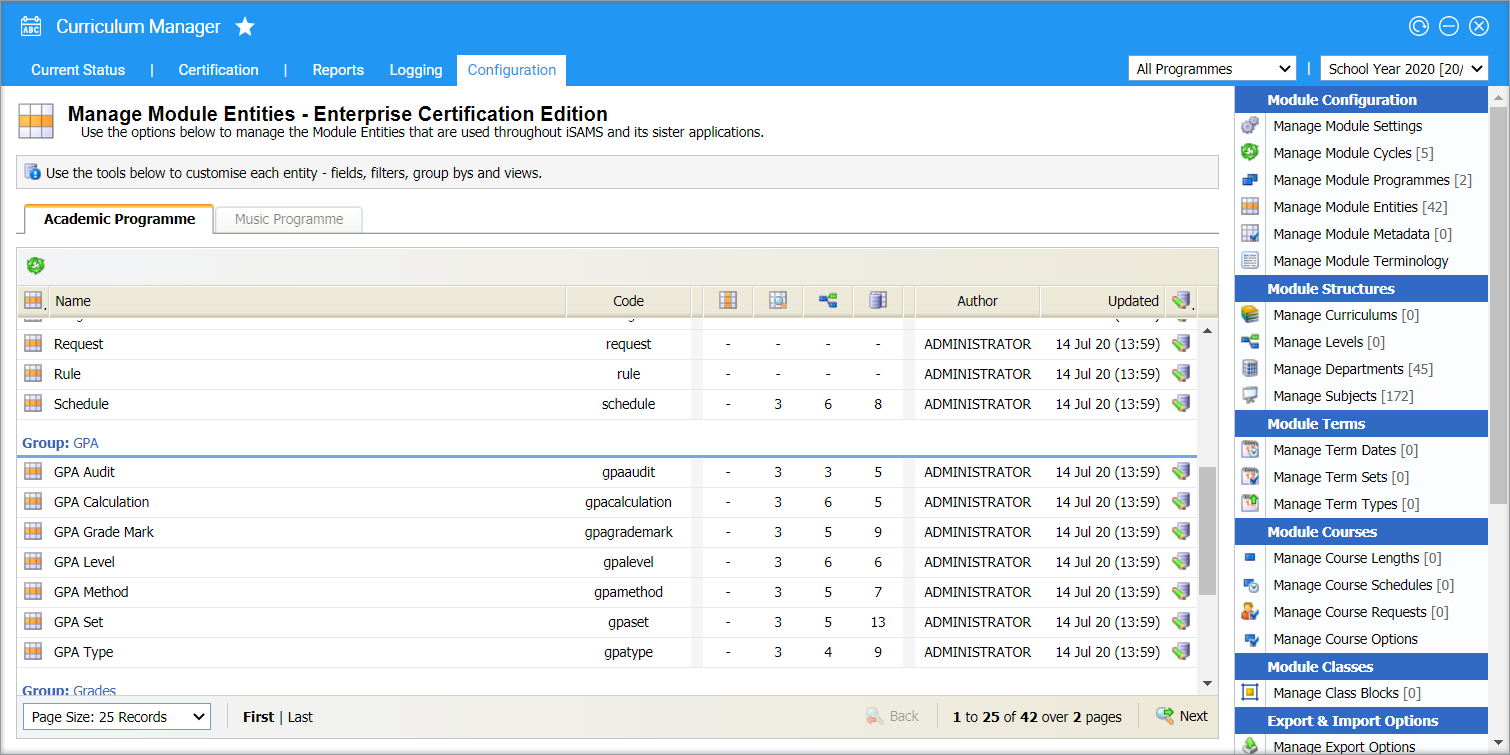
- Select Manage Module Entities from the right hand menu:
- A tab is displayed for each programme in the module.
- Each entity is displayed with columns indicating properties; the number of fields, filters, group by and views that have been applied to the entity.
- Entities are grouped together by the area that they relate to in the module.
- Select the tab for the programme that you want to work with.
- Use the navigation tools at the bottom of the screen to display the entity that you want to work with.
- Select the edit icon next to the entity that you want to work with. The Edit Module Entity window is displayed:
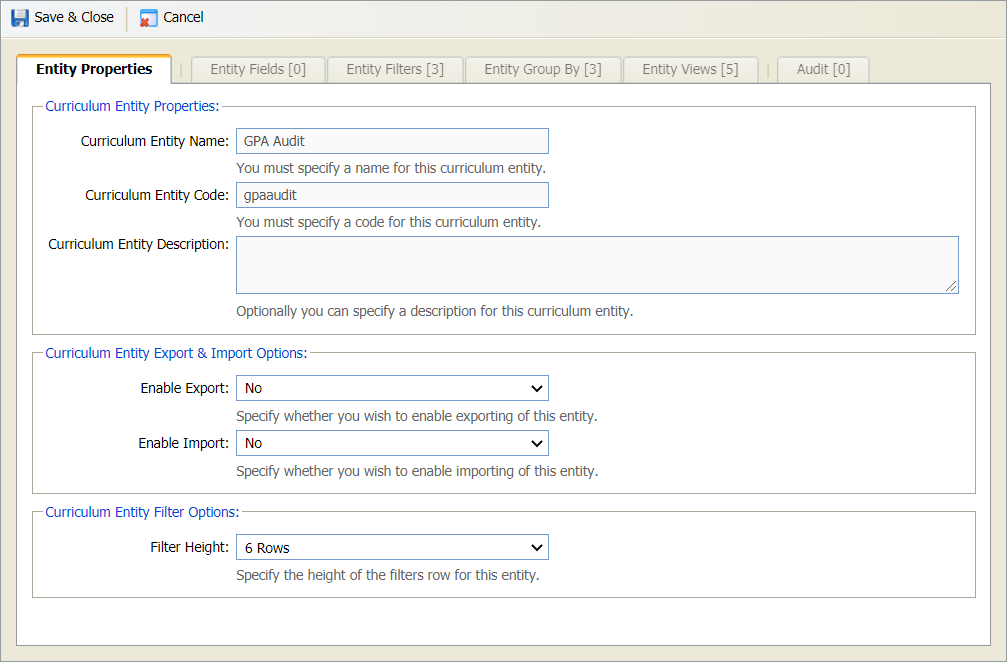
- The Entity Properties tab displays an overview of the entity. The example above shows the 'GPA Audit' which is found in the Certification tab (when configured for use).
- The four following tabs hold details for the entity. A count next to the tab title indicates the number of selections made in the tab. This matches the numbers shown in the columns of the Manage Module Entities screen (fields, filters, group by and views).
- The Audit tab lists any amendments that have been made to the entity.
-
In the Entity Properties tab:
- Entity Properties cannot be changed.
- It is not recommended that you make any changes to Export & Import Options.
- Filter Options indicate the number of rows displayed if filters are used for the entity. The example below has 6 rows in the filter:

-
Work through the tabs shown to set details for the entity:
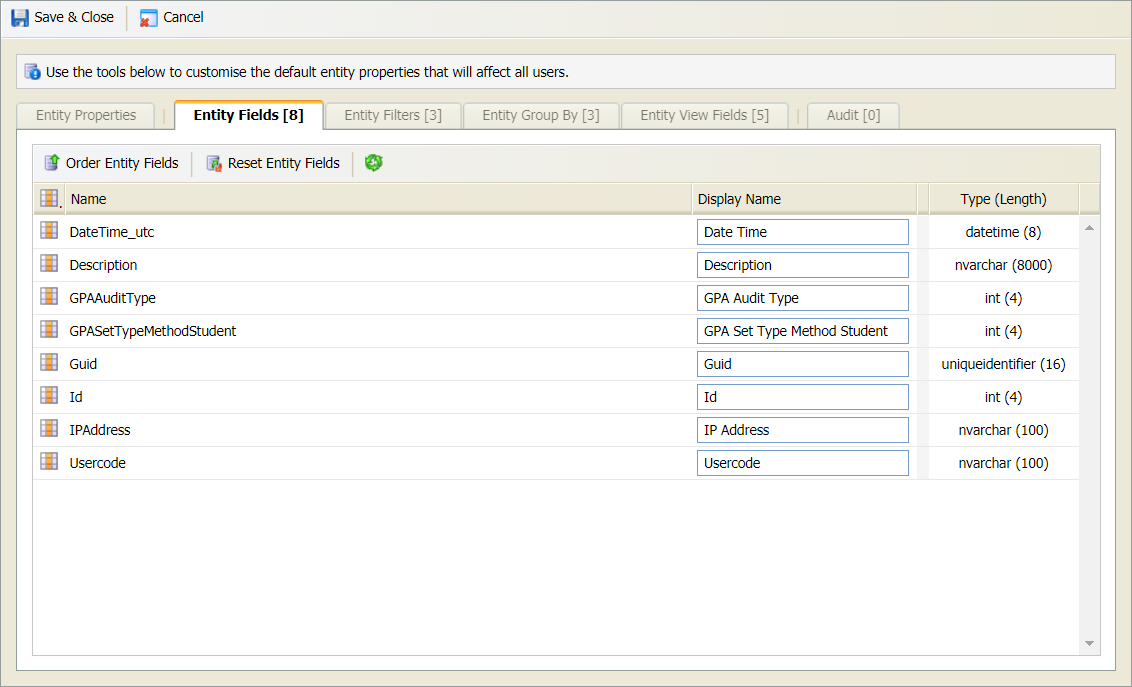
 Entity Fields
All of the fields that are available for the entity are listed.
Change the Display Names for the fields as required:
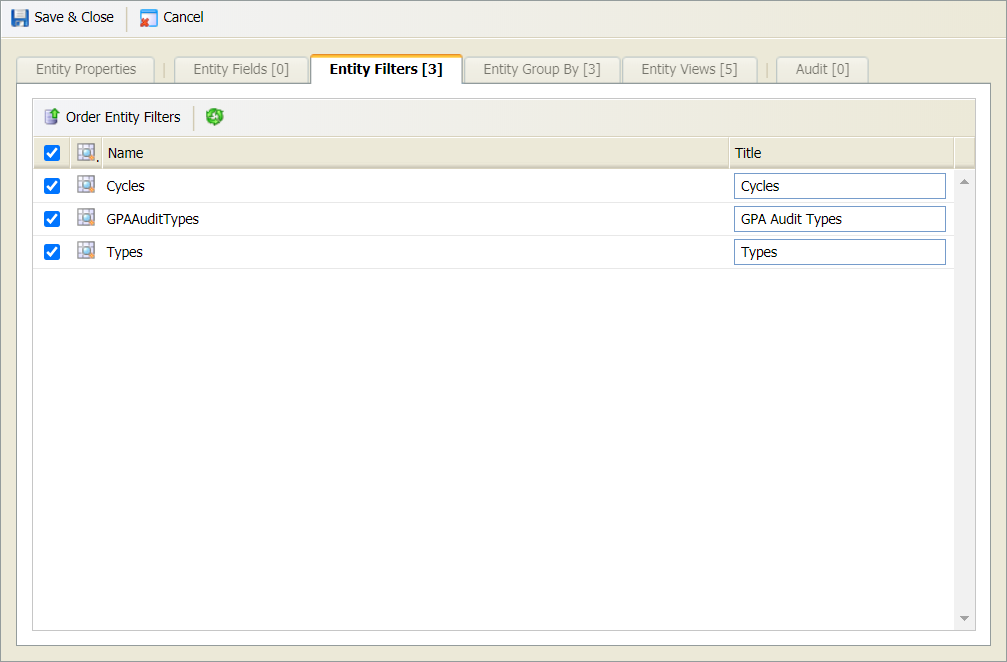
 Entity Filters
All of the filters that can be used for the entity are listed.
- Use the checkboxes to select the filters that you want to include for the entity:
- Change the Titles used for the filters as required. Your selections determine how filters are displayed for the selected entity:
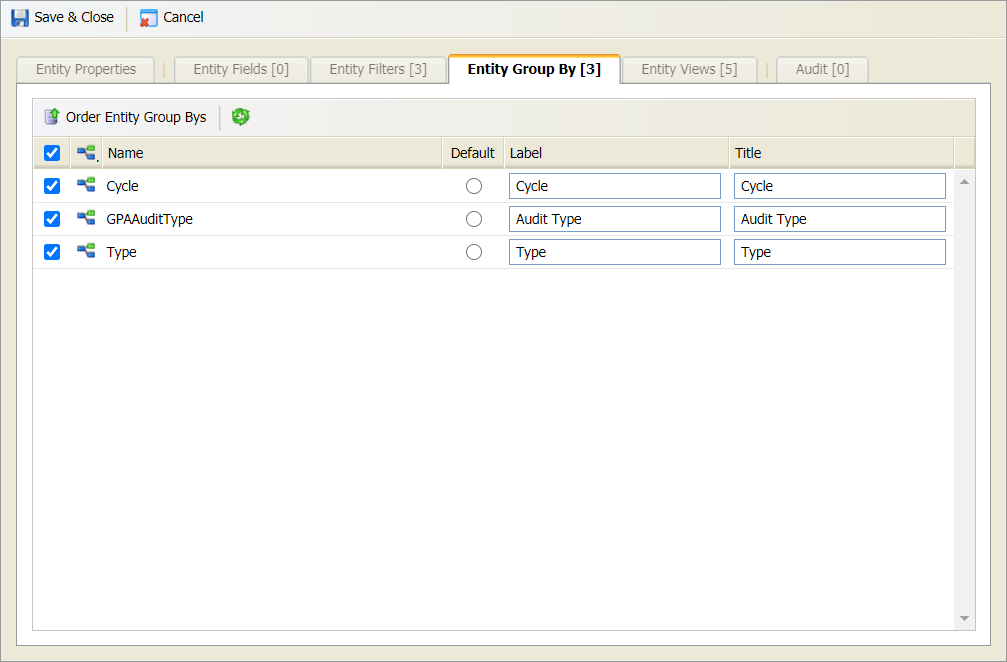
 Entity Group By
All of the group by selections that can be made for the entity are listed.
- Use the checkboxes to select the group by selections that you want to include for the entity:
- Select a default if required.
-
Change the Labels and Titles as
required:
- The Label name is displayed in the Group By drop-down menu.
- The Title name is displayed in the screen where data is grouped. An example of how your selections are displayed for the selected entity is shown below:
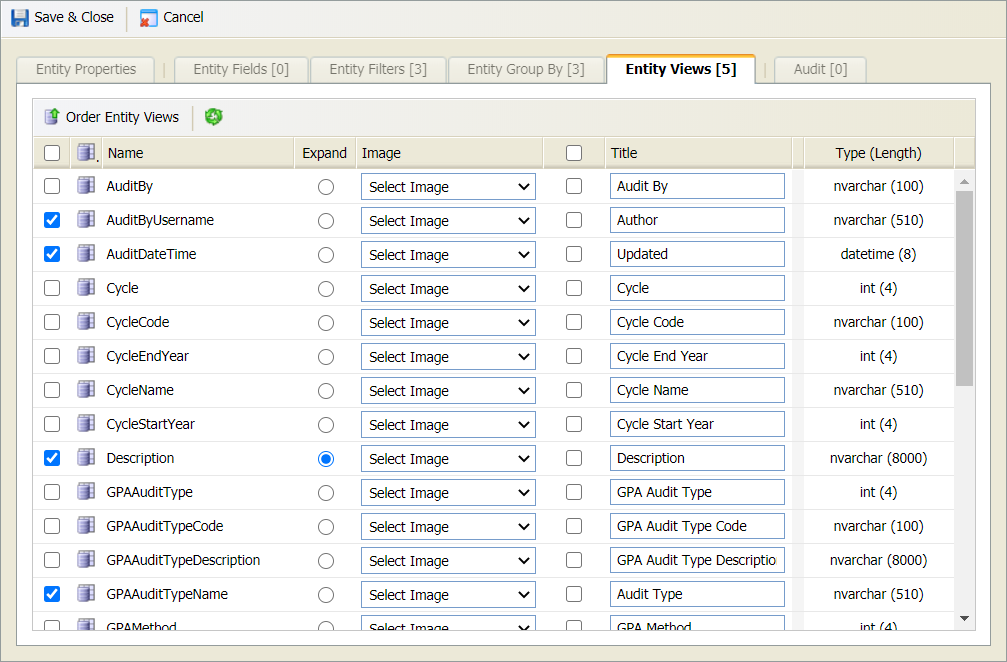
 Entity Views
All of the information that can viewed for the entity is listed.
- Use the checkboxes on the left to select the columns that you want to display:
-
Select whether an Image or a Title
are displayed in the header bar for the entity. Either:
- Use the Select Image drop-down to select an image for the entity. An icon is used instead of a column title. or
- Enter a Title for the entity and check the box to the left of the Title. This is useful if you want to customise titles to suit you.
- Your selections determine the columns displayed for the selected entity:
Be aware that the selections made in Manage Module Settings can determine the fields that are displayed regardless of whether they are selected here.

-
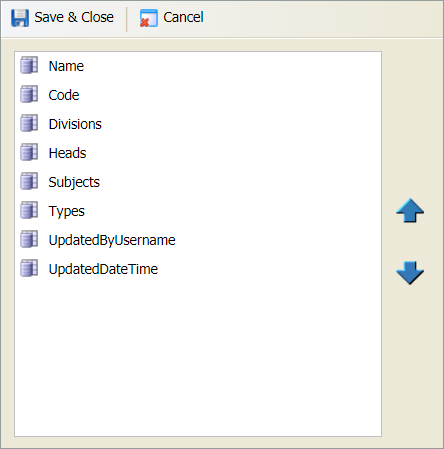
Choose to change the order that any of your entity selections are displayed
in the module.
- Select Order Entity xxx in your selected tab. A popup window is displayed, an example is shown below:
- Select to make a selection and use the arrows to move it up or down the list.
- Select Save & Close to close this window and return to the Edit Module Entity window.
- Select Save & Close to close the Edit Module Entity window. The entity is displayed in the module as per your selections.
- Repeat this process from the beginning for other entities as required.