Record timesheet entries
Timesheets record the time you've spent on activities, including non-chargeable work. Each organisation may have a different configuration - services, jobs and activity/analysis codes. Check with your administrator before you start if needed.
You must enter client, job, analysis and time details to complete the timesheet.
-
Select Entry > My Timesheet from the menu.
- Select Home > Timesheet from the menu. Select Home > Popup Timesheet from the menu.
This method launches your timesheet in a separate browser tab so that you can keep your timesheet open whilst working on other areas of the system.Select Entry > My Timesheet from the menu. Click the blue Timesheets hyperlink in the Timesheets dashlet.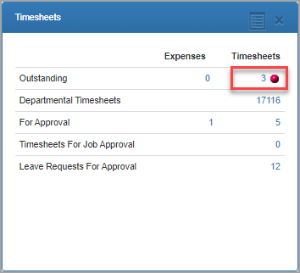
- On the Timesheet Entries for page, from the View list, choose Day or Week.
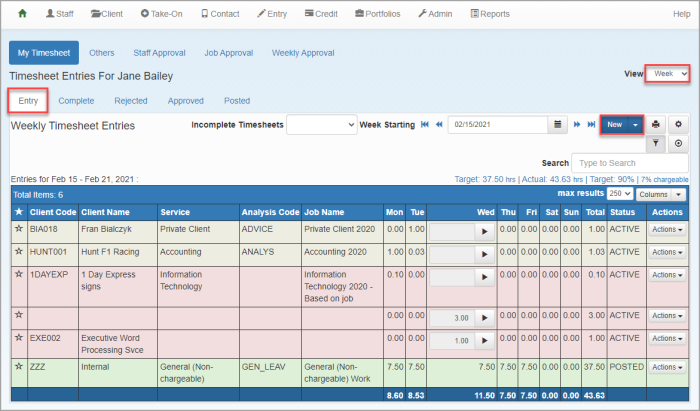
- The timesheet defaults to the current date/week commencing, but can be changed by selecting the required date from the calendar or week from the list.

-
Click New Entry. If timesheet entries already exist, click New. You can also copy an existing entry.
Tip: Create a new entry from the previous entry and apply it to the current day by clicking New then from last.

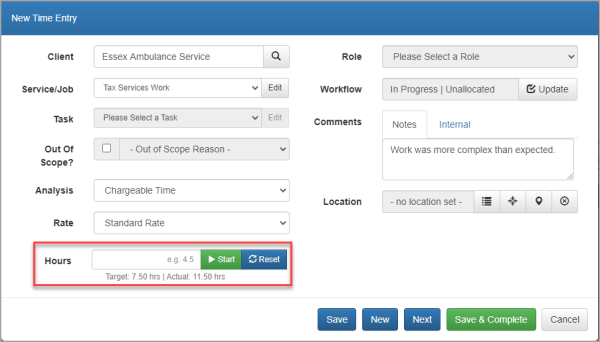
- On the New Time Entry dialog, in the Client box, enter the client code or name (minimum 3 characters), then select the client from the list. Alternatively, click the magnifying glass to search for the client.
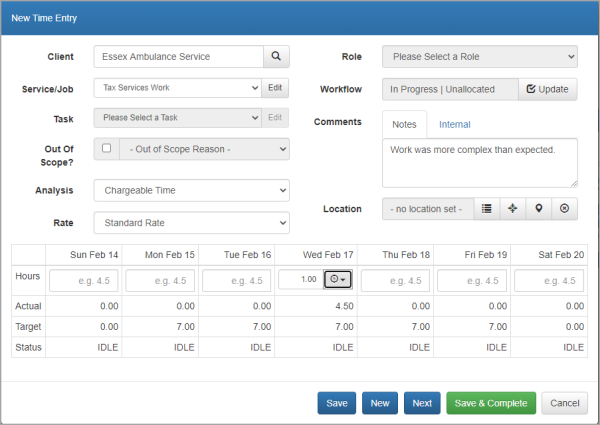
- Select the Service/Job from the list. The list is drawn from the services/jobs recorded against the selected client. You can (if you have permission) click Edit to edit existing services/jobs or add non-engaged services. You can also add new jobs. See Maintain services or Create a new job.
- Select the required Task (if used). Tasks are not required for chargeable time.
- Out of scope (if visible) is used to identify time that has not been agreed with the client. For example, you may have done the personal tax for a client, who then asks about inheritance planning and how it would affect their tax return. It isn't part of the scope of the normal tax return preparation and therefore, needs to be identified and possibly charged separately. Select Out of Scope then select the required reason from the list (a reason must be selected).
- Select an Analysis code from the list (the activities available for the selected service).
If tasks are in use, the code is defaulted based on the task selected. - Select the charge Rate (if you have permission). Show more Displays all the charge bands for which you have valid charge rates.
- Select a Role (if used).
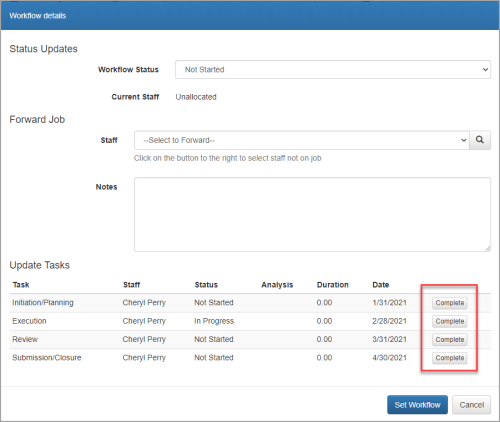
- The Workflow is usually updated in the job itself. If you want to record workflow information, click Update. From the Workflow Status window, click Complete for all related tasks, then click Set Workflow.
-
In the Comments box, add any notes for the current entry. Comments added on the Note tab are available for billing. Comments added to the Internal tab are for internal use only. If you need a different note for a period of time relating to the same job, you will need to create a new entry. The quickest way is to copy an existing entry.
Tip: If more space is required, drag the icon to resize the note window.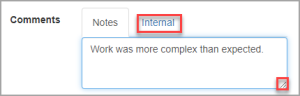
-
If required, specify the Location where the work was carried out. (This function may be hidden.)

Select the required location from the list provided. 
Detects the current location of your device. 
Auto detect when needed. 
Remove any currently selected location. - Enter the time you want to record ( in hours, entered as a decimal, e.g. 1.1 hours is 66 minutes):
- For a single day, enter the number of hours), or click Start to start a timer.
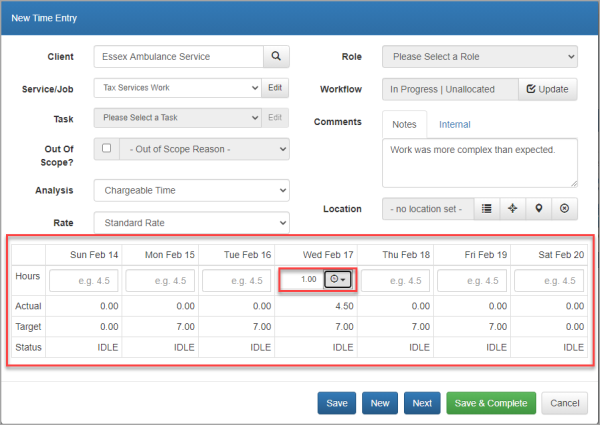
- For a week, in the grid, enter the number of hours in the applicable Hours box for each day. You can click the Stopwatch icon to start the timer (only available for the current day).
- You can now:
- Click Save to save the entry and return to the timesheet entries list. Use this option when entering a single entry, or editing an existing entry.
- Click New to save the entry and open a blank New Time Entry window.
- Click Next to saves the entry and open a New Time Entry window for the same client, with the details retained. Use this option when multiple entries are required for the same client.
- Click Save & Complete - to save the timesheet entry and mark as complete (this option is available if you have permissions to complete your own timesheet).
What happens next
- You can add more entries, copy existing entries,edit entries or delete entries if needed.
- When you have finished recording your entries, mark your timesheet as complete.
- Your timesheet is then review and approved (if used).
- Once approved, the timesheet is then available to be posted to a client for billing.