Timesheet settings/defaults
Practice Admin
Settings for timesheets are applied as part of your system implementation, but you may subsequently want to make changes.
- Select Admin > Timesheet Administration from the menu.
- Select the Settings tab.
- Make required changes as described in the following sections, then click Save.
Timesheet creation
This panel defines the automatic options for creating timesheets are created. You can also create timesheet weeks from here.
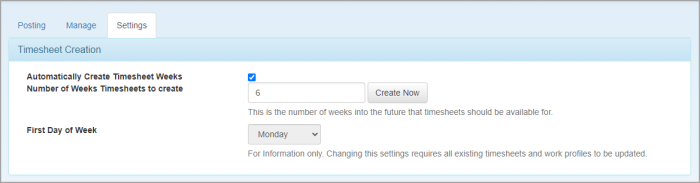
Automatically create timesheet weeks
Select this checkbox to enable the system to create timesheets for you, based on the number of weeks in the future specified in the Number of weeks timesheets to create.field.
Number of timesheet weeks to create
Enter the number of weeks into the future that timesheets should be created for. This process is automatically performed as part of the period end process, but can be initiated by clicking Create Now.
First day of the week
Displays the first day of the timesheet week, typically a Monday. This is set up as part of the implementation process and cannot be subsequently changed without the assistance of our Support Team.
Timesheet styles and behaviour
This panel is used to control how timesheets look and behave when entries are made.
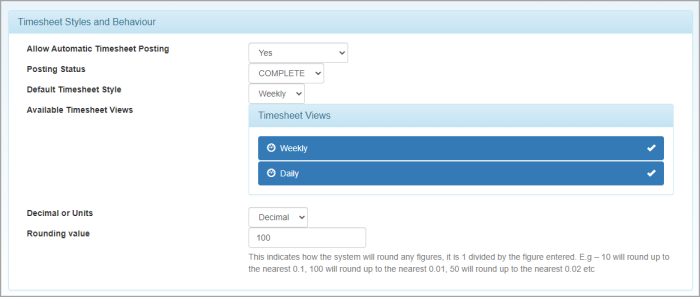
Allow automatic timesheet posting
The option selected here determines what options are available when setting up staff timesheets.
- If Yes is selected here, you will be able to select Yes for individual staff members, enabling timesheet entries to be automatically posted. If timesheet entries require approval, the entries will be automatically posted once approved.
- If Yes, to Month End is selected here, you will be able to select Yes for individual staff members, enabling timesheet entries to be automatically posted within the current period. If timesheet entries require approval, the entries will be automatically posted once approved.
- If No is selected here, timesheets must be manually posted by an administrator for everyone. You will not be able to enable automatic posting for any staff member.
If you switch from Yes orYes, to Month End to No>, you will not be able to enable automatic posting for any staff member, irrespective of whether automatic posting was previously enabled.
Posting status
This setting determines whether timesheets can be posted once they are Complete or once they have been Approved. You can override this setting for individual members of staff (see setting up staff timesheets).
Default timesheet style
Select the default timesheet style (i.e.Weekly or Daily) for the first time the users logs into the system and opens their timesheet. If the user subsequently changes the view, the system will remember the change.
Available timesheet views
Choose which timesheet views/styles are available for selection by staff members. You may prefer to make only one option available.
Decimal or units
Select whether time entered is displayed as decimal hours or units.
Rounding Value
This value determines how the system rounds the figures.
If Decimal is selected, 1 is divided by the figure entered. For example:
- 10 will round to the nearest 0.1
- 100 will round to the nearest 0.01
- 50 will round to the nearest 0.02
If Units is selected, the value entered indicates the number of units that make up the hour. For example, if 10 is entered, there will be 10 units of 6 minutes each.
Optional settings
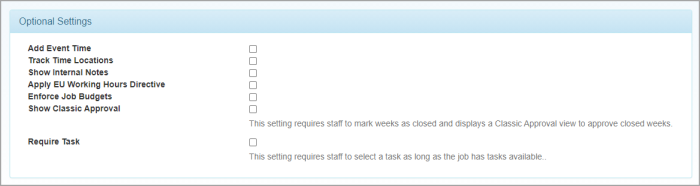
Add event time
Adds a nominal amount of time (0.1) to the timesheet for any events assigned to a member of staff. The amount of time can be subsequently changed.
Track time locations
Select this checkbox to track locations against timesheets. Once selected, a default location can be set for each staff member and used to track the location of the staff member when the timesheet entries are completed.
Show internal notes
Select this checkbox to enable internal notes to be added. Staff members can include notes for internal use, that can be viewed for billing purposes, but will not be displayed on fee layouts and therefore, not visible to customers.
Applying EU working hours directive
Select this checkbox to highlight any timesheet that is over 48 hours.
Enforce budgets
Select this checkbox to enable budgets to be set against jobs, preventing more time being entered into the system once the budget value has been reached.
Show classic approval
Select this check box to enable Classic Approval to be used. This displays a Complete button on the timesheet header once the staff member reaches their target hours.