Create expense claims
The My Expenses page lists all your expense claims separated into Receipts, My Expenses, For Approval, Others or Posting tabs. It's easy to create a claim, add your receipts, then submit for approval. You can capture your receipts as you go too, then add them to an expense claim later on.
Create a claim
-
Select Entry > Staff Expenses from the menu, then select the My Expenses tab.

-
Click New Claim.
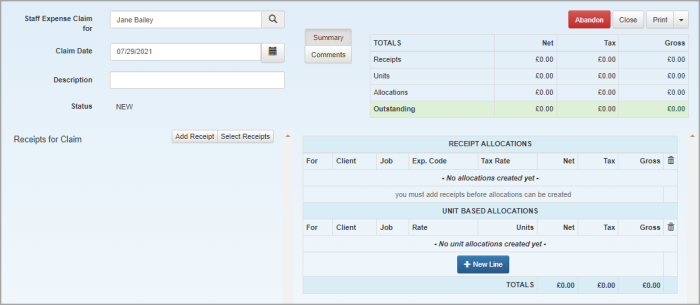
- The Claim Date defaults to today's date, but you can change it. Enter a Description.
-
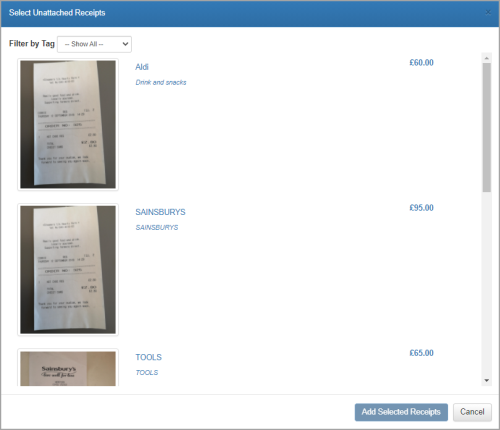
To add a new receipt to this claim, click Add Receipt. If you've already added receipts, click Select Receipts to add them to this claim.
Any outstanding claims are shown, separated into Active, Complete, Approved, Rejected and Posted.
-
Select the receipts that relate to this claim (only unattached receipts are available for selection), then click Add Selected Receipts. The receipts are listed in the claim.

If the receipts have already been allocated (assigned to a client), the allocations are displayed under Receipt allocations.
See Manage receipts to edit, group, allocate, remove or delete receipts.
-
Click Comments to add any notes to this claim.
-
Click Print if you want to keep a paper copy of this claim or click Print > Export with Attachments to save a copy.
-
Do one of the following:
-
If you've allocated your receipts, you can now submit the claim. Click Submit.
-
Click Save to save the claim and allocate your receipts later.