Create recurring receipts
Many clients are now looking to pay their fees using direct debits or standing orders. It is therefore necessary to set up and create recurring receipts to be issued and posted once monies have been received. Multiple recurring receipts can be set up against a client.
There are three stages to this process:
-
Record direct debit mandate
-
Create recurring receipts
-
Post recurring receipts
Record a direct debit or standing order mandate
-
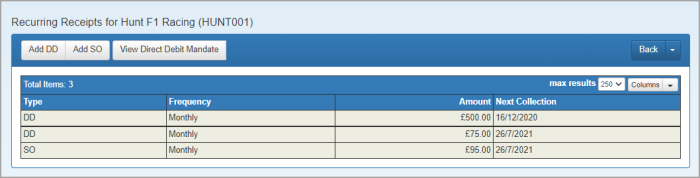
Select Client > Task Pad, then click Recurring Receipts.
-
From the Recurring Receipts page, click Add DD to add a direct debit or Add SO to add a standing order.
-
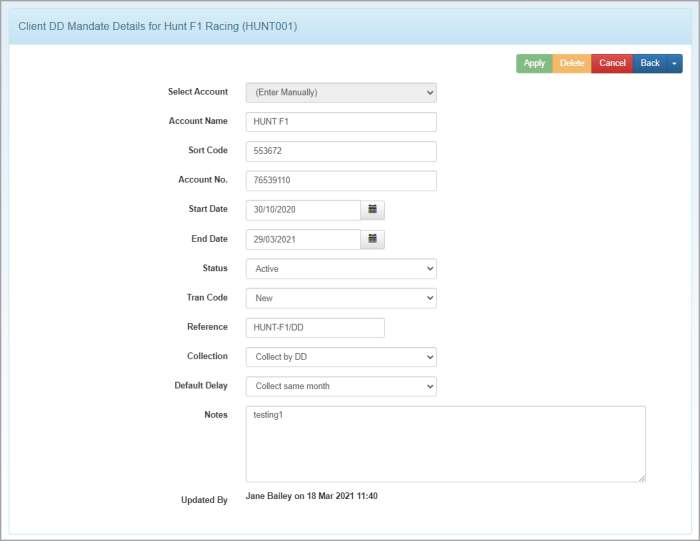
From the Add New DD page or Add New SO, complete the page as follows:
FIELD DESCRIPTION Batch Indicates whether the DD/SO is part of a batch that will be collected, or whether it will be collected on an individual basis. Bank Which bank account this receipt is to be deposited to. Frequency The frequency that the DD/SO will run. Paid on The day of the month that the DD/SO is due to be collected on. Amount The amount to be collected by this DD/SO. Value Type Select whether a Fixed or Variable amount will be collected. Status Choose whether the DD/SO is Active or Suspended which determines whether the DD will be corrected. Allocation Sets how the DD/SO will be allocated against outstanding bills and RFPs. - Manual - no processing will be done during the collection of the DD/SO. Allocation must be manually completed from the Client’s DRS Transactions or the Unallocated Entries page.
- Automatic – the system will attempt to allocate the DD/SO against outstanding entries, but if there are no outstanding entries it will be left unallocated. Allocation will be against the oldest transaction first.
- Create RFP Receipt - the system will attempt to allocate the DD/SO but if there are no outstanding entries or if there is a balance of cash once all entries are allocated, the balance of cash will have an RFP Receipt created for that amount.
Next Due Indicates when the next collection is due to take place. Notes Add any additional information relating to the DD/SO if required. -
Once completed, click Save. The new receipt is then added to the list. You can click the a recurring receipt line to see details expanded in the list. A History option is available once expanded.