Set up Modern Authentication for Office 365
This section should be completed by a member of your IT team.
Register your application
You need to register your application before you can use OAuth. Find out how to register your application on the Microsoft help site. For Step 3: New registration, leave the content blank.
Add the necessary permissions
IRIS Cascade requires app-only authentication so, once you have registered your application, you can add the necessary permissions.
For step 2 of this process, here is an example of what your JSON content should look like:
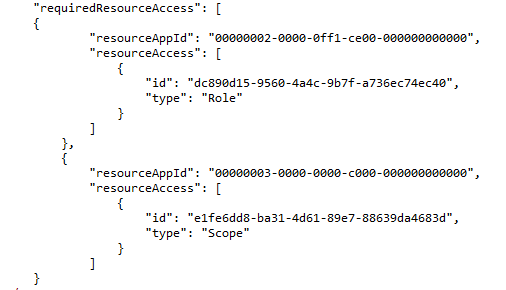
Text to copy:
		"requiredResourceAccess": [
		{
				"resourceAppId": "00000002-0000-0ff1-ce00-000000000000",
				"resourceAccess": [
					{
						"id": "dc890d15-9560-4a4c-9b7f-a736ec74ec40",
						"type": "Role"
					}
				]
			},
			{
				"resourceAppId": "00000003-0000-0000-c000-000000000000",
				"resourceAccess": [
					{
						"id": "e1fe6dd8-ba31-4d61-89e7-88639da4683d",
						"type": "Scope"
					}
				]
		}
Configure calendar integration properties in IRIS Cascade
This section should be completed by a IRIS Cascade system administrator.
You should have been provided the Application (client) ID , Directory (tenant) ID and the Client Secret value from your IT team. Anyone with access to the administration section in Cascade should be able to complete these final steps.
-
From the Application Data page, select Calendar Integration Providers.
-
Select Modern (Microsoft365) from the Authentication Method drop down.
-
Enter the Application (client) ID , Directory (tenant) ID and the Client Secret value provided by your IT.
-
Select Save.
-
If you already have this set up and your looking to update the Client Secret value then add the new Client Secret value and select Save. You can leave all other settings as they are.