Add new export template
To add a new export template:
-
Select 3rd Party Interface Manager from the main navigation menu.
-
Select Add New Export Template.
-
The Template Configuration is split across three tabs:
Fields
Here you can set which fields are included in the export template. By default, when creating an export template, the Employee ID, Surname and First name from the main page are added automatically.
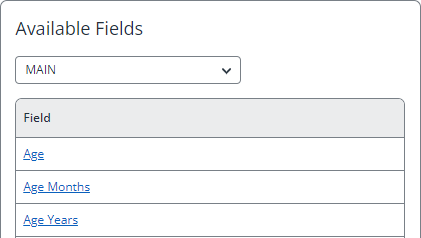
Available Fields lists all of the items you can add to the export template. Select the screen from the list, below you’ll then see all the fields from that screen. Double click a field name to add it to the export template.
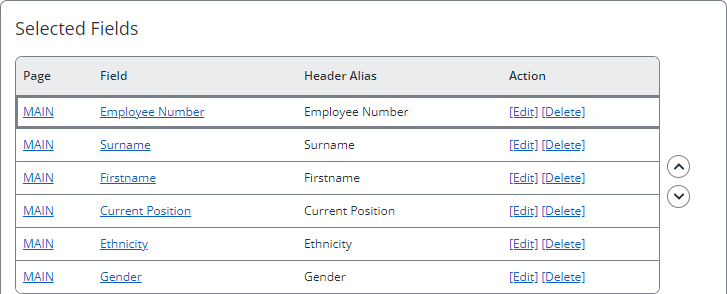
Selected Fields lists the items selected to be included in the export structure. If you want to change the order of fields, select the field name and use the arrow icons to move the filed up or down the list, as required.
Each field has a Header Alias, that will be shown at the top of the exported file when created. Select Edit if you wish to assign a different alias to the field.
Select Delete to remove a field from the export template.
Page Rules
Here you can set certain rules for each screen. These rules are only linked to the screen, not the fields. If you select the rule Export When Modified, you’ll be presented with a date box when running the export, the system will check for any modifications since the date entered when deciding to export a record.
Select the Page and the Rule from the respective lists and select Add or Replace to put the rule in effect. Rules available to select are contextual based on the page selected. You can only have one rule per page . If a rule for the page already exists it will be replaced when you select Add or Replace.
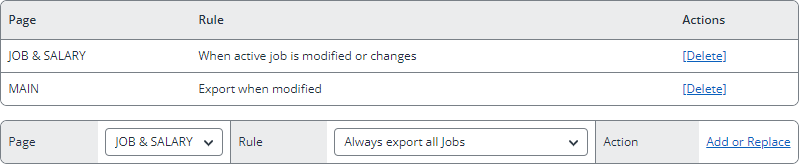
When it comes to deciding if a record will be exported, all rules are considered. If one of the rules says it must be exported, then all columns are exported.
Miscellaneous
Here you can set up various formatting options and the name of the template file.