MyEd App Settings
IRIS Reach has default options that are displayed for the My School and My Students screens on the MyEd Name of the application parents and carers use to receive messages sent by schools using IRIS Reach. app. The My Ed Settings section allows you to select the default options you want displayed in the MyEd app.
To personalise the app, you can add information about your organisation A school, multi-academy trust (MAT), single academy trust (SAT), club, nursery or organisation that uses the software. and a logo.
- Select My Ed > My Ed Settings.
-
The My Ed - Settings page is displayed.
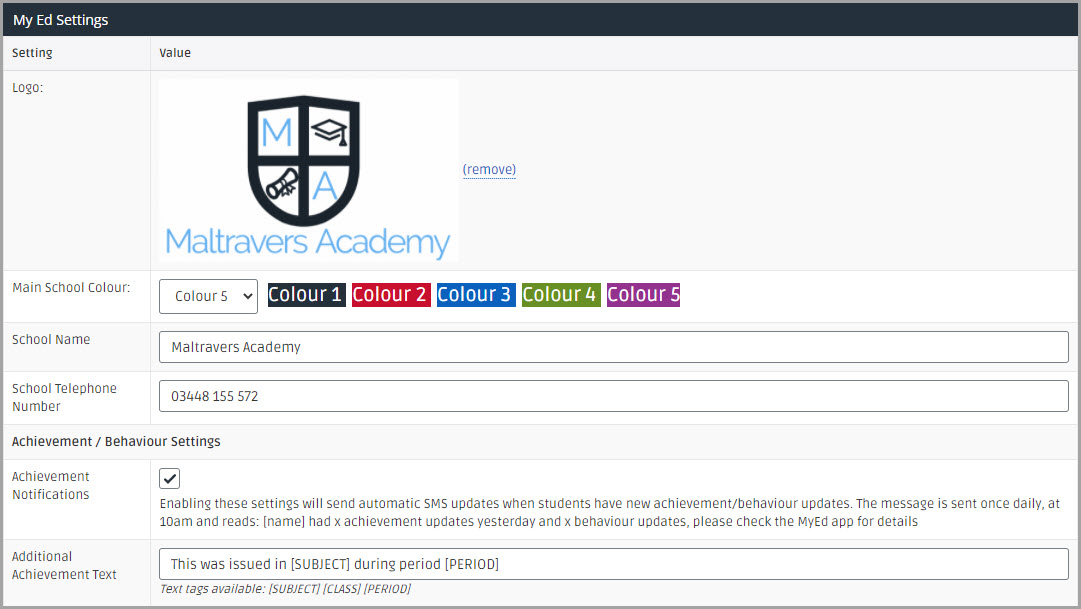
Edit MyEd Settings
Logo — to add or remove your organisation logo. For more information, go to Add or Remove Images in the MyEd App.
Main School Colour — select an option to set the main colour form menus, icons, and banners.
School Name — enter the name of your organisation.
School Telephone Number — enter the telephone number you want a person A parent, legal guardian, carer, or someone responsible for a student. to use if they need to contact your organisation.
Achievement / Behaviour Settings
Achievement Notifications — select to send automatic text message updates for student achievements.
Additional Achievement Text — enter details you want displayed in the Achievement Log in the My Students section. If left blank, IRIS Reach automatically populates the section using the default message.
Behaviour Notifications — select to send automatic text message about student behaviour.
Additional Behaviour Text — enter details you want displayed in the Behaviour Log in the My Students section. If left blank, IRIS Reach automatically populates the section using the default message.
Banner Settings
Banner Text — enter the details you want displayed in the MyEd app banner.
Banner Start Date — enter date from which you want a banner displayed in the app.
Banner End Date — enter date that you want a banner to no longer be displayed in the app.
Banner Colour — enter the hex code for the colour you want the banner to be.
The menu options displayed to a person in the MyEd app are determined by creating or selecting a button.
My School Buttons and My Student Buttons
Select or clear the check boxes adjacent to the My School Buttons or My Student Buttons option you want to display or remove from the MyEd app.
If you do not have the Payments module, Payments Button is greyed out and you are unable to select it. To purchase and set up Payments, you need to log a support ticket (a Service Cloud account is required). If you have the Payments module set up, add the URL for your payments system in Payments URL.
If a button is greyed out in the My Students screen on the app, this indicates that there is no content for the student.
Create, Edit, and Delete MyEd Options
Custom Buttons allows you to add options to the My School (accessible by anyone who downloads MyEd) or My Students (accessible only to a person with priority 1 / parental responsibility) screens. For example, to direct a person to a social media account, a microsite (for more information, go to Create, Edit, and Delete Microsites), or to a website (e.g., ShowMyHomework or a school VLE).
IRIS Reach has the ability to support iCal feeds for school calendars. If your organisation uses a cloud based calendar, such as Office 365, Google Calendar, or similar, log a support ticket (a Service Cloud account is required) with the iCal address and request to setup the iCal calendar on your app. Please allow a minimum of 2 working days for this to be completed.
- Select My Ed > Custom Buttons.
- The My Ed - Custom Buttons page is displayed.
Create Custom Buttons
-
In Add Button select the Button Type, enter a Title, then select an option from the Content Format drop-down list. The following options are available:
- HTML — Create your own text, for example, information about uniform.
- URL — Link to a website.
- System URL — When you have created and exported the necessary documents from SIMS to IRIS Reach, link to the digital document, for example, student exams or student reports. For more information, go toSend Digital Document Communications.
- RSS — Link to your organisation website's RSS feed for the latest news.
- Select Submit to save the details.
-
The MyEd - Add Content page is displayed.
If you selected HTML as the content format, enter the required text in Content.
If you selected URL or RSS, enter the Link.
If you selected System URL, copy and paste the applicable link as follows:
- Documents — https://myeds.co/MyStudents/StudentReport/
- Exam Timetables — https://myeds.co/MyStudents/StudentExams/
- Select the Icon you want displayed for your Custom Button.
- Select Submit to save. The option is immediately available to a person using the MyEd app.
Edit Custom Buttons
The School Button Manager and the Student Button Manager panels display the Custom Button Icon, content Type (HTML, URL, System URL or RSS).
- Select the Title of the required button.
- The My Ed - Add Content page is displayed. Edit the Title, Content or Link, and Icon, then select Submit to save.
Delete Custom Buttons
- Select the Title of the required button.
-
The My Ed - Add Content page is displayed. Select Or...Delete this button, then select Submit to save.

- The button is deleted instantly and no longer displayed in the MyEd app.