Managing Contacts
To send communications to Community Reach contacts the contacts need to be manually added to IRIS Reach. The Contact Manager section allows you to add or import new contacts, edit contacts, delete contacts, and delete contact groups.
- Select Community Reach > Contact Manager.
- The Community Reach - Contact Manager page is displayed.
Add Contacts
Community Reach contacts can be added manually or imported. Follow the instructions, as required.
Add Contacts Manually
-
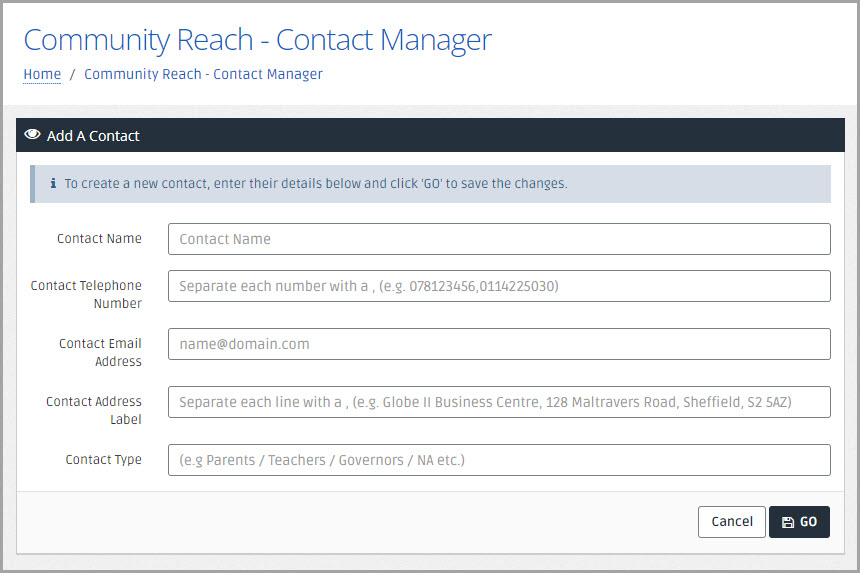
Enter the following details for the contact in the Add A Contact panel:
Contact Name — Enter the full name of the person A parent, legal guardian, carer, or someone responsible for a student..
Contact Telephone Number — Enter the telephone number for the person (if there are multiple numbers to add, separate each number with a comma, e.g. 078123456,0114225030).
Contact Email Address — Enter the email address for the person.
Contact Address Label — Enter the full address for the person (separate each line with a comma, e.g. Globe II Business Centre, 128 Maltravers Road, Sheffield, S2 5AZ).
Contact Type — Enter a contact type which automatically creates a contact group for the contacts e.g. Parent, Teacher, etc.
-
Select Go. A success message is displayed to confirm the contact has been added.
Import Contacts
-
Select Bulk Import Contacts in the Bulk Import Contacts panel.

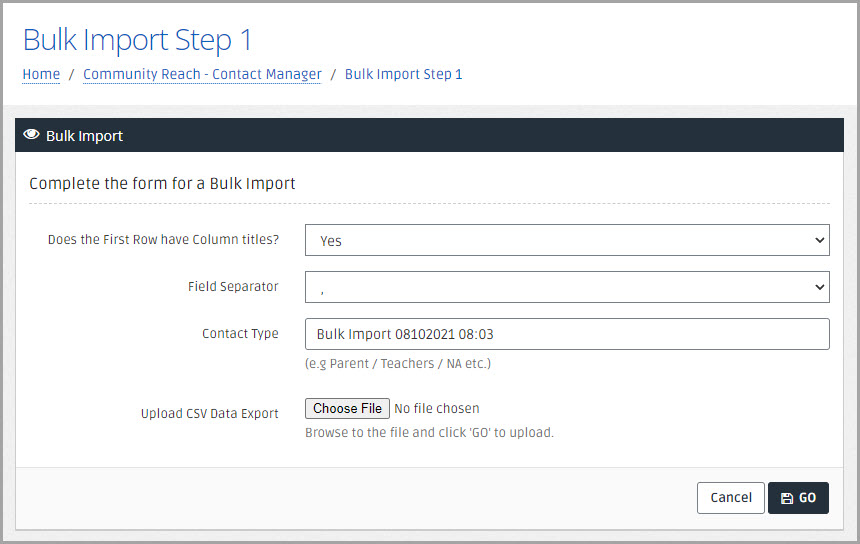
- The Bulk Import Step 1 page is displayed, follow the Capita Sims Staff Report Upload Instructions or the Importing the CMIS report into RSconnected instructions to generate a report of your contacts from your MIS (Management Information System).
-
After you have prepared your report from your MIS, in IRIS Reach complete the following details in the Bulk Import panel.
Does the First Row have Column Titles? — Select Yes or No from the drop-down list.
Field Separator — Select the required option from the drop-down list.
Contact Type — Enter the type of contacts (e.g. Parent/Teacher/Governor).
- Select Choose File to select the file you want to import.
-
Select Go to import the file.
- The Community Reach - Bulk Import Step 2 page is displayed. From the Bulk Import Step 2 panel, select the required options from Field Sort 1, Field Sort 2, and Field 3 for the Contacts Name. If the field is not required, select Not Needed, then select Go.
- The Community Reach - Bulk Import Step 3 page is displayed. From the Bulk Import Step 3 panel, select the required options from Field Sort 1, Field Sort 2, Field Sort 3, Field Sort 4, Field Sort 5, Field Sort 6, and Field Sort 7 for the Contacts Address. If the field is not required, select Not Needed, then select Go.
-
The Community Reach - Bulk Import Step 4 page is displayed. From the Bulk Import Step 4 panel, select the required options from Field Sort 1, Field Sort 2, and Field Sort 3 for the Contacts Telephone Numbers, then select Go.
If you import both mobile and landline numbers, IRIS Reach sends messages to both numbers.
- The Community Reach - Bulk Import Step 5 page is displayed. From the Bulk Import Step 5 panel, select the required options from Field Sort 1 and Field Sort 2 for the Contacts Email Address(es), then select Go.
-
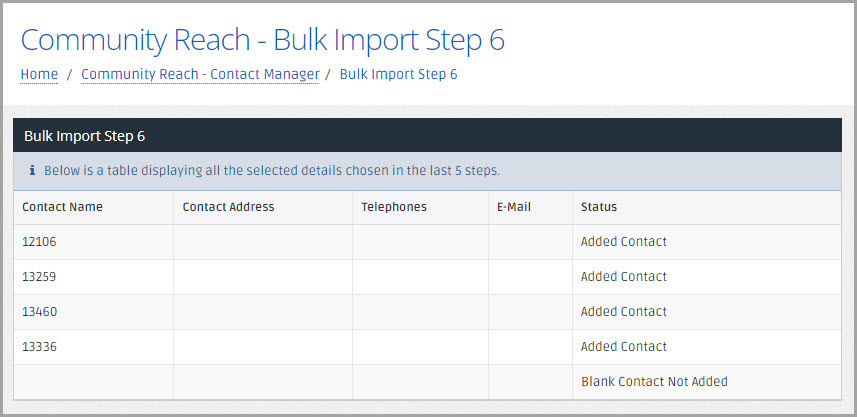
The Community Reach - Bulk Import Step 6 page is displayed with the selected options from the previous steps displayed. The Bulk Import Step 6 panel displays the contact name, contact address, telephone numbers, email address and the status of the contacts added.
Edit or Delete Contact Details and Group Memberships
Edit Contact Details
-
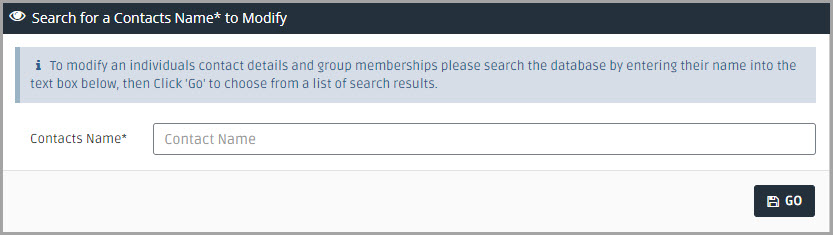
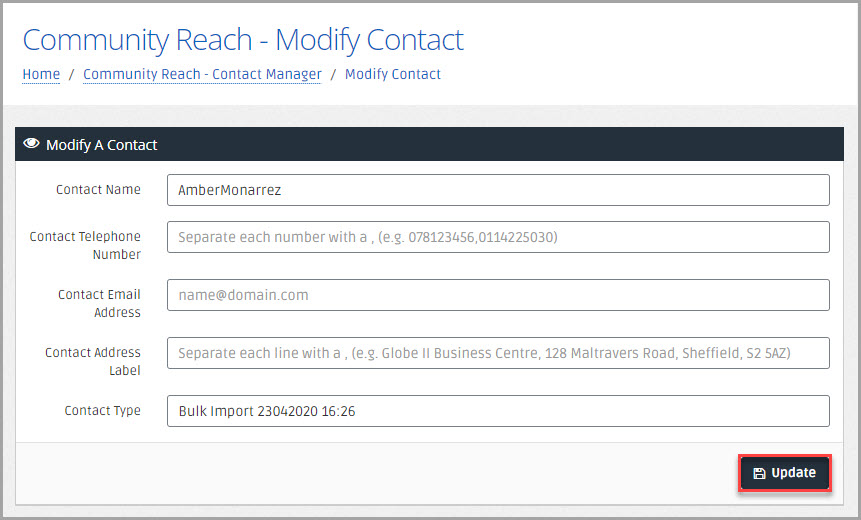
In the Search for a Contacts Name* to Modify panel enter the Contacts Name*, then select Go.
-
The Community Reach - Modify Contact page is displayed. The contact's details are displayed in the Modify A Contact panel , change the required details, then select Update to save.
Edit Group Memberships for a Contact
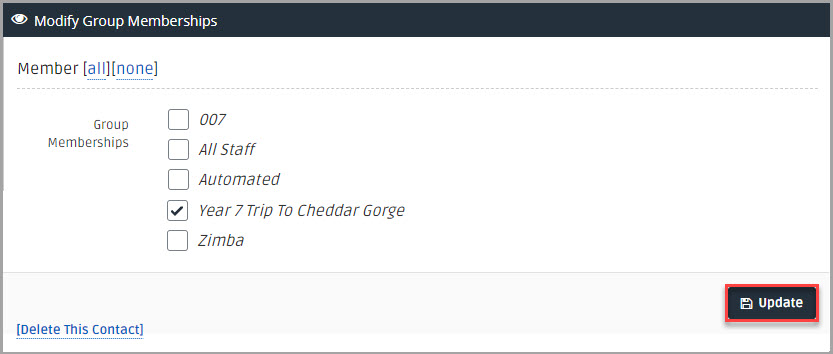
- In the Modify Group Memberships panel, select or deselect the check boxes adjacent to the required Group Memberships. Select All or None adjacent to Member to select or deselect all Group Memberships.
-
select Update to save.
Delete a Contact
-
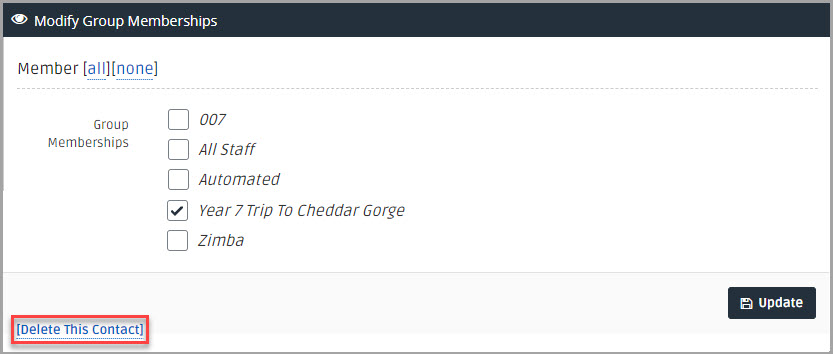
In the Modify Group Memberships panel, select Delete This Contact.
-
The Community Reach - Contact Manager page is displayed and a message is displayed to confirm the contact has been deleted.
Delete Contacts and Group
The Contact Groups panel displays the groups (created by the Contact Type entered when creating a contact).
You are unable to retrieve contacts and groups that have been deleted.
-
Select Delete Contacts and Group in the Delete Contacts column for the group you want to delete.

-
A success message is displayed, select OK to return to the Community Reach - Contact Manager page.