Creating a Trip
The Trips ledger has a set range of nominals that are attached to it by default. As a consequence, when income is posted to the nominal LLL
If you are creating a trip account but do not want to record the details on the TRIPS ledger, you create a trip account on the Cost Centre ledger. When recording income and expenditure for the trip against the account, payments are recorded against the cost centre. See Creating Cost Centre Accounts (v2, v4, v6) for more information.
- Select Masters > Accounts from the top menu.
- The List of Ledgers dialog is displayed. Highlight the required ledger, then click the Select button, or double-click the relevant TRIP ledger, which will be prefixed by your location code, e.g. CEN_TRIPS - CEN Trip Accounts.
- The Account Maintenance dialog is displayed labelled according to the ledger selected. Click the Add button.
- Enter an Account code for the trip (maximum 12 characters) e.g. CORNWALL20, then click the OK button.
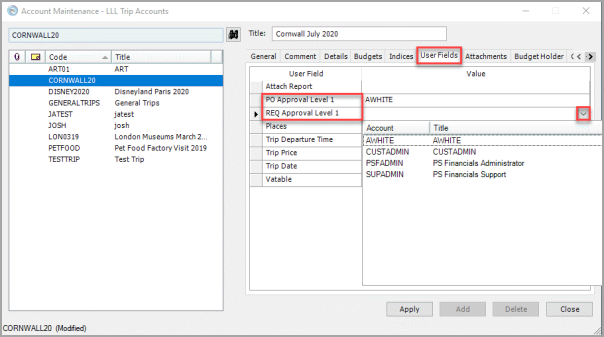
- Enter a title for the trip, e.g. Cornwall July 2020 in the Title field.
- Select the User Fields tab which is used to record the main details of the trip as follows (all are optional):
Places - enter the number of places available for this trip e.g. 60.
Trip Departure Time - enter the departure time of the trip e.g. 08:30.
Trip Price - enter the Price per student for the trip e.g. 186.00.
Trip Date - click in the field, then use the drop-down calendar to select the date of the trip e.g. 21/06/2021.
Vatable - click in the field, then use the drop-down to select either N (No) or Y (Yes) to specify whether the trip is subject to VAT.
- It is possible that each trip (account within the TRIPS ledger) can have up to three approvers for requisitions or purchase orders created in PS Purchasing enabling trip expenditure to be closely monitored. If available, these fields will be displayed as PO Approval Level 1, REQ Approval Level 1, etc. as shown in the following graphic. Click into the field and select the required approver from the drop-down list. If these user fields are not visible, but you would like to add approvers, please see Assigning Approvers/ Authorisers to Fixed Assets & Trips.
- Select the Indices tab (if this is not visible, use the arrow icons on the far right to move further along). The indices are used to select how you want to report on the trip account. If you want to report on the account under a specific funding arrangement, select the applicable index and check box. The ACTIVITIES and FUNDTYPE indices may be mandatory (depending on your system setup), therefore if you do not wish to use indices for reporting, select the XNODET for both indices.
- Finally, select the Security tab (if this is not visible, use the arrow icons on the far right to move further along) to determine who can View, Modify and Post to the trip account. Select the required security role from the applicable drop-down list as shown in the following graphic. We recommend Modify access is restricted the person who administers your system (select Z_SYSADMIN from the drop-down list).
- Once you have completed the relevant information, click the Apply button to save the new trip account.