Maintaining Ledgers
It is very rare that a new ledger will be required, as existing ledgers will have been created and set up as part of the installation process. The following example shows how to create a School Fund ledger to demonstrate how a new ledger can be created if required. The following sections then show how to add/edit ledger properties.
Creating / Editing a Ledger
- Select Masters > Ledgers from the menu bar.
- From the Ledger Maintenance dialog, enter a code for the ledger in the top left-hand field together with an applicable Title. Ensure that location specific ledgers are preceded with their three character location code, e.g. LLL_SCHFUND. Click the Add button.
- Complete the remaining details as described in the following sections.
Setting ledger access levels
By default, the Access Level for a new ledger is set to 3. This can be increased to restrict access to the ledger if required.
The Input Allowed check box is selected by default and should only be deselected if you want to prevent documents from being posted to this ledger.
For more information, see How to - Apply Security to a Ledger.
Specifying ledger types
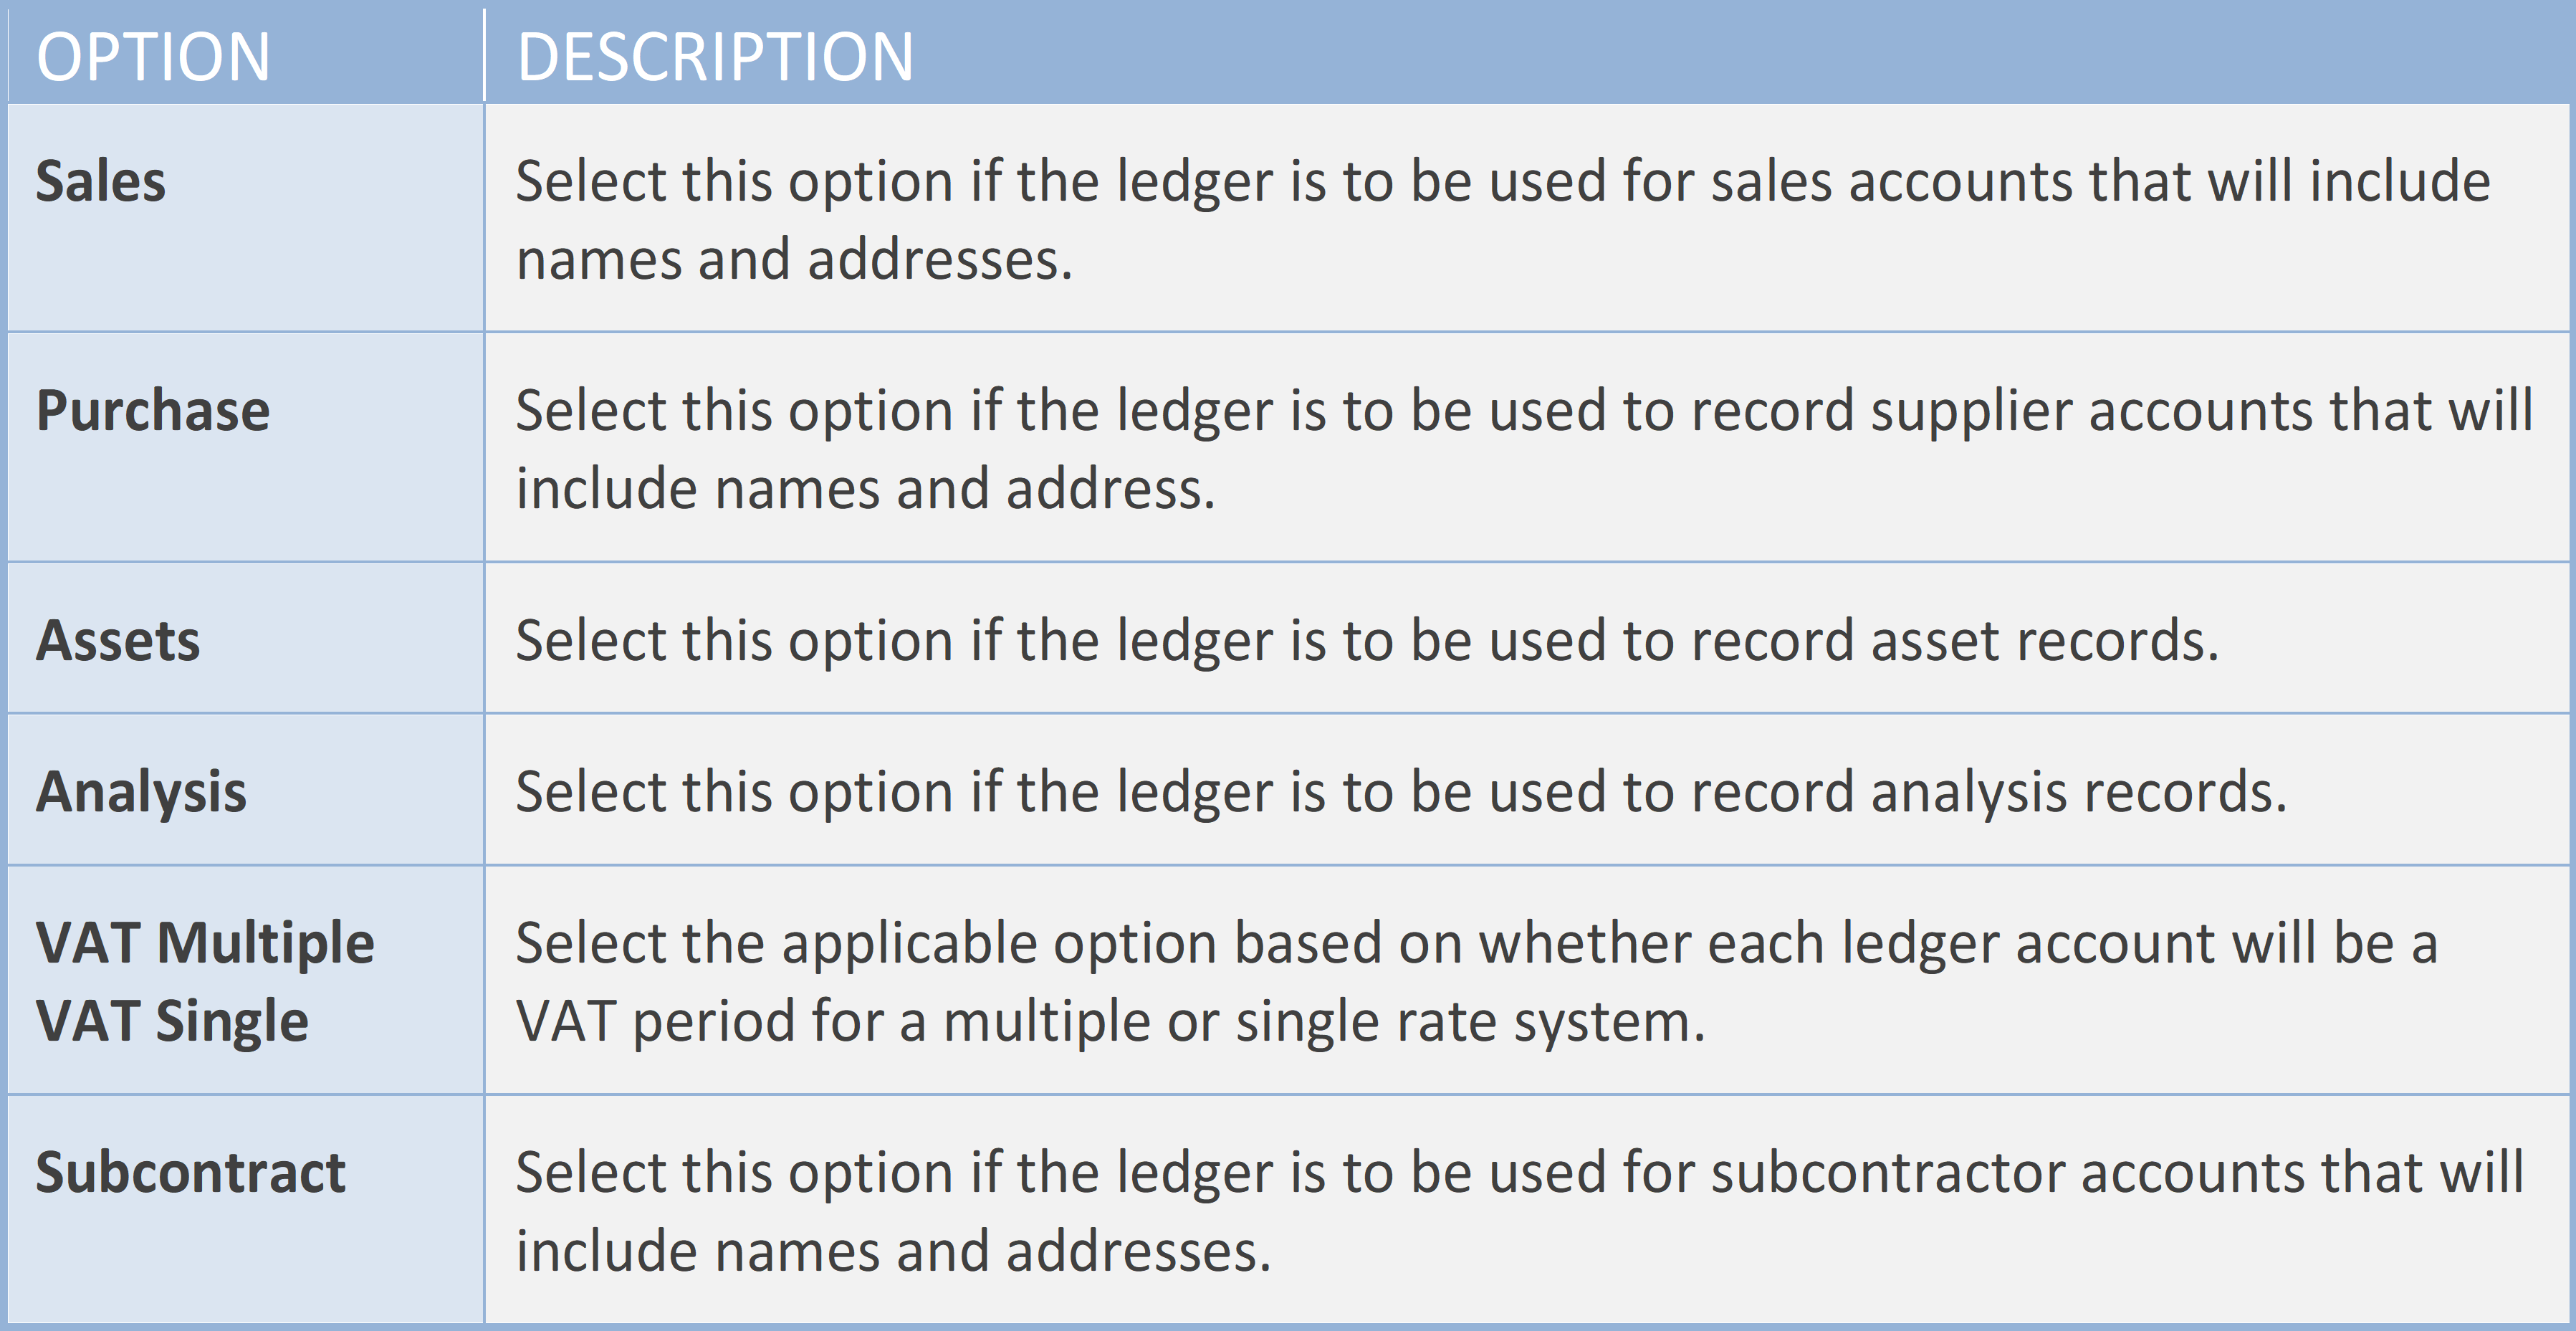
Select the required type of ledger from the Ledger Type drop-down list. This is used to determine how the ledger will be used within the system. The following choices are available:
Setting ledger options
Advanced Search - Select this check box if there are likely to be a significant number of accounts added to the ledger. This option displays a search dialog forcing a search to be carried out to restrict the number of accounts listed.
VAT Defaults (applicable to SALES and PURCHASE ledgers only) - Sets the VAT country code default for the accounts held within the ledger. If the ledger is to contain accounts with several different country codes, then the default should be set to None and the individual accounts have their VAT country code set individually.
Address Format (applicable to SALES and PURCHASE ledgers only) - Sets the default address format for accounts created in the ledger.
Viewing/Choosing the nominals linked to a ledger
When a ledger is first created, no nominals are linked to the ledger. Linking a nominal to a ledger forces an account form the ledger to be selected whenever the nominal is chosen.
If you want to restrict the ledger to have only one nominal linked to it, select the Unique radio button. Select the Multiple radio button to allow any number of nominals to be linked.
Once a ledger has been created, any linked nominals can be viewed by clicking the Nominals drop-down arrow.
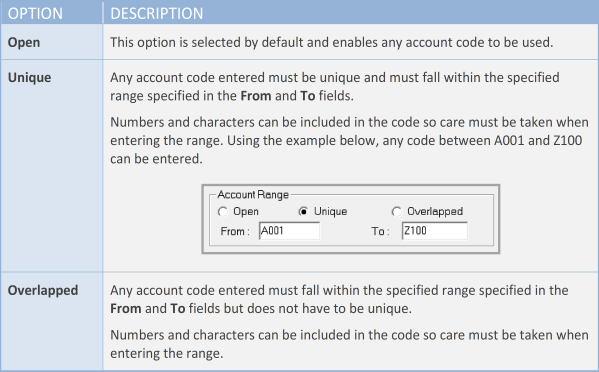
Applying account code restrictions to a ledger
By default, when a user creates an account for this ledger, no restrictions are applied. The following additional options are available.
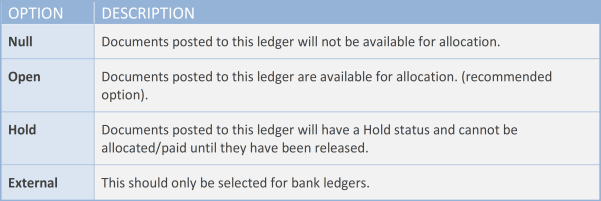
Defining the initial state of documents posted to the ledger
The Initial State section is used to define the initial state of any document posted to this ledger.
The following options are available:
Changing the Initial State of an existing ledger affects all the accounts in the ledger. However, individual accounts can subsequently have their status amended as required.
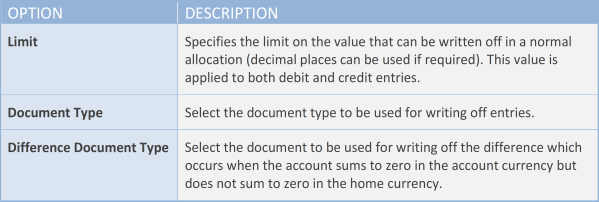
Specifying the allocation write off
The Allocation Write Off section is used to manage the way the allocation of any values that are written off are handled.
The following options are available:
Applying ledger validation

Bank Details Required - (applicable to SALES and PURCHASE ledgers only) select this check box to make entering bank details mandatory when creating an accord for this ledger.
Payment Terms - (applicable to SALES and PURCHASE ledgers only) select this check box to make entering payment terms mandatory when creating an accord for this ledger.
Applying validation to the account code
By default, validation is applied to the account code to force it to contain three characters followed by up to 9 numbers followed by three characters.
If required, you can amend the validation of this code to force certain letter/number combinations to suit your needs.
The validation is determined using a regular expression (a sequence of characters that define a search pattern). An internet search on "regular expression" will provide more information as required.
The default expressions for the account code is as follows:
^[A-Z,0-9]{3}[0-9]{3}[A-Z]{3}
The following table provides a list of typical expressions that can be combined to define the validation of the account code. One or more options can be combined (separating each one with a space).
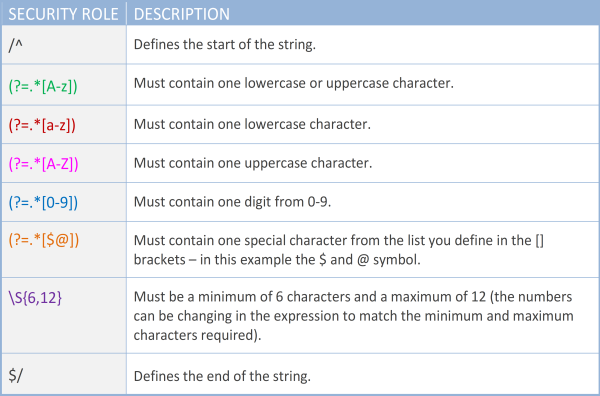
Combining these expressions into a string then determines the minimum requirements of the account code (the expressions can be in any order).
Applying Security to the ledger
Security options for ledgers are accessed by clicking the Security button. The Ledger Security Maintenance dialog is displayed.
When defining security roles for ledgers, the following options are available:

Select the required roles then click the Close button to save the changes.
The following example shows the security settings applied to the PURCHASE - Purchase Accounts ledger. The settings shown indicate that users who have the L_PURCHASE security role assigned can view the ledger, post documents to the ledger, view accounts within the ledger (i.e. the suppliers) and modify the account properties. Only users with the Z_SYSADMIN can modify the ledger properties.
Whichever role is shown in the drop-down list, the same role must be assigned to the applicable user group in order to give them access to that part of the system.
For more information, see How to - Apply Security to a Ledger.
Changing the default tab displayed for ledger accounts
When a user creates an account for the ledger, you can determine which tab in the Account Maintenance dialog is displayed by default.

Click the drop-down arrow and select the required tab from the list.
Creating/Maintaining Payment/Discount Terms
For more information, see How to - Add Payment / Discount Terms to Ledgers or Accounts.