Authorising Documents
Most establishment/organisation's make use of the authorisation facility in IRIS Financials Purchasing. Once an applicable document is posted (requisition or purchase order), an email is automatically sent to the approver for their authorisation.
Approvers must have applicable access levels in order to authorise documents. If not, the Document Authorisation icon is not visible and/or applicable documents not available for authorisation. For more information, refer to Setting Up IRIS Purchasing Document Approvers.
To allow users to approve their own documents, the Allow Self Approval setting must be set to Yes.
Authorising documents consists of the following:
Opening the Document to be Authorised
Accepting an Item or the Document
Rejecting an Item or the Document
Opening the Document to be Authorised
-
You are automatically emailed when a document requires your authorisation. The quickest and easiest way to access the document is to open the email and select the View Order link.
-
Alternatively, from the Home page, select the Document Authorisation icon.
-
The Search window is displayed. Selecting Search displays a list of all documents awaiting your authorisation. If there are likely to be a significant number, enter applicable filter criteria first.
-
A list of documents is displayed in the Search Results section.
-
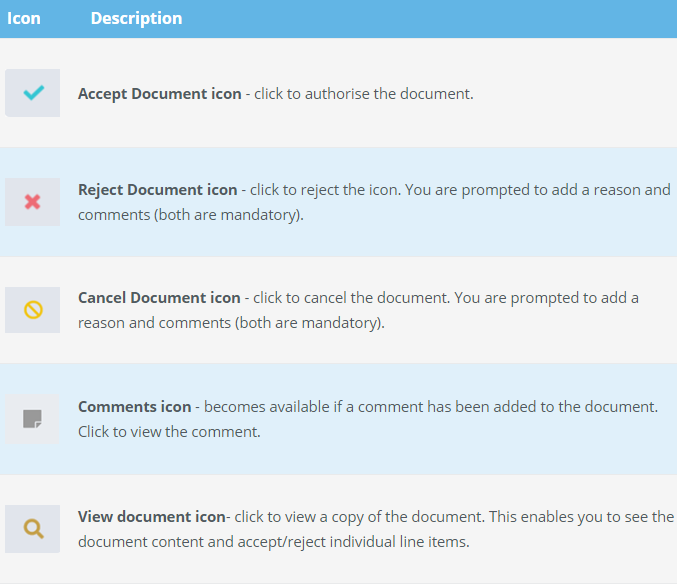
The icons on the right of each item enable you to deal with each document without needing to view it.
-
It is advisable to view the document before authorising. To see the full content for the document, select the View Document icon.
-
The selected document is then displayed with a set of buttons at the bottom providing options to Accept, Reject, or Cancel. An additional option enables you to check the impact on the budget (if available).
-
At the top of the screen a Document View carousel is available. This enables you to scroll through all documents requiring your authorisation by clicking the document number on the top left or right to move forwards or backwards to the next/previous document.
Accepting an Item or the Document
-
To accept an item line, select the blue Tick icon adjacent to the applicable item. Select Yes on the displayed message to continue. Repeat for all other lines to be accepted.
-
Once accepted, the line item approver column displays AUTHORISED.
-
To accept the whole document, select Accept at the bottom of the document. Select Yes on the displayed message to continue.
-
A success message is displayed indicating that the document has been successfully authorised.
-
An email is sent to the person who created the requisition/purchase order.
Rejecting an Item or the Document
-
If a document or item line is being rejected, the reasons for the rejection must be provided together with applicable comments. To reject an item line, select the red Cross icon adjacent to the item to be rejected. To reject the whole document, select Reject at the bottom of the document.
-
Select the required Reason from the drop-down list (mandatory).
The reasons displayed can be amended by the person within your establishment/organisation who administers your system, i.e. has a CUSTADMIN login and therefore may be different to those listed in the following graphic.
-
Enter the reasons you are rejecting the item/document in Rejection Comments (mandatory).
-
Select Yes to process the rejection. Both reason and comments must be supplied before the rejection can be processed.
-
A success message is displayed depending on whether a line or document has been rejected.
An email is sent to the person who created the requisition/purchase order indicating the line or document has been rejected.
The document is marked as rejected and is considered closed, i.e. it can be viewed but no longer edited or progressed in the purchasing process.
If required, the person who originally create the requisition/purchase order can copy the rejected document, make appropriate changes and re-issue for authorisation. For more information, refer to Copying Documents.