Running a System Audit
IRIS Financials has an function that allows for any additional data or changes to existing data to be tracked and reported upon.
You must select the applicable fields on the Audit Definition before it can report on any data. You are unable to report on any actions that have occurred before the applicable audit has been switched on.
Running a system audit consists of the following:
Switching on the Audit using the Audit Definition
Running and Using the Reporting Suite Audit Report
Manually Creating an Audit using the Audit Query
Switching on the Audit using the Audit Definition
- Log in to IRIS Financials as an administrator, (i.e., using the CUSTADMIN login).
- Select Admin Modules, then select Audit Definition from the menu.
- The PS Financials Audit Definition - Standard Auditing window is displayed.
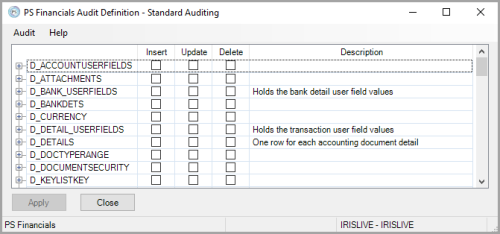
- Select the audit options required for each data table within the database. Select Expand (+) adjacent to the table name to display the details for each table.
The following tables can be selected with the Standard Auditing functionality. If you would like to Audit more extensively, please contact the Support Team.
The 3 levels of audit options are:
Insert - adding a record to the database.
Update - making amendments to the database. For example, changing bank details.
Delete - removing data from the database.
As a minimum, you should select audit options for the details in the following tables:
D_NAMEBANKINFO - contains all of the bank account information on the system.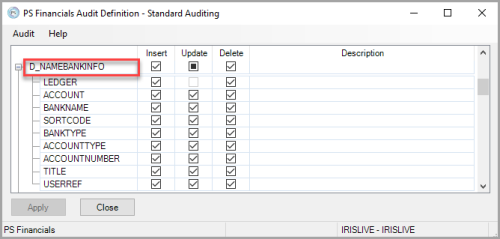
D_NAMETERMS - contains all of the payment terms information.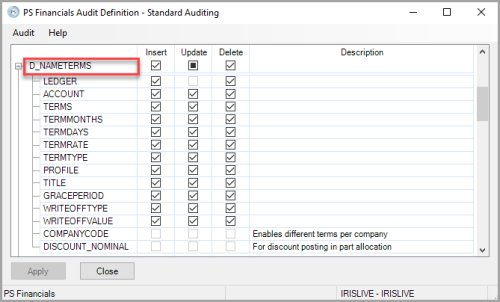
M_ACCOUNT - contains all of the header information for the accounts e.g. title, account code, etc.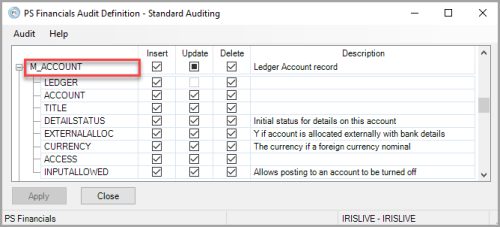
M_NAMEACCOUNT - contains all of the contact information held against the account, e.g. address.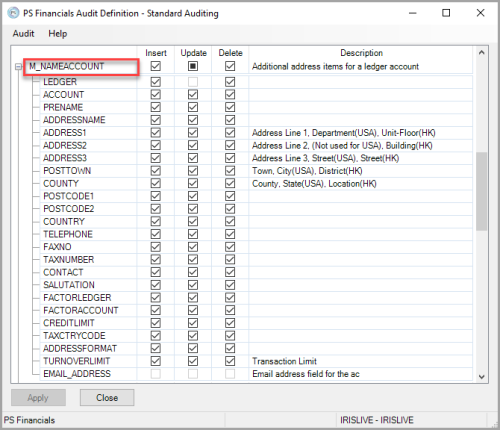
M_TAXACCOUNT - contains all of the details on the VAT accounts/periods, including the date and user details for closed/opened the VAT period, which can be audited.
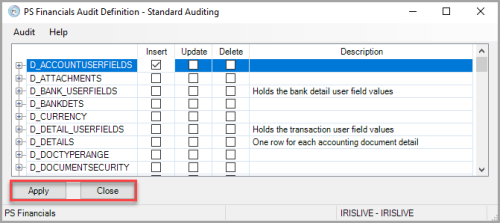
- When you have made your selections, select Apply to save your changes, then select Close. You can then load the Audit Query to report these amendments.
Running and Using the Reporting Suite Audit Report
If you are on Reporting Suite Build 003.6, you have access to the Account Audit Report in the Additional Reports section.
- To access the reporting suite in IRIS Financials, select Modules, then select Reporting Suite from the menu.
- Select Account Audit Report from the Additional Reports panel.
- The IRIS Financials Reporting Suite Browser is displayed. Select the following criteria for the report.
Please select the Database - Select the database you want to report on.
Please select the From Date - Select the earliest date you want to report from.
Please select the To Date - Select the latest date you want to report to.
Please select the Audit Table(s) - Select the applicable table you want to report on. For more information about tables, please see Switching on the Audit using the Audit Definition.
Please select the Column(s) - Select the options from the table that you want to report on. For example, the account name or who has accessed the account.
Please select the Ledgers - Select the ledger you want to report on.
Please select the Action(s) - Select the actions you want to report on, e.g. Insert, Update, or Delete. For more information about actions, please see Switching on the Audit using the Audit Definition.
Please select the Group by - select how you want to display the results, e.g. by audit table, date, or user. - When you have selected the criteria, select View Report.
- The details of the Account Audit Report are displayed. Select Expand (+) adjacent to the account name to display the action details.
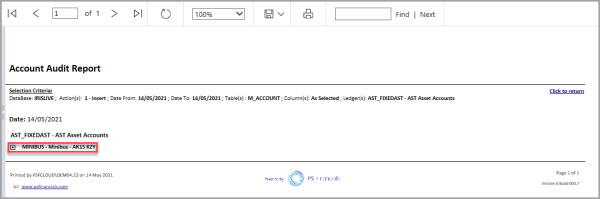
- Select Expand (+) adjacent to the action to display further details, which can be further expanded.
To save a copy of the report, select the Save icon, then select an option from the drop-down menu. To print a copy of the report, select the Print icon.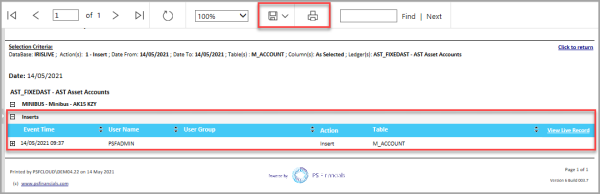
Manually Creating an Audit using the Audit Query
You can use the Audit Query if you are on an older version of the software and do not have access to the Account Audit Report from the Reporting Suite.
- Log in to IRIS Financials as an administrator, (i.e., using the CUSTADMIN login).
- Select AdminModules, then select Audit Query from the menu.
- The PS Financials Audit Query window is displayed.
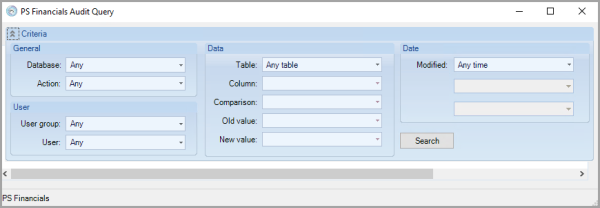
- Complete the criteria as follows:
Database - Select the database you want to report on.
Action - Select the actions you want to report on, e.g. insert, update, delete, etc. For more information about actions, please see Switching on the Audit using the Audit Definition.
User Group - Select the user group you want to report on.
User - Select an individual or all users to report on.
Table - Select the applicable table you want to report on. For more information about tables, please see Switching on the Audit using the Audit Definition.
Column - Select the options from the table that you want to report on. For example, the account name or who has accessed the account.
Comparison - If you know the specific change you can select the option. We recommend leaving this as Any Change.
Old Value - If you have selected a Comparison, select the original value of a record. We recommend leaving this as Any Change.
New Value - If you have selected a Comparison, select the new value of a record. We recommend leaving this as Any Change.
Modified - Select an option to report on a specific timeframe. If you select an option, select a from and to date from the additional Modified fields. - When you have selected your criteria, select Search.
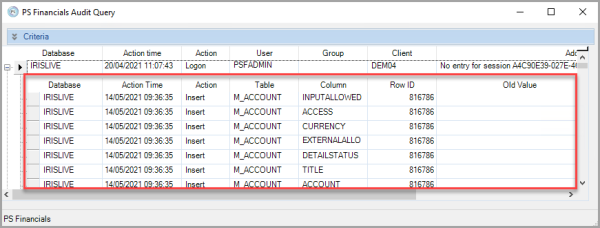
- The report is displayed, similar to the following graphic, with the details for the selected criteria.
- Select Expand (+) adjacent to the database column for any item to display the details of the action.
The database tables detailed in this guide are the only ones able to be audited as part of the standard functionality, to audit other database tables (although they appear in the drop-down lists) you need to purchase an additional licence.