Recording and Submitting an Expenses Claim
If you have incurred expenses for which you need to claim payment from yourestablishment/organisation, you can enter the details in IRIS Expenses, then submit your claim for approval. For example, if you have had to pay for parking for a client visit or claim for mileage costs for an off site meeting.
IRIS Expenses is only used to claim for personal expenses incurred for business purposes. If you have expenses that need to be recorded for company funds, i.e., a company credit card, fuel card, etc. you need to record the expense in PS Accounting. For more information, please see Recording Expenses Incurred Using Company Funds.
Before you can add a claim to record the details of expenses, you need to create a claim group. For more information, please see Creating a Group for Claims.
Recording the Details of Expense Claims
Expense claims are made depending on the type of expense being recorded. Claims can be made for expenses such as hotel, food, or travel costs.
If incurred expenses from travel costs are claimed for using mileage calculations, a mileage claim must be recorded in IRIS Expenses. For more information, please see Recording a Claim for Mileage Expenses.
Accessing the Claim Input Page
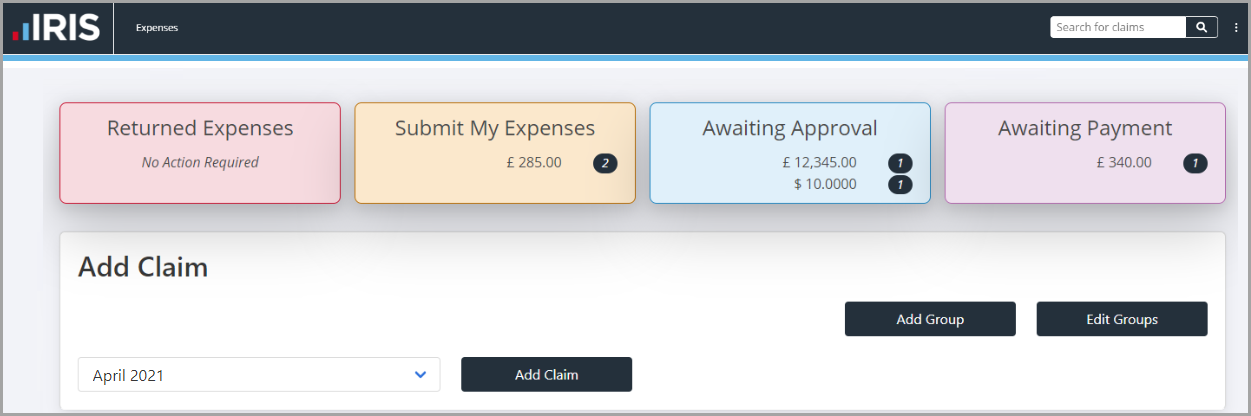
- On the My Claims page, select the claim group from the drop-down list in the Add Claim panel, then select Add Claim.
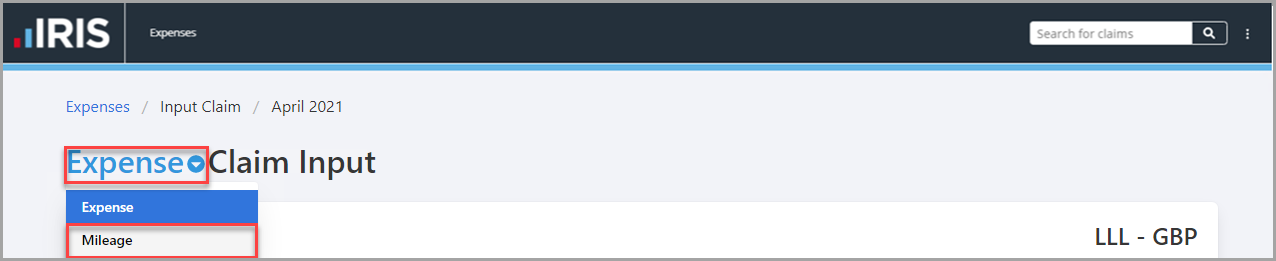
- The Expense Claim Input page is displayed. If you are recording the details of a mileage claim, select Mileage from the drop-down menu.
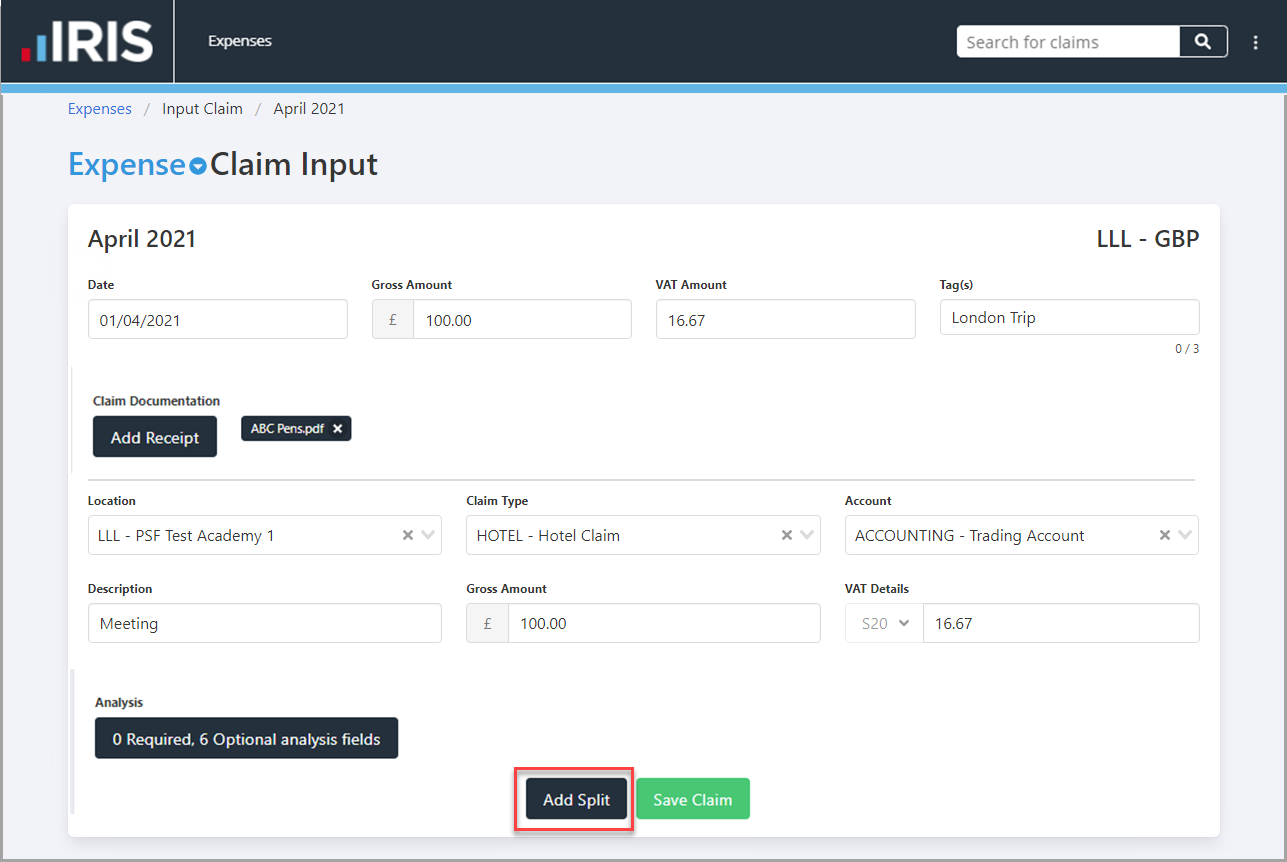
The location against which the claim is being recorded is displayed in the top right-hand corner e.g. LLL. If the incorrect location for the claim is displayed, select Expenses from the menu, as shown in the following graphic, to return to the My Claims page, then select the correct claim group for the location. If the location has been set incorrectly for the claim group, you can edit the location set for the claim group providing no claims have been submitted against the group. For more information, please see Maintaining Claim Groups.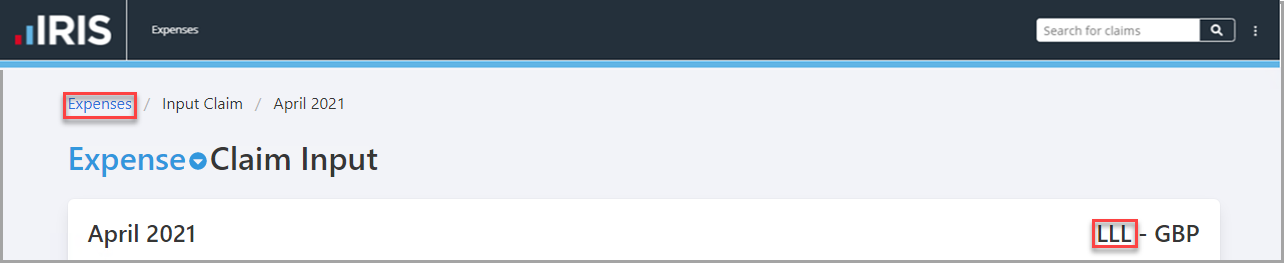
Recording a Claim for Expenses
- On the Expense Claim Input page, enter the following details for the claim.
Date - select to select the date of the expense from the calendar or enter the date in DD/MM/YYYY format.
Gross Amount - enter the total of all the expenses being recorded in the input form, excluding VAT, e.g. 100.00 (do not enter any currency symbols, i.e., £, $, etc.)
VAT Amount - enter the total VAT for all the expenses being recorded in the input form, e.g. 16.67 (do not enter any currency symbols, i.e., £, $, etc.)
Tag(s) - (Optional) enter a word or phrase that can be entered on other claims to group the claims, e.g. London Trip.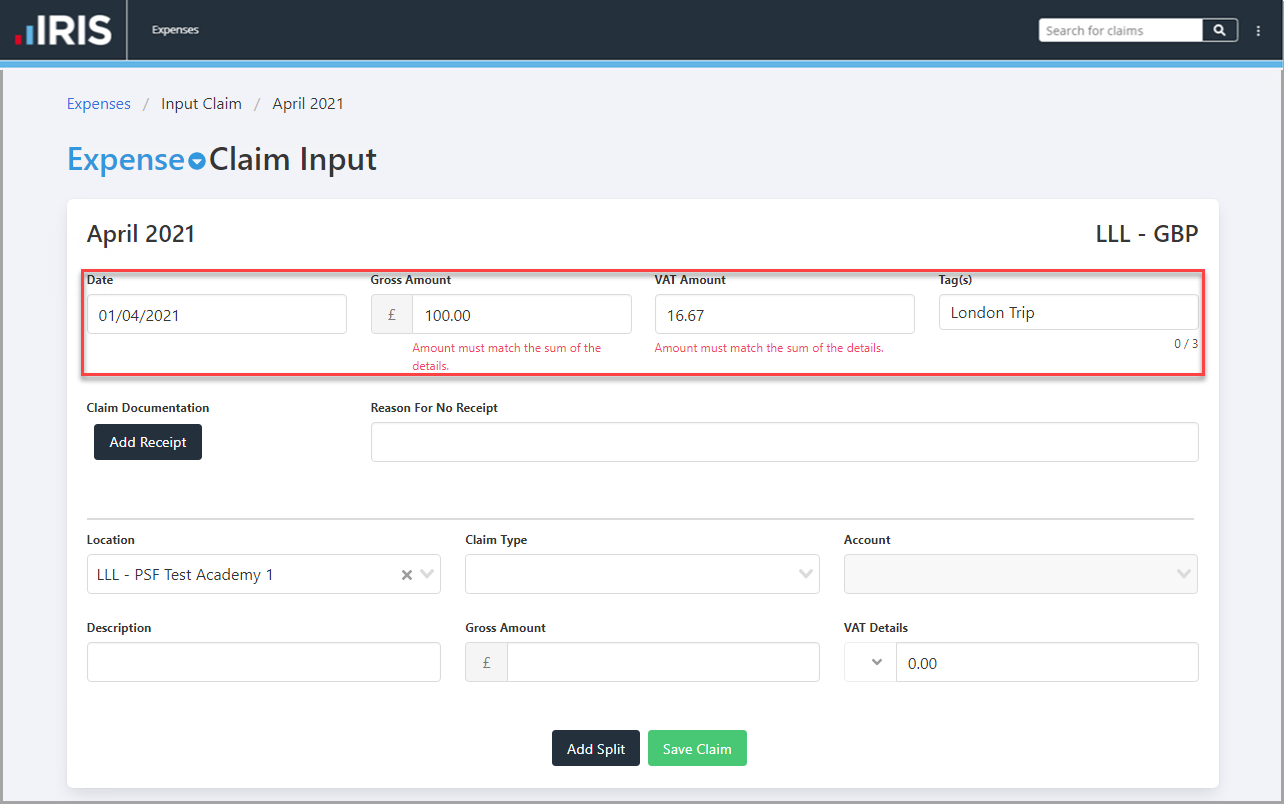
- select Add Receipt to upload an attachment of any receipts relating to the claim.
If IRIS Expenses has been set up to require a receipt, you must upload a receipt or enter a reason you do not have a receipt in Reason For No Receipt before you can save the claim.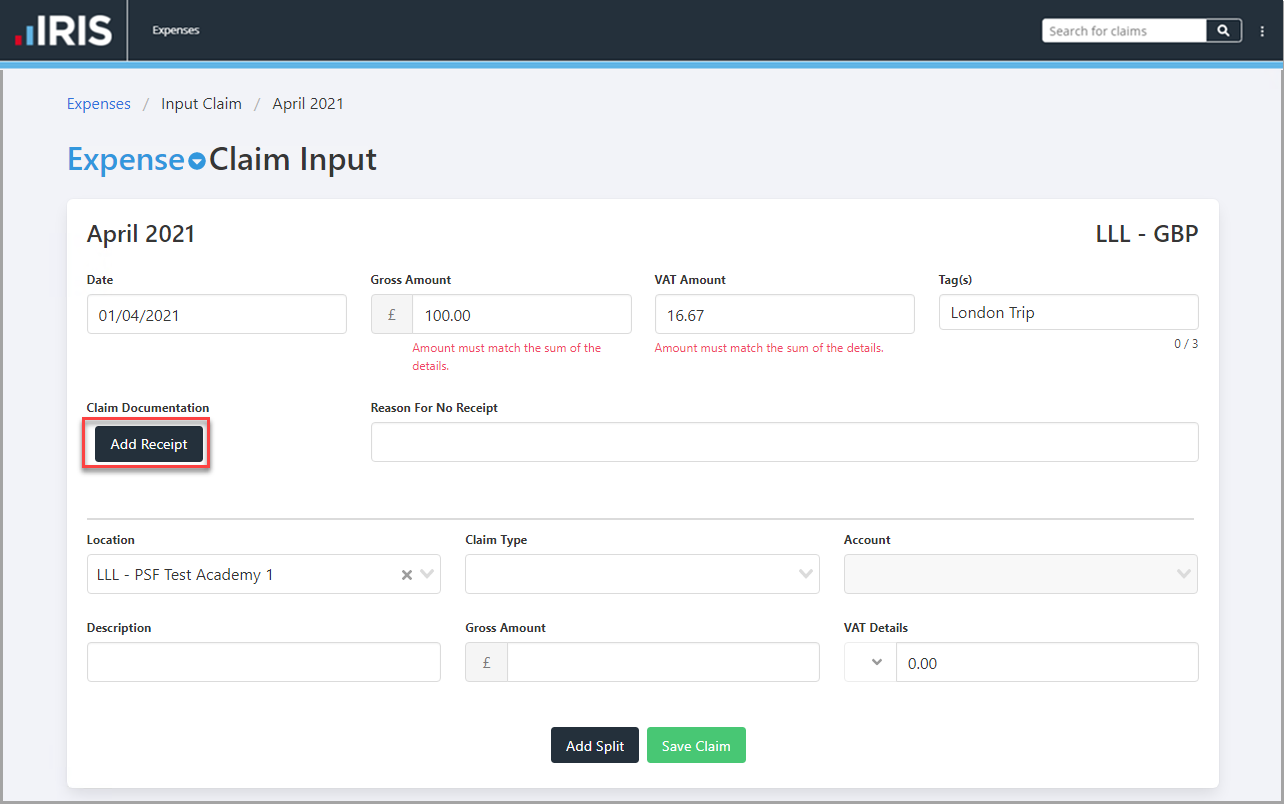
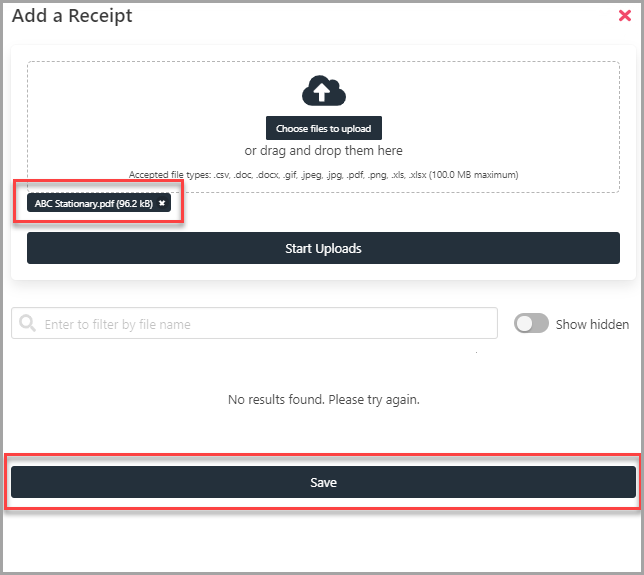
- The Add a Receipt panel is displayed. select Choose files to upload and select the required file(s) to upload. If you have previously uploaded a receipt that relates to the claim being recorded, select the required file(s) from the Vault Entries panel. select Save to add the attachment to the claim. Alternatively, you can drag the required receipt files onto the Add Receipt panel.
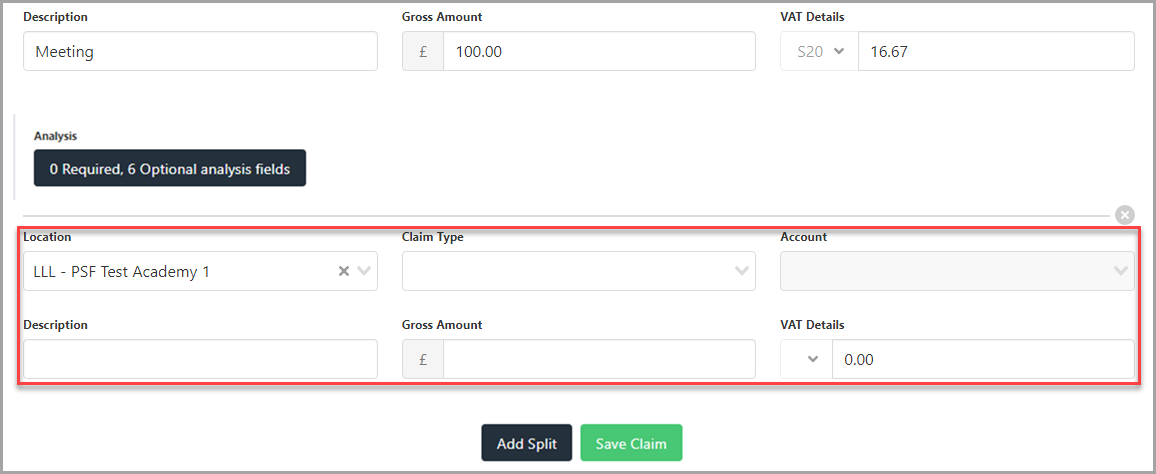
- The Location defaults to the location set for the claim group. To change the location to which the expense line relates, select a location from the drop-down list (this does not affect the location to which the expense is to be posted).
- Select the Claim Type from the drop-down list, e.g. HOTEL - Hotel Claim.
- Select the Account to which the expense needs to be recorded against from the drop-down list.
- Enter a Description to help identify what the claim is for.
- Enter the Gross Amount and VAT Details (do not enter any currency symbols, i.e., £, $, etc.) If you can specify the VAT rate for a claim, select the drop-down arrow in VAT Details, then select a VAT rate from the Please select an item panel.
When you select a VAT rate, the amount of VAT is automatically calculated. If the claim type is set to a default VAT rate, then the rate of VAT and VAT amount are automatically populated.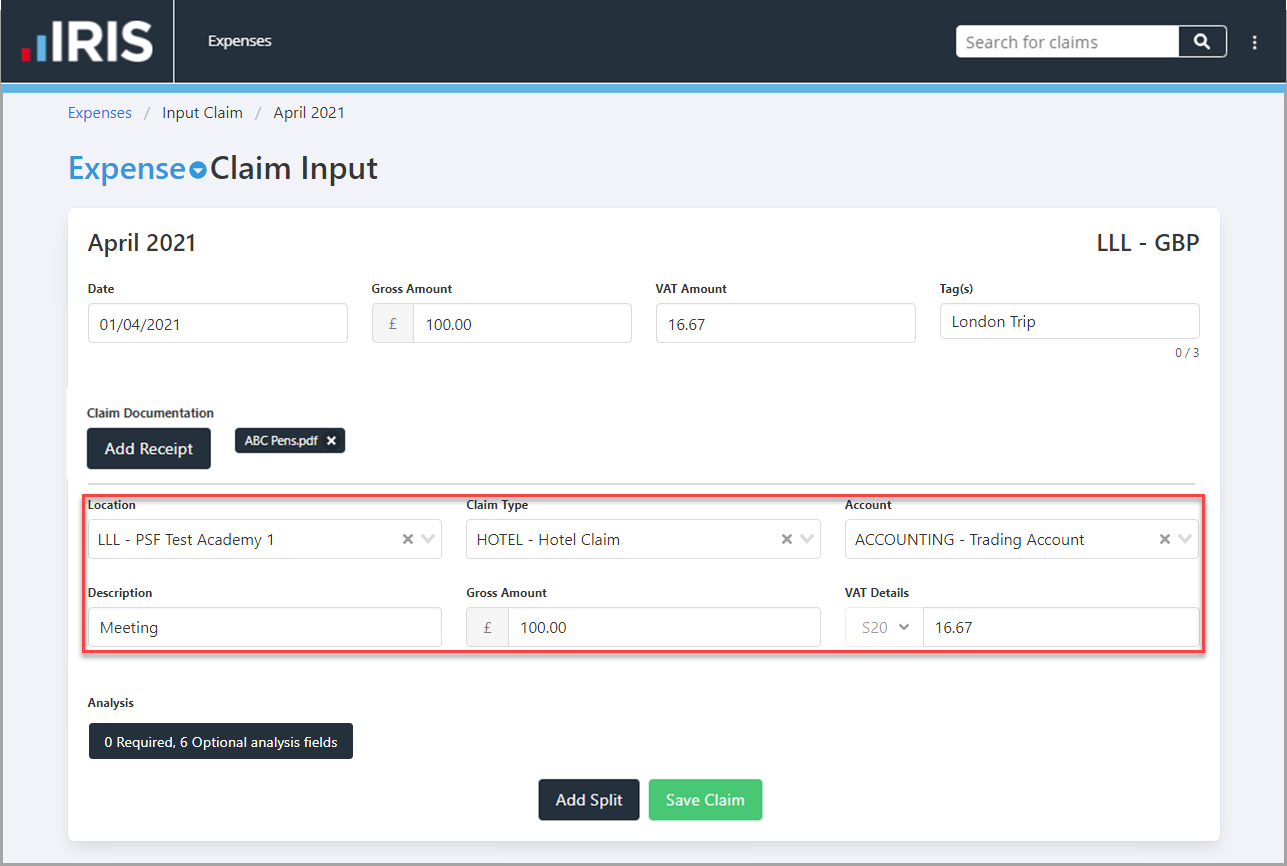
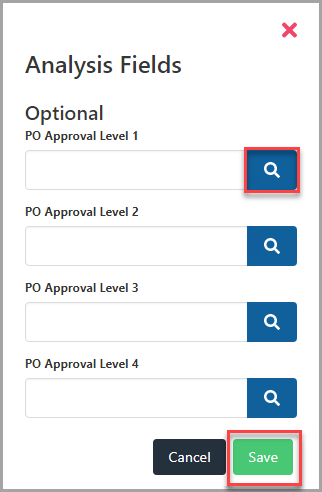
- If the claim requires additional information for analysis purposes, select Analysis.
Analysis is only required if the nominal to which the expense is being posted required Detail Analysis Fields records.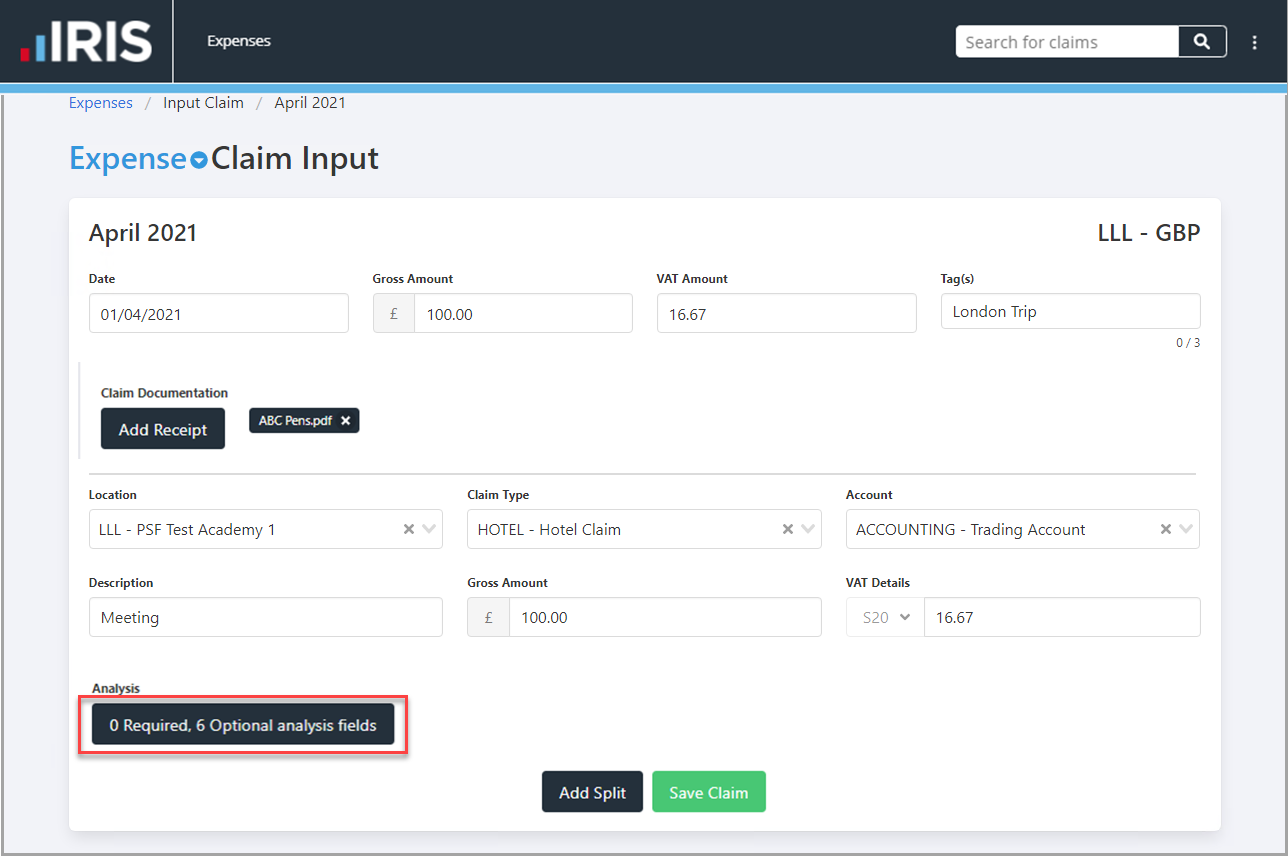
- The Analysis Fields panel is displayed. select Search for the required option, then select an option from the Select an item window. select Save to confirm your selections.
- If your claim relates to more than one expense item, for example a Hotel and Food costs, you can split the claim to enter the details for another claim type. select Add Split to display an additional fields panel in which expense details can be entered.
- Complete the details for the additional expense item.
- When you have entered all the required expense details for the claim, select Save Claim.
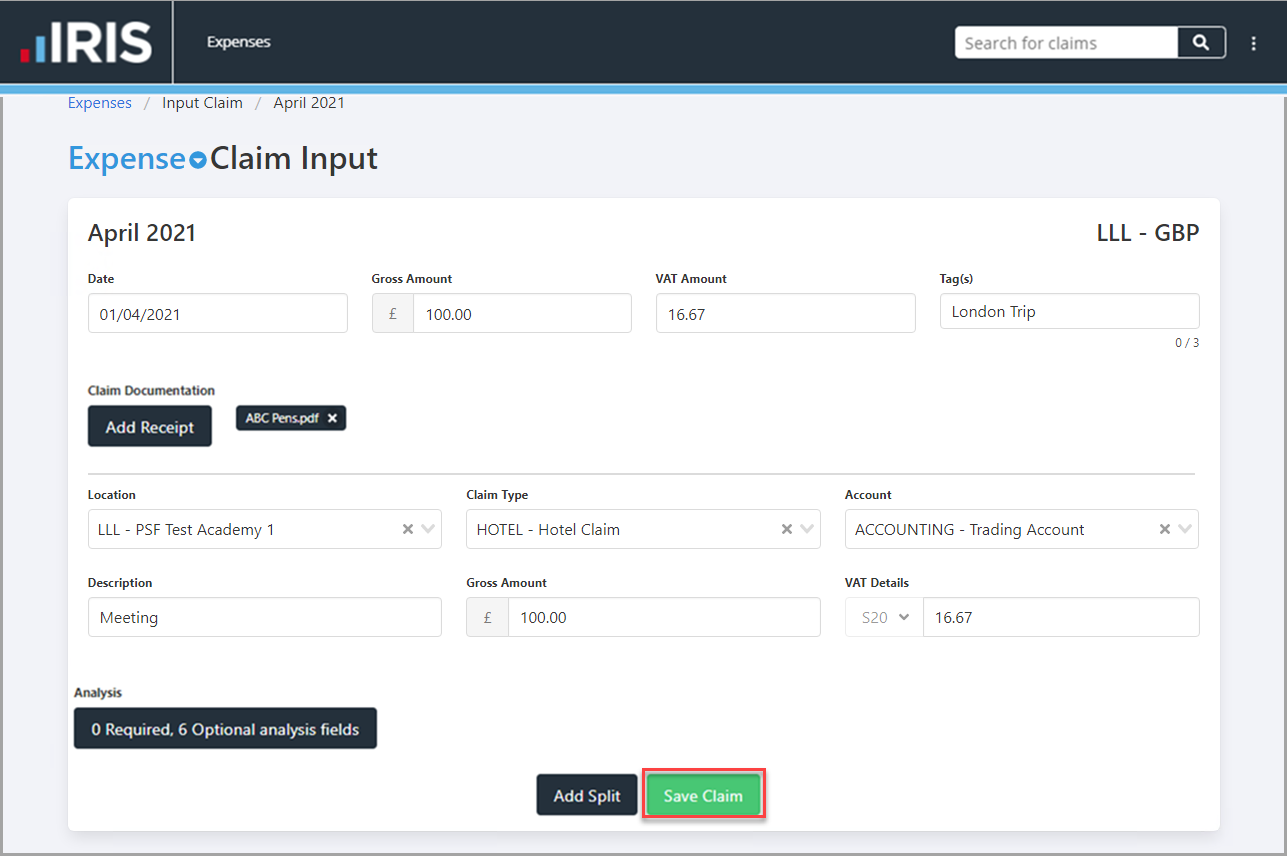
- The Claim Saved message is displayed.

Recording a Claim for Mileage Expenses
- On the Mileage Claim Input page, enter the following details for the claim.
Date - select to select the date of the expense from the calendar or enter the date in DD/MM/YYYY format.
Gross Amount - is automatically populated based on the additional information selected in the claim input form.
Tag(s) - (Optional) enter a word or phrase that can be entered on other claims to group the claims, e.g. London Trip.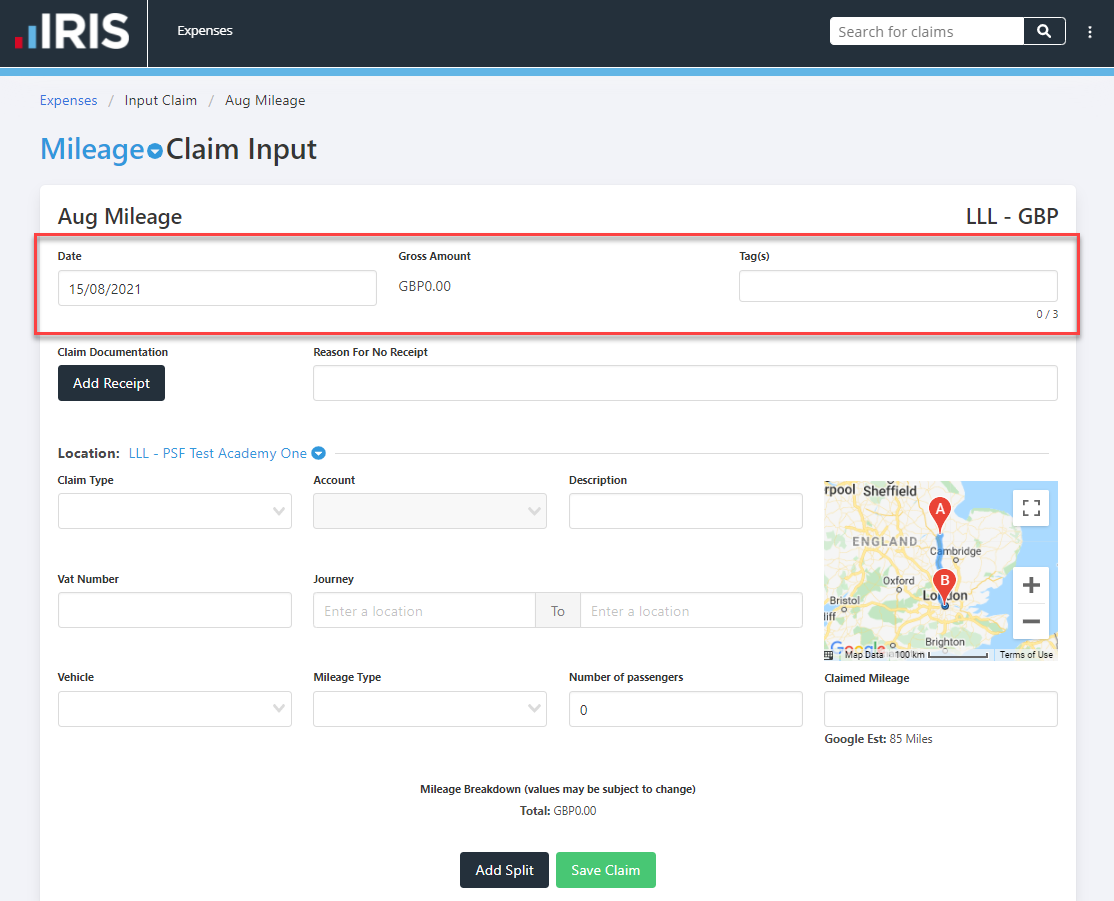
- select Add Receipt to upload an attachment of any receipts relating to the claim.
If IRIS Expenses has been set up to require a receipt, you must upload a receipt or enter a reason you do not have a receipt in Reason For No Receipt before you can save the claim.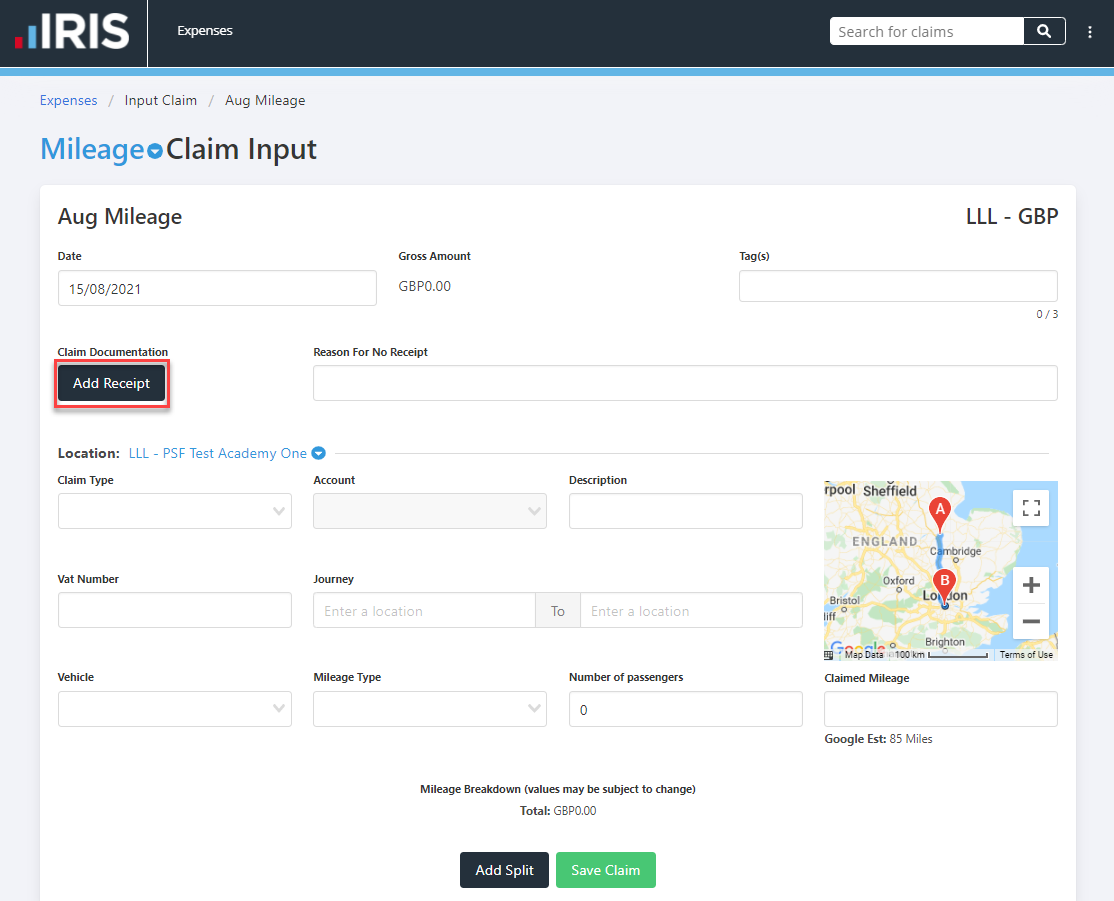
- The Add a Receipt panel is displayed. select Choose files to upload and select the required file(s) to upload. If you have previously uploaded a receipt that relates to the claim being recorded, select the required file(s) from the Vault Entries panel. select Save to add the attachment to the claim. Alternatively, you can drag the required receipt files onto the Add Receipt panel.
- The Location defaults to the location set for the claim group. To change the location to which the expense line relates, select a location from the drop-down list (this does not affect the location to which the expense is to be posted).
- Select the type of claim from the Claim Type drop-down list, e.g. MILEAGE - Mileage Claim.
- Select the Account to which the expense needs to be recorded against from the drop-down list.
- The Gross Amount is automatically calculated.
- Enter a Description to help identify what the claim is for.
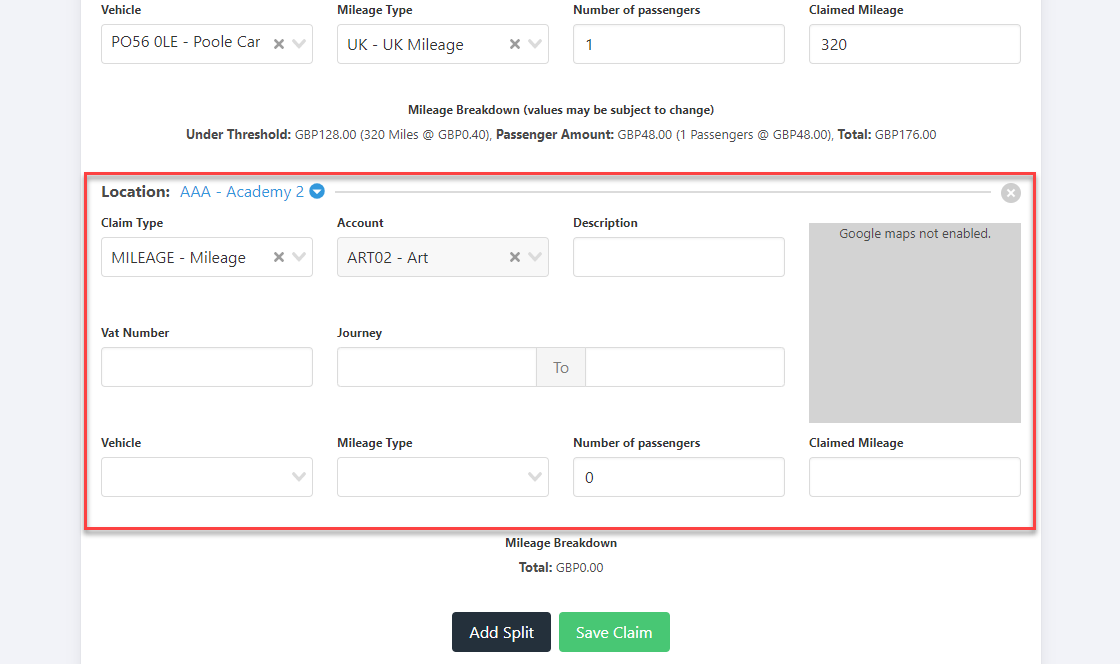
- Enter the from and to destinations or postcodes in Journey From and Journey To.
- Select the Vehicle used from the drop-down list.
- To calculate the correct amount for the mileage claim, select the Mileage Type from the drop-down list, e.g. CAR - Car Mileage rates.
- Enter the Number of passengers, e.g. 1 (If there were no passengers enter 0).
- Enter the total number of miles travelled in Total Distance, e.g. 320.
The details of the calculations for the Gross Amount of the claim are displayed in the Mileage Breakdown.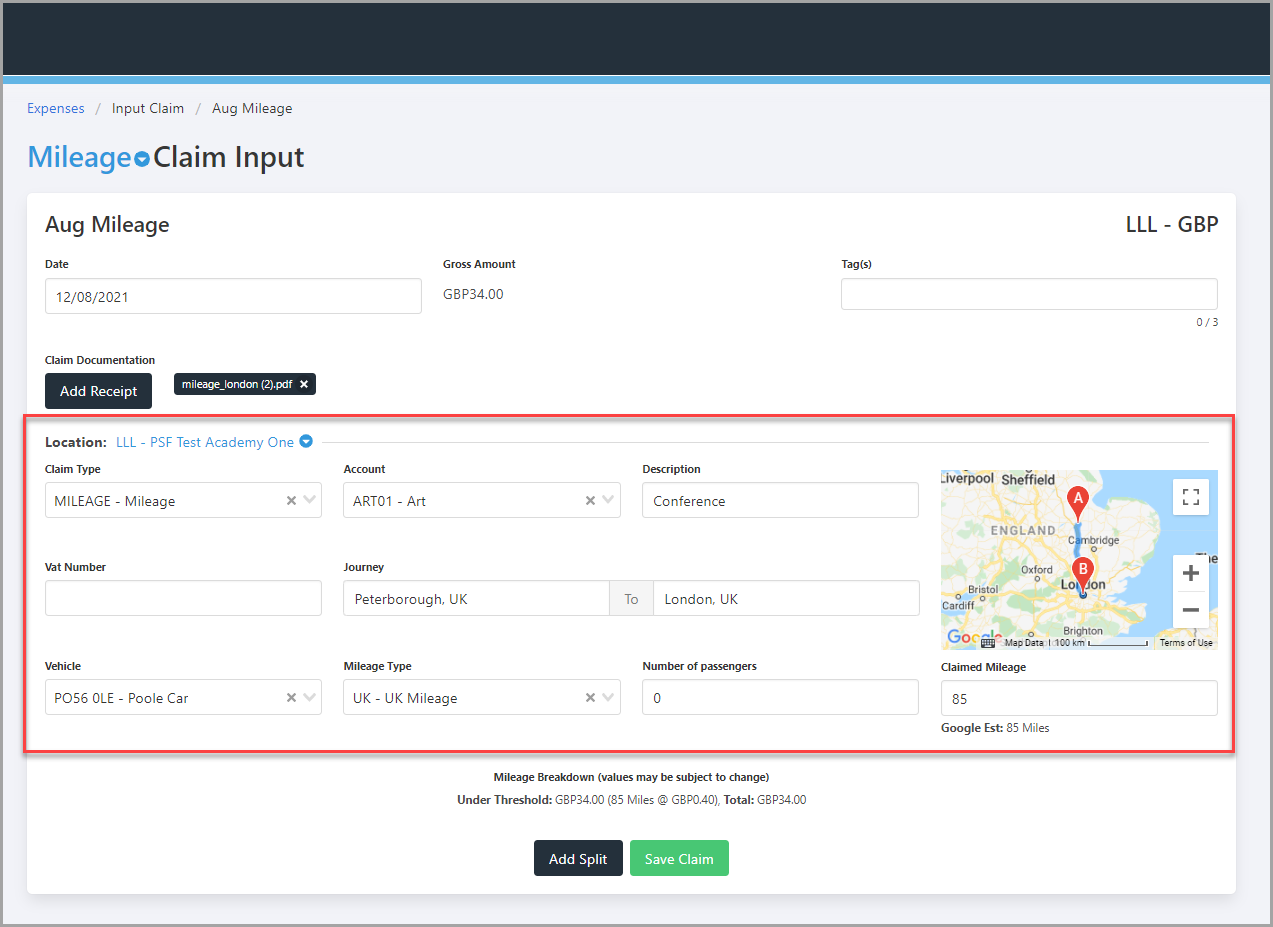
- If your claim relates to more than one expense item, for example another vehicle that was used for which you paid for fuel, you can split the claim to enter the details for another claim type. select Add Split to display an additional fields in which expense details can be entered.
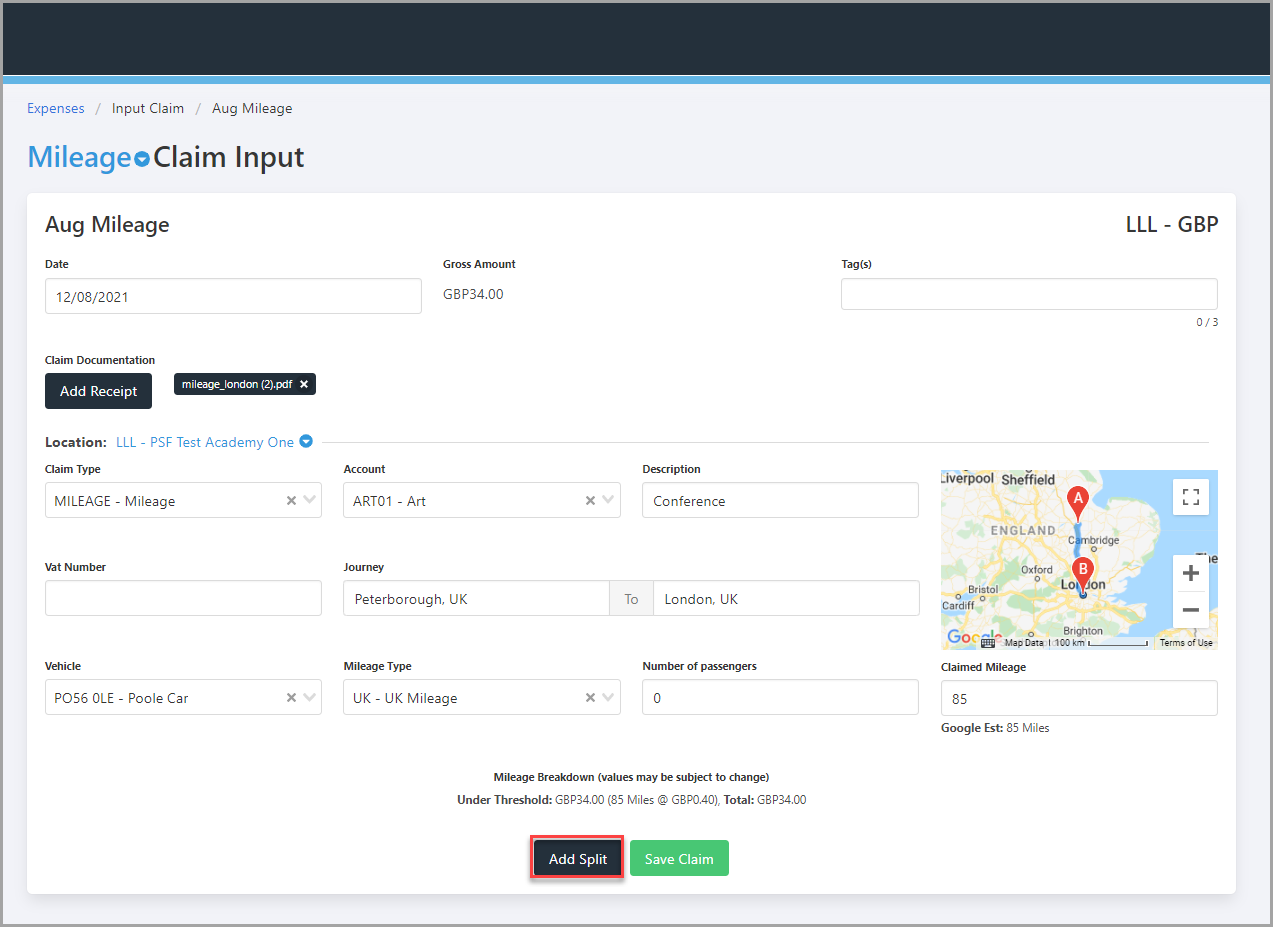
- Complete the details for the additional expense item.
- When you have entered all the required expense details for the claim, select Save Claim.
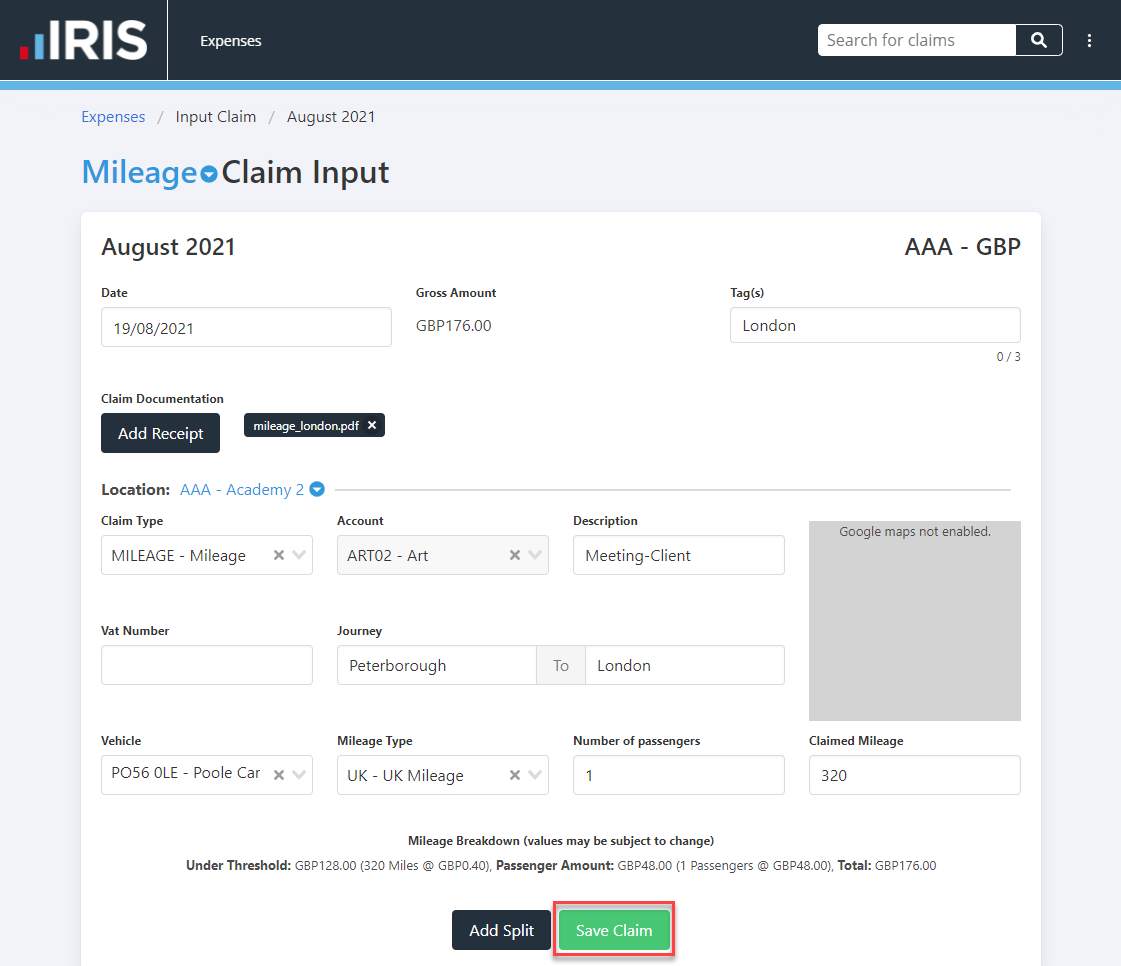
- The Claim Saved message is displayed.
Submitting Expenses Claims
When you have entered all the expenses you want to claim for to a claim group, you need to submit the expenses for approval.
Once you have submitted claims within a group for approval you are unable to add any additional expense claims to the group.
- On the My Claims page, select AWAITING SUBMISSION.

- The Awaiting Submission page is displayed. Select the Claim Group e.g. April 2021 with the claims you want to submit from the Claim Groups Awaiting Submission panel.
- The claims awaiting submission are displayed. If you have additional claims that need to be added to the claim group, select Add New Claim. To submit all the claims in the group, select Submit Claims.
If you want to edit, delete, or view the details a claim before submitting the group of claims, select the required claim to display the Expense Claim page. For more information, please see Amending an Existing Expenses Claim.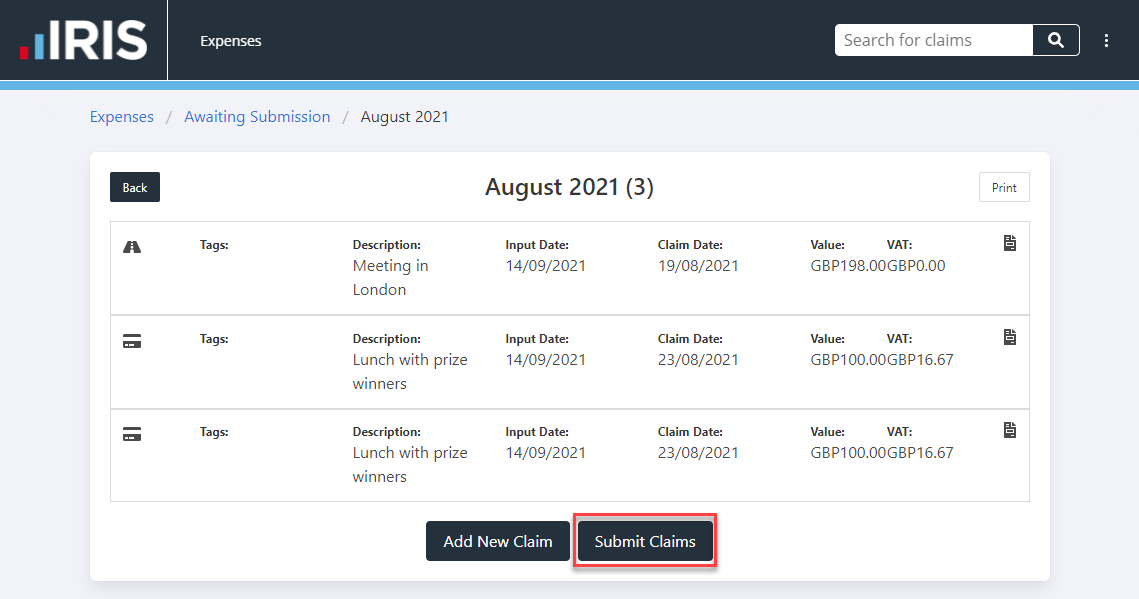
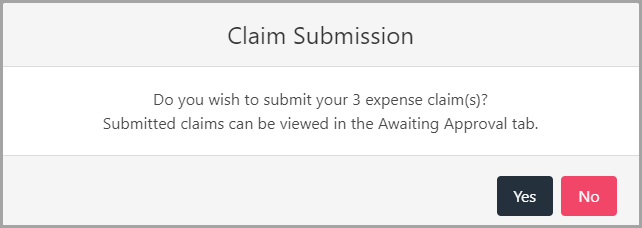
- The Claim Submission window is displayed. select Yes to confirm submission of the claims.
- The Claims Submitted success message is displayed.