My preferences
Set your preferences in Ed:gen to alter how data is viewed. For example, set which module opens first when you log in to Ed:gen and choose the way that student names are displayed.
Also see: Customising Your Dashboard View and Dashboard Profiles in the Control Panel.
To set preferences:
- Select the My Preferences & Settings icon in the top toolbar .
- Work through the tabs available to configure your preferences:
The Ed:gen Preferences screen is displayed:
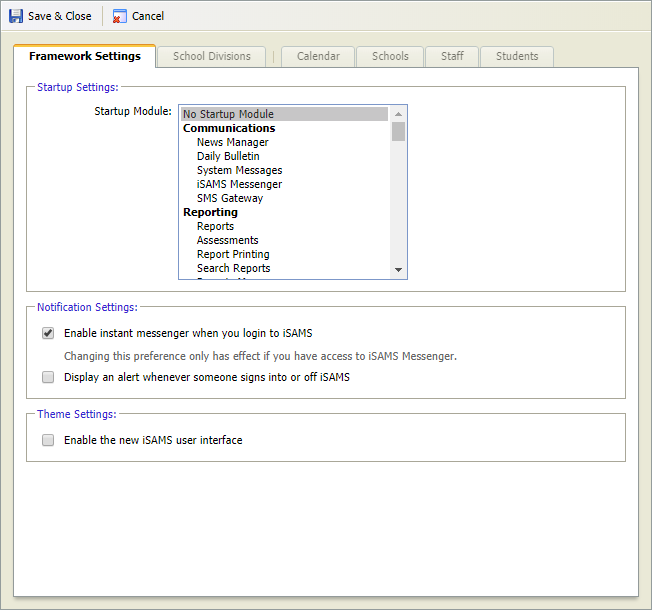
Framework Settings
- Select the Framework Settings tab:
- Select your preferred Startup Module from the drop-down list. You may find it useful to select the module which you use most frequently.
- Select the checkboxes to select your preferred Notification Settings. Use this to block instant Ed:gen messages if you prefer.
- Select Save & Close.
Your desktop is displayed with any changes you have made.
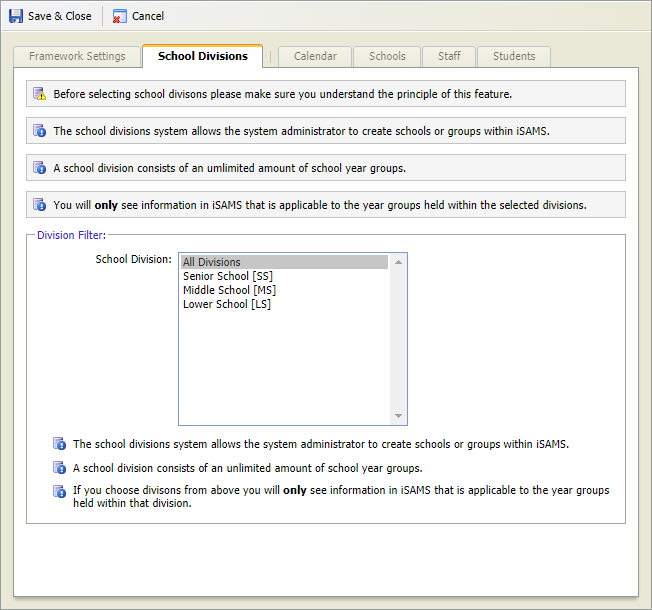
School Divisions
- Select the School Divisions tab:
- Either:
- Select All Divisions.
- Select your selected school division.
- Hold down the Ctrl key and select multiple school divisions.
or
or
- Select Save & Close.
- Select the message to toggle between all school divisions and your filtered school division.
Only your selected school division data will be shown. More than one school division can be selected.
Your desktop is displayed with any changes you have made.
A message is displayed under the top toolbar on your desktop if you have filtered your data by School Division:

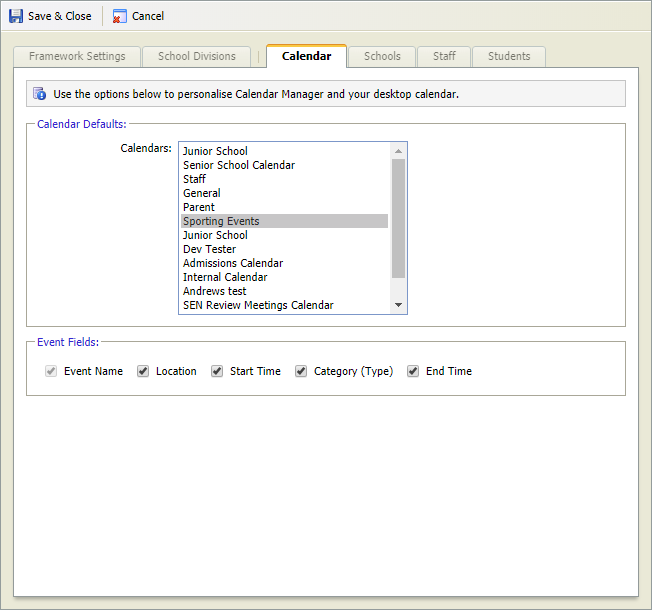
Calendar
- Select the Calendar tab:
- Select which calendar is opened first in School Calendar.
- Either:
- Select your selected calendar in Calendar Defaults.
- Hold down the Ctrl key and select multiple Calendars.
or
- Select the checkboxes to select the Event Fields that you want to display in calendars.
- Select Save & Close.
Your desktop is displayed with any changes you have made.
Schools
- Select the Schools tab:
- Select the checkboxes to select the Applicant Fields that you want to display in the Other Schools module.
- Select the checkboxes to select the Student Fields that you want to display in the Other Schools module.
- Select the checkboxes to select the Alumni Fields that you want to display in the Other Schools module.
- Select Save & Close.
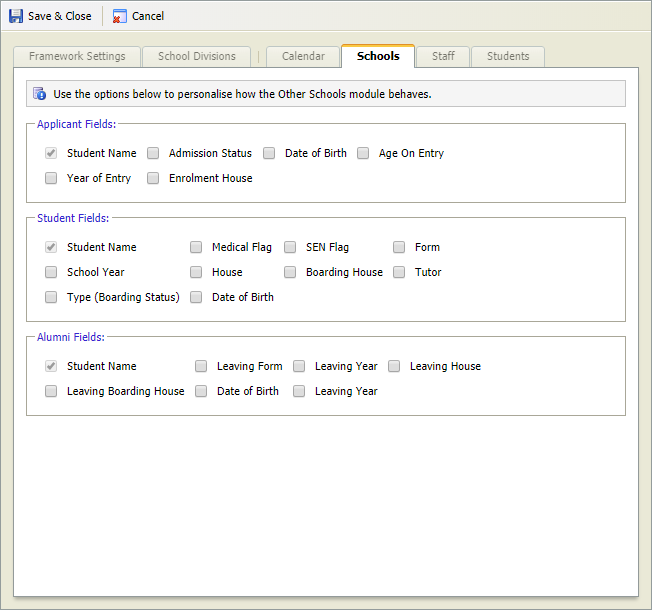
Your desktop is displayed with any changes you have made.
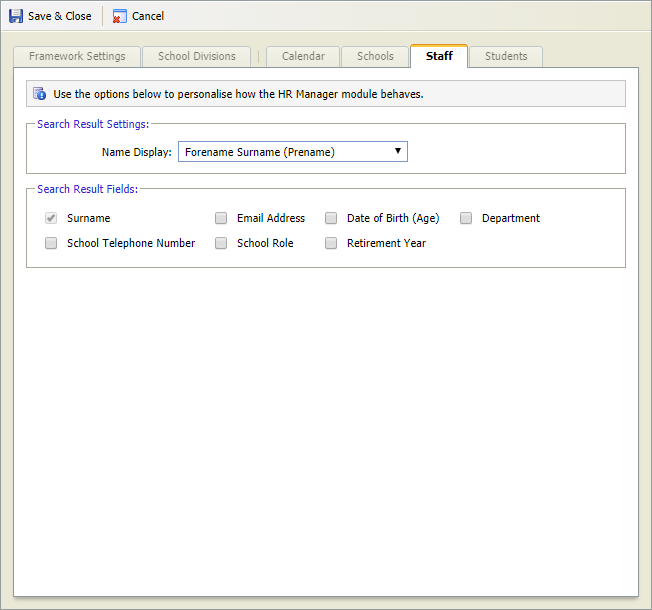
Staff
- Select the Staff tab:
- Select a Name Display from the drop-down list in Search Results Settings.
- Select the checkboxes to select the Search Results Fields that you want to display in the Staff Manager module.
- Select Save & Close.
Your desktop is displayed with any changes you have made.
Students
- Select the Students tab:
- Select your preferred Startup Section from the drop-down list. Choose to display current students, admissions or former students first when you load the pupil manager module.
- In the Search Results Settings section:
- Select your preferred Name Display from the drop-down list.
- Use the checkboxes to select the font style of names on display.
- Select your Default Page Size from the drop-down list. This indicates the number of students shown per page in the Pupil Manager module.
- Use the checkboxes in the Current Fields section to select the current student fields that you want to display in the Pupil Manager module.
- Use the checkboxes in the Admissions Fields section to select the student admissions fields that you want to display in the Pupil Manager module.
- Select Save & Close.
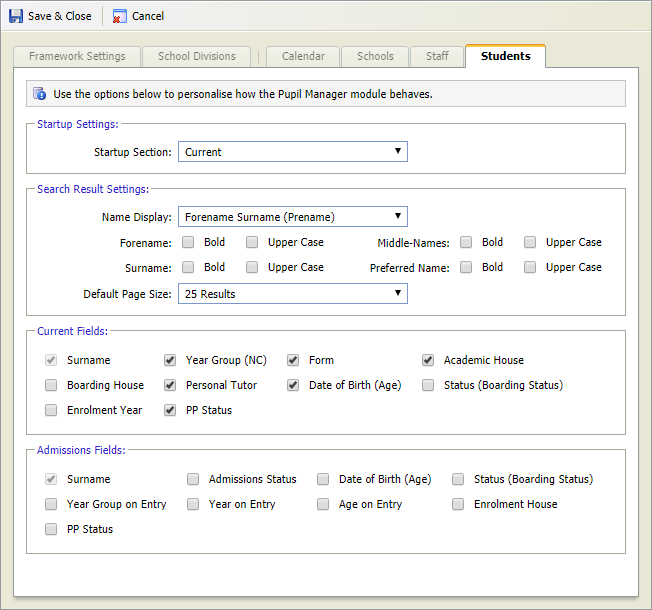
PP Status indicates the Parent Portal status of a student.
Your desktop is displayed with any changes you have made.