How to configure Senta from scratch
Configuring Senta by IRIS is like using building blocks - you have to start from the bottom. To understand how these building blocks work together, go to Configure Senta by IRIS
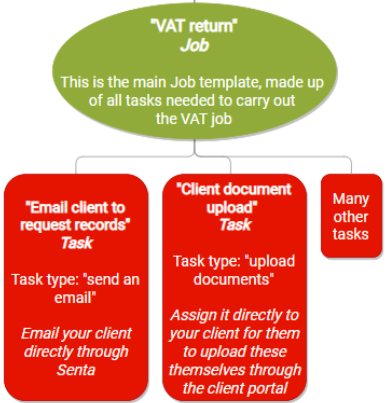
To understand more about services, jobs and tasks, go to Tasks, jobs, and services
Steps for configuration:
Step 1: Create a lookup
The first step is to create the lookup and add the options to choose from.

-
Go to Settings > Lookups and select Add lookup.
-
Give your lookup a description and add the Items you need. To add more options to the drop-down, use Add Item.
-
Select Save to finish.
Step 2: Create a form
The form will capture information from your client and includes the lookup from Step 1.
-
Go to Settings > Form and select Add Form.
-
Complete the details required:
-
Form name
-
Select "Yes" to add this form as a tab to the client record when used.
-
-
To add the lookup from Step 1:
-
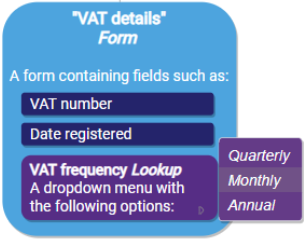
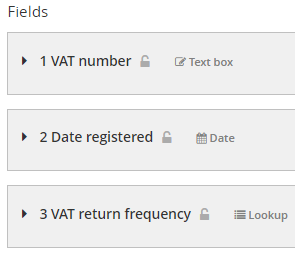
Select Add field and complete the details as needed. For Field type, choose Lookup from the list and choose the lookup you previously created.
-
Add any other fields where you would like to capture data for the client. In the VAT example above, we would add a Number field for VAT Number and a Date field for Date registered.
-
-
When you have finished creating your form, select Save.
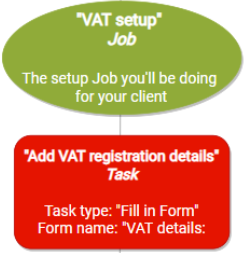
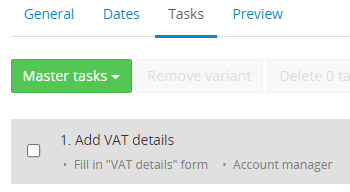
Step 3: Create a set up job template and add a Task
The setup job will include the form from Step 2.
-
Go to Settings > Jobs and select Add job.
-
Complete the details required in the General tab and then go to Tasks.
-
To add the form from Step 2:
-
Select Add task and from the Type of task drop-down, select Fill in a form.
-
Go to the Fill in a form tab and from the Form dropdown, select the form from Step 2.
-
-
Select OK when finished.
-
Save the job to complete.
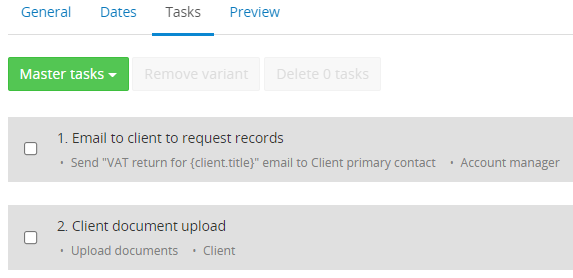
Step 4: Create a job template (to recur) and add tasks
The job template to create now is the job which will recur as part of our service.
-
Go to Settings > Jobs and select Add Job.
-
Complete the details required in the General tab and then go to Tasks.
-
Select Add task and from the Type of task dropdown, select Send email.
-
Edit the email template, and sender and recipient, via the Email tab.
-
Once finished, select OK.
-
-
Select Add task and from the Type of task dropdown, select Upload documents.
-
Select Client from the Assign task to dropdown. This will assign the task to the client in their client portal.
-
Add instructions for the client to see in the client portal, via the Upload documents tab.
-
Once finished, select OK.
-
-
Save the job to complete.
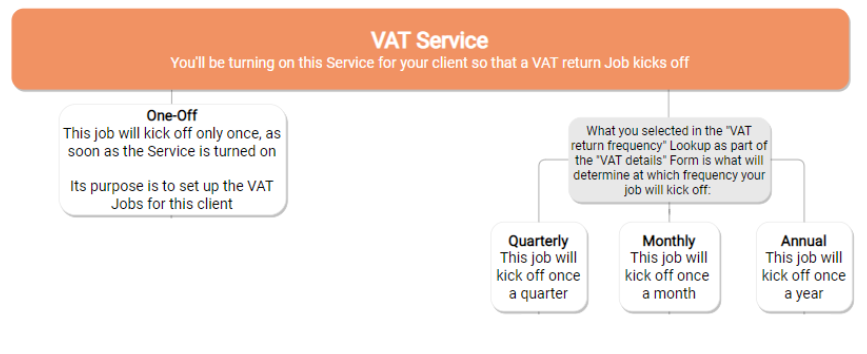
Step 5: Create a service and add jobs.
This service will include the jobs created in Step 3 and 4.
-
Go to Settings > Services and select Add Service.
-
Complete the name, description and choose if this service will start automatically for every client or when you switch on the service on the client record.
-
To add the job from Step 3:
-
Go to the Jobs tab and select Add job.
-
From the Job drop-down, select the job created in Step 3.
-
From the How often dropdown, select One-off.
-
-
To add the job from Step 3:
-
Remain on the Jobs tab and select Add job.
-
From the Job dropdown, select the Job created in Step 4.
-
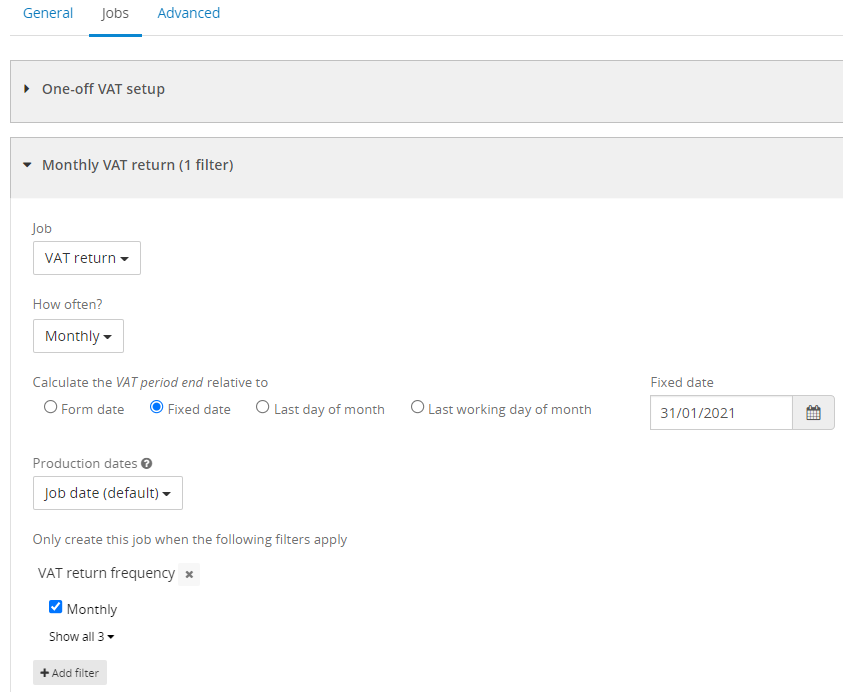
From the How often dropdown, select the required frequency. For example, Monthly.
-
To ensure the Monthly Job kicks off for clients with the Monthly frequency selected, add a filter. Select Add filter and in the field picker, find the frequency field from the form you created in Step 2. Select OK to add the field as a filter and tick the required frequency, for example Monthly.
-
-
When you have finished configuring the service, select Save.