Client portal for practices
The Senta client portal provides an easy and secure way to send documents, receive files, and assign tasks to your clients.
The URL for your clients to access the portal is the same as the one you use to access your Senta workspace, for example yourcompanyname.senta.co
On the dashboard you can view:
Main dashboard
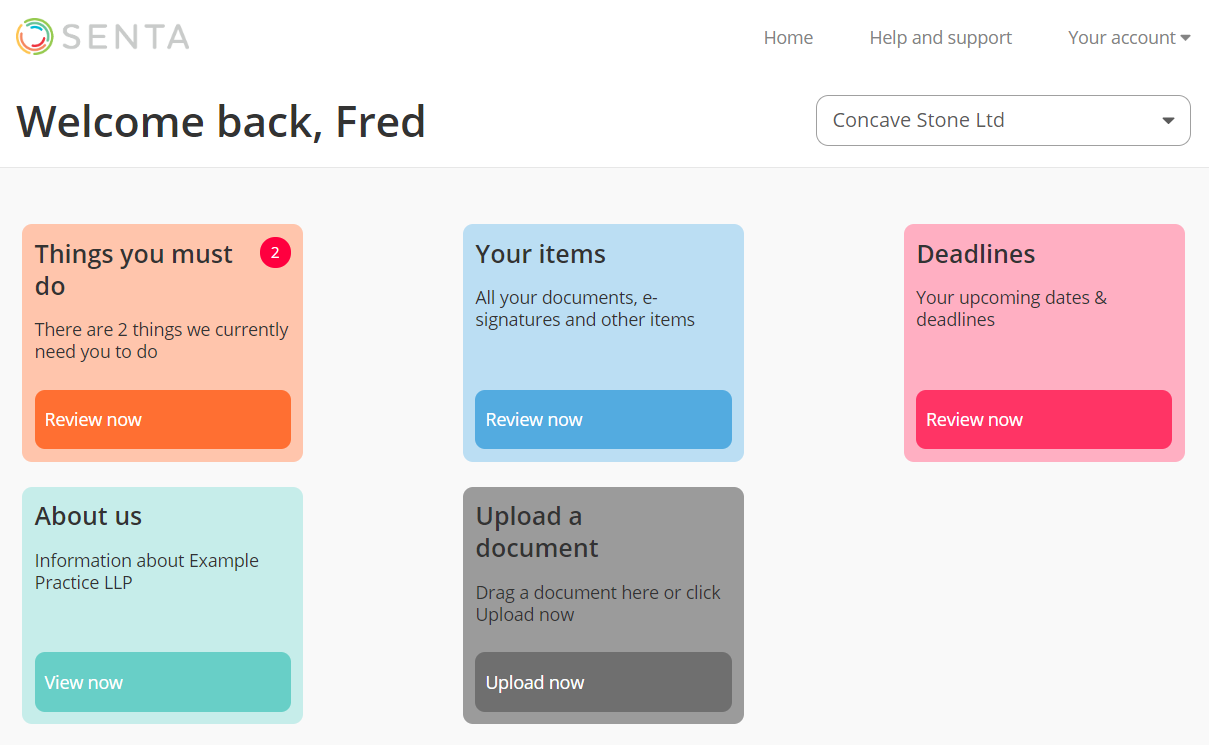
The main dashboard is the very first page that your client will see when they first sign in to the Client portal.
Home
Click the Home button to return to the main dashboard.
Help and support
Browse through the Senta guides and videos.
Your account
Sign out of the Client portal.
Switch profile
If your client has more than one profile in Senta, and these profiles are linked, then they can switch between them using the menu at the top right.
Whenever your client signs in to the portal, they can choose which profile they want to access.
Areas on the dashboard
There are a number of different coloured areas on the main dashboard, which open up new pages where your client can perform various tasks. These are:
-
Things you must do
-
Your items
-
Deadlines
-
About us
-
Upload a document
Things you must do
Notify your client of any tasks, forms or documents that have been uploaded to the Client portal. The number of items waiting to be completed is displayed in red.
You can review the task types that are available to assign to your client.
Click Review now to view the Things you must do page, which will show any outstanding items that require attention.
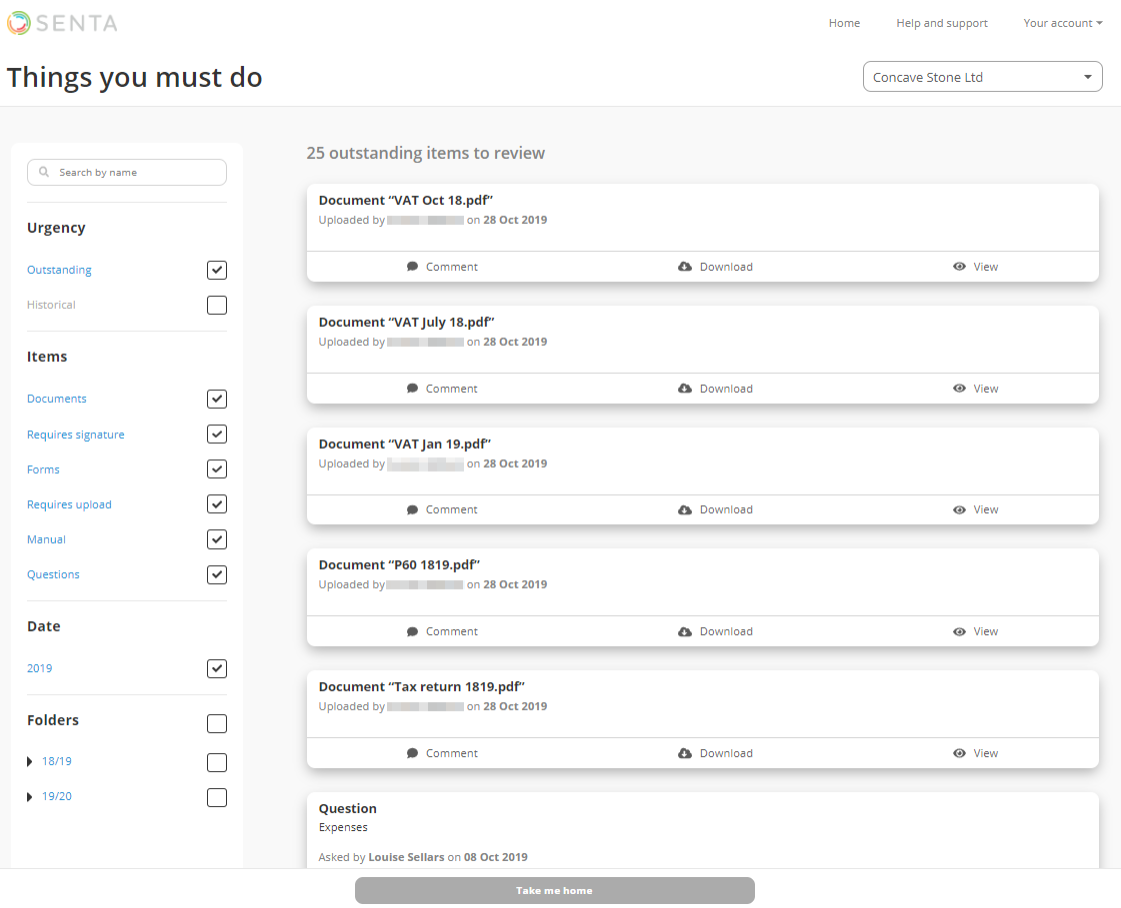
There are several filter options to help you navigate around the page:
-
Search bar
Clients can search for documents by typing in the search bar above the filter options.
-
Urgency
Items that require attention and have not been completed are listed as Outstanding.
-
Items that are complete are listed as Historical.
-
Items
Filter items by item type:
-
Documents
-
Requires signature
-
Forms
-
Requires upload
-
Manual
-
Questions
-
Date
Clients can narrow down the list by date, or by year. -
Folders
Clients can filter to only show items in specific folders that contain documents that are visible to them (two folders deep). For example, if the folders are set out in the Documents tab as 18/19>Payroll>Week 1, any documents contained in "Week 1" will be available to view when the client selects "Payroll" in the portal. Clients can select multiple folders.
Your items
If your client filters historical documents to show anything they have already completed, the Things you must do page will change to Your items page. (It can also be accessed by clicking Your items on the dashboard.) This page is shows outstanding and historical items from any time period, including completed items and items that don't require an action, such as documents that have been uploaded for reference.

Deadlines
Here, your client can view any important dates you have shared with them.
Select Review now to allow them to view any upcoming deadlines. The deadlines are organised by month and year.
To learn how to set up deadlines for your client, please see Setting up deadlines.
About us
Here, you share details about your practice with your client.
Select View now toopen up a window where your client will be able to view information such as practice address, telephone number, and any other information you want them to see.
To add information to the About us section, go to Settings > Practice details > General tab and add your message to Welcome message for Client users.
Upload a document
The Upload a document area is where your client can upload documents. Once a document has been uploaded, it isalways available to view and re-download in the Your items area.
To upload a document your client can:
-
Select Upload now.
-
Drag and drop them from the desktop to the Client portal
-
Click Select file and choose the file
Once a client uploads a document, they will not be able to delete it. You can delete any client documents, apart from electronically signed documents, by going to the Documents tab on the client page in your site.
Document signing
When you upload a document for your client to sign, the document appears in Your items, in the Outstanding items to review section.
Your client can elect Sign to preview the document, sign or reject, and download the document.