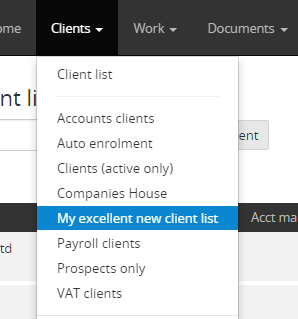
Client list
The client list shows your clients. Use the search bar to find a client, sort, filter, and create your own client lists (some default lists are provided on the Clients menu).
By default, your clients are listed alphabetically. Use the arrows on the columns to reorder the list, or filter on the columns using the funnel. The arrows and funnel will be highlighted green if they are in use making it easy for you to see where sorting and filtering is applied.
You can:
Edit columns
-
On the Client list, select Custom view.
-
Select Edit columns.
-
To move a column, select the vertical ellipsis (three dots) and drag the column to where you want it to go.
-
To delete a column, select the cross.
-
To create a new column, selectAdd new column. In the column picker, expand the forms to view the fields or use the search bar. Select one or more columns and then select OK to add them to the client list.
-
To edit individual column settings, click the cogat the top of the column. You can change the name, display settings, footer details and choose how to show contacts.
-
Display: Column is the default; Hidden will hide the column once you select Done but any sorting and filtering applied will still be used; and Underneath will display the column data underneath the other data in the row.
-
Footer: None is the default; Count will return the number of rows with a value; and Average and Total can only be used for columns with numerical values such as Number, Money and Percent field types.
-
Show contacts: This option will only be available for columns added from Contact details such as first name, email address etc. Choose whether to display only the primary contact (default) or to show all contacts. If you choose All, each contact will display as a new row. For example, if Concave Stone Ltd has three contacts, there will be three rows for Concave Stone Ltd in your Client list.
-
-
-
SelectDone then Save changes. This will save the default Client list. To create a new custom view, see Save a client view below.
Advanced columns
As well as adding columns to any client list to show client information and job data, there are a number of advanced column options which can help you organise your clients.
Scroll down to the bottom of the column picker and select Advanced to expand the section. The advanced column options are:
Flagged / Starre
Flags and stars allow you to highlight specific clients. Each option adds a column to your client list allowing you to flag and star client records.
-
Flags are seen by everyone in your practice
-
Stars are visible only to you
Once flags or stars are applied, you can use the funnel to filter by Flagged, Unflagged, Starred and Unstarred.
Services
The services column will display all the services that are currently running for any client.
You can filter the list by selecting one or multiple services. If you select multiple services, for example Bookkeeping and Payroll, only clients who have both services will display. If Client A has Bookkeeping but no Payroll, and Client B vice versa, neither of these clients will display on the client list.
Created
The created column will display the date that the client record was created. This column can be sorted in date order, and filtered to a specific date or date ranges.
Job status
The job status column shows the status of the next job that needs to be completed for the client. The status of any job is dictated by the status of the tasks within it. For more information, see our guide to task statuses.
If the client has any overdue jobs, the job status column will display as overdue. This column can be filtered down to show a specific job status.
Imported
The imported column will display whether a client was imported from a spreadsheet (Yes), or added in manually (No).
Activated users
The activated users column will display the number of contacts per client record who have been activated on the client portal. Activation refers to being activated via the Contacts tab, rather than the client setting up their password and accessing the client portal.
Save a client view
When you make changes to your client list, you can save the changes to the default view or save them as a new client list view. This will create a custom client list that you can view again later.
-
Make any changes to the default client list but don't save yet.
-
Select the arrow next to Save changes and then select Save view as.
-
Enter a name for the new client list. This is saved to your Clients menu.
Custom views can only be viewed by you. If you have Administrator permissions, you can change the visibility of client lists via Custom view > Change visibility.
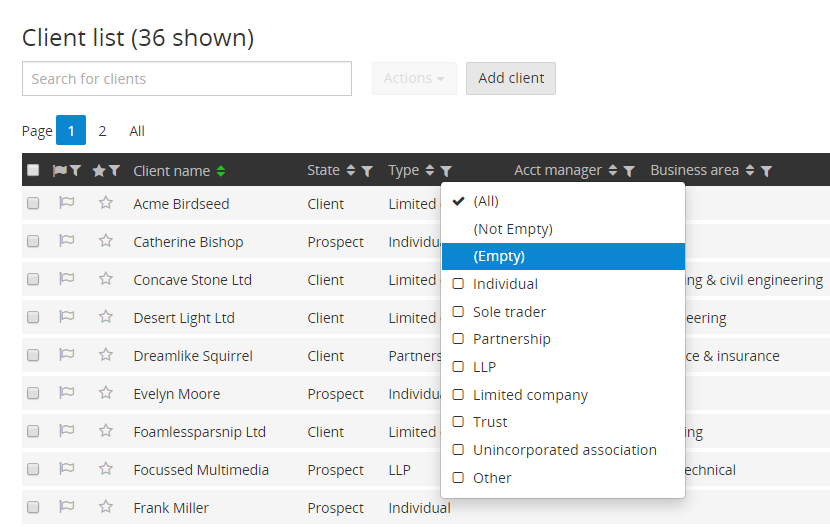
Filter the client list to show empty fields
You can filter the columns to show empty fields, which is useful when you need to quickly display all clients with missing information, such as a missing UTR or VAT number for example.
-
Go to Clients > Client list and find the column you want to filter.
-
Select the funnel and select (Empty).
-
All records are displayed where the client type hasn't been selected.
-
To export the file, select the records that you want to export and click Actions > Export.
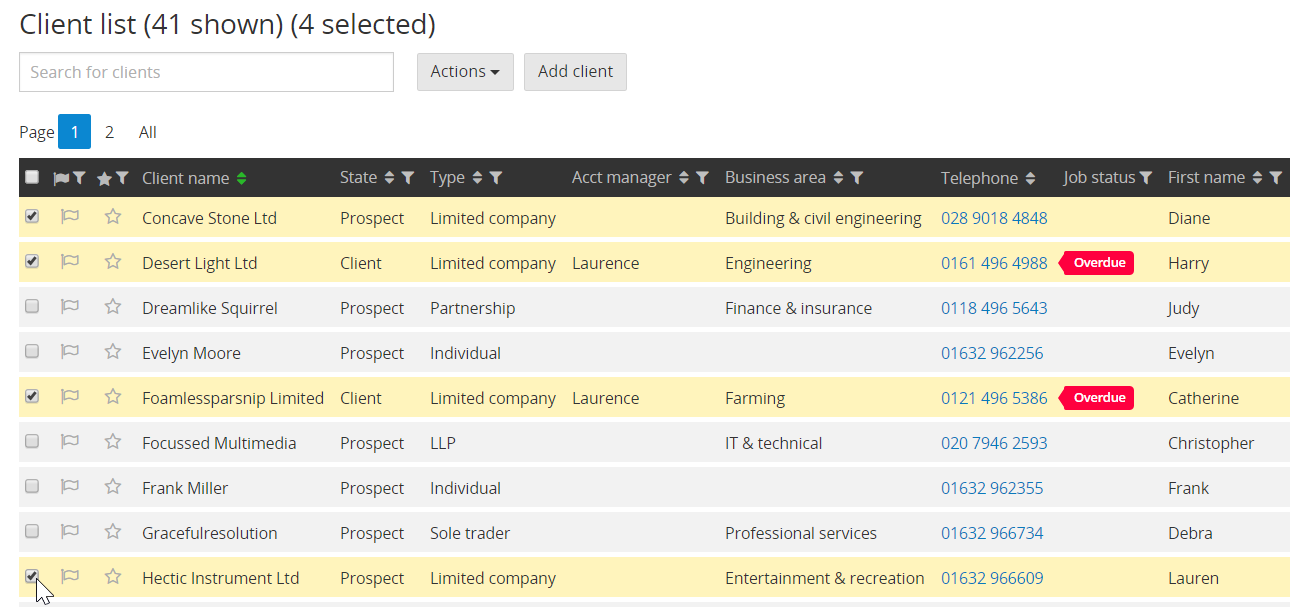
Bulk actions
To access the Actions menu, select at least one client from the client list. From Actions you can perform the following actions in bulk:
Send email
Send one-off emails to one or multiple contacts from the Client list.
Before sending emails from Senta, ensure that your email integration has been set up. This will ensure that the emails are sent from your email address rather than noreply@senta.co
-
Select your client(s) and go to Actions > Send email.
-
Choose whether to email the primary contacts only or to CC in all other contacts from that client record.
-
The default sender will be your email address however you can select another user's email address under From.
-
Update the Subject and Message. It is possible to use placeholders in both areas such as {to.firstname} to pull through the first name of the recipient.
-
Use the Message toolbar to format any text as required. The toolbar also includes options for adding in hyperlinks and attachments.
-
Once you are happy with your email, select Send emails. Senta will confirm the number of bulk emails to send for you to confirm by selecting Yes, send them.
-
If the Practice outbox is switched on, these emails will be queued in the outbox ready for you to send. If the Practice outbox is switched off, these will be sent immediately.
Update field
You can update any field, including contact information, in bulk from the client list, making it really easy to change groups of clients from Prospects to Clients, update an address for all contacts if a business relocates, or any other mass change you might need to apply to your clients and contacts.
-
Select your client(s) and go to Actions > Update field.
-
In the field picker, select the field you would like to update and select OK.
-
You will be presented with a dialogue box asking you what you want to set as the new value. Select the desired value, then Confirm.
-
Senta will confirm the number of clients to be updated and ask you to confirm by selecting Yes, update them.
-
Once you have confirmed, Senta will go through and update each one. A progress bar will be displayed at the top.
The Update field feature allows you to update to one new value at a time. For example, if you need to update some clients to Client and some clients to Former client, you will need to follow the process twice.
Start ad hoc job
Sometimes you might want to kick off an ad hoc job for multiple clients at once, as a one-off. There is a quick and easy way to do this using the Actions menu in the client list.
Please note: This will only kick off ad hoc jobs for your clients. If you want to turn on services for many clients at once, please see the following guide: adding services in bulk.
-
Select your client(s) and go to Actions > Start ad hoc job.
-
Select the job and job date from the drop-down menus, then select Start job.
To find out more about ad hoc jobs, see our guide.
Export
You can export information from the client list to a .csv file. This is useful when you're creating external records and audits.
Exporting client data is only available to admin users.
-
On the Client list select the clients you want to include in the export.
-
ClickActions and then Export.
-
Select whether you want to export the visible columns or all of the data available for the client.
-
A CSV file is download to the default location.
Exporting all data exports all of the client data AND the primary contact data. It does not include any additional contacts by default.
If you want to export additional contact data, add a contact field as a column and change the settings to show all contacts. See Contacts for more information.
Delete
Clients can be deleted in bulk from the client list. The client records, including the related jobs, tasks and documents will be deleted.
Please note: Exporting client data is only available to admin users.
-
Select your client(s) and go to Actions > Delete.
-
Senta will confirm the number of clients to be deleted and ask you to confirm by selecting Yes delete clients.