Create an invoice
If you have signed up for IRIS Pay, you can request a payment from your customer and we'll create an invoice for you. Find out more about IRIS Pay.
Any previously create quotes can be converted to invoices. If not, create a new invoice.
Make sure that you have set up your invoices before proceeding.
-
Go to Invoices (take me there in the app) and select Create.
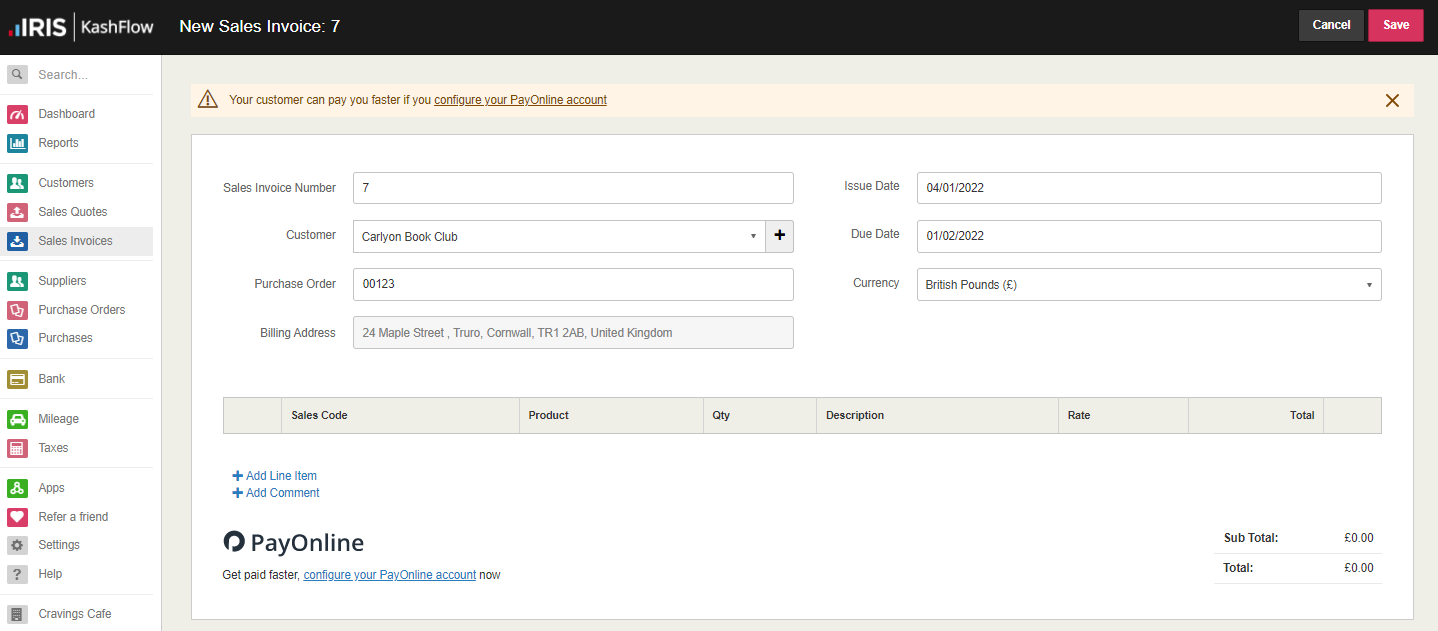
- The Sales Invoice Number is automatically generated based on your last highest numbered invoice. You can enter a different number, but it must be unique.
- Select a Customer from the list or select +to add a new customer.
- If the customer has sent you a purchase order, enter the reference in Purchase Order.
- The Billing Address and Delivery Address are populated from the selected customer but can be changed.
-
The Issue Date is the date the invoice was raised. It defaults to today's date, but can be changed
-
The Due Date is the date that the payment is due based on your default payment terms, but can be changed.
- The Currency defaults to your chosen currency but can be changed if you are invoicing this customer in a different currency.
Add invoice lines
Once the main invoice details have been entered, you can now add the invoice items.
-
Select Add Line Item.

-
Select the Sales Code from the list to set the nominal code (this is mandatory if you use stock linking).
Sales codes can be configured to meet your chart of account needs. You can also create products and attach them to sales codes. You can then select a product and the Description and Price are automatically populated.
-
If you have set up Products, select one from the list or select + to add a new code and product name. You can also leave this field blank.
-
Enter the Qty then add a Description if needed.
-
If you use projects, select which Project to link the invoice to from the list. This helps you track project income and expenditure.
-
Enter the cost per item without VAT in Rate (known as the net value). The Total is automatically calculated based on the Qty and Rate.
If you are VAT registered, select the VAT Rate charged from the list. The VAT amount is calculated based on the Rate and VAT Rate, but can be changed. The Total is the sum of Rate and VAT for the line item. -
Select Disallowed if this amount represents an expense or partial expense that cannot be claimed for tax purposes. Selecting this option will ensure the values feed the SA103 report correctly, where required.
-
Depending on your discount settings, you can apply a manual discount by selecting Apply *% discount. If automatic discounts have been chosen, these are applied when the product code is selected.
-
Select Add Comment to add a comment relating to the line item.
-
If configured, you can add a PayOnline button to the invoice so that your customers can click the button and pay straight away.
-
Repeat these steps to add any further items.
You can drag and drop line items to re-order them.
-
Select Save.
Next steps: