|
 |
|
|
This topic explains how to backup an IRIS SQL database using the tools provided with SQL Server Express (commonly referred to as SQL Express). These steps are applicable for SQL 2008, SQL 2012, SQL 2014 & SQL 2016.
It covers making a manual backup to the \iris\data\sqlbak directory. This then allows the user to make a copy of the DATA folder ensuring all the user defined data in IRIS is backed up.
Please read all the information in this topic before starting the backup, including the Q&A at the end.
Click Start | Programs | Microsoft SQL Server and then click Microsoft SQL Server Management Studio
For some versions of Windows Vista, Windows 7 and Server 2012, you may need to right-click on the SQL Server Management Studio and select Run As Administrator.
The connect box displays. Under normal circumstances, the user will be able to click Connect without changing anything here.
If the IRIS database has been created
in an ‘instance’ other than machinename\IRISPRACTICE
(the default), that instance will have to be selected at this point.
The servername required
displays along with the programs location and the IRIS data folder. In
the example below, the programs are in c:\iris
and the servername needed to connect to displays along with the database
name.
Once connected, the Microsoft SQL Server Management Studio screen displays.
Click the + next to Databases to expand and show the databases available.
Right-click on the appropriate database (normally iris) and click Tasks | Backup
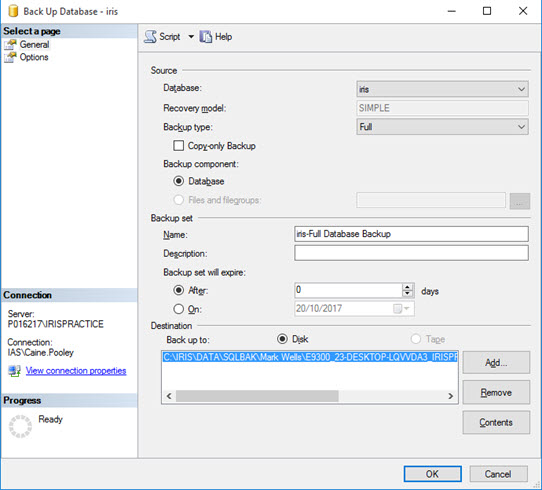
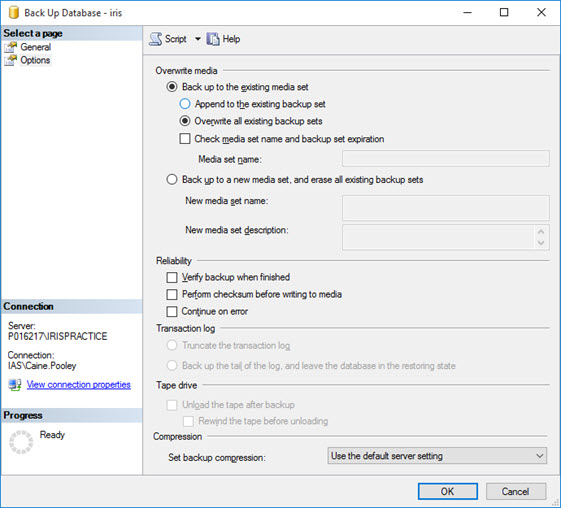
The Back Up Database – iris screen displays.
Highlight the path listed in the Destination box and click Remove.
Click Add.
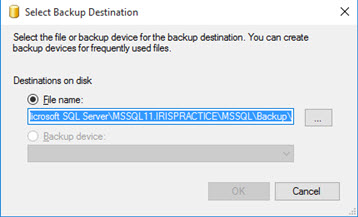
The Select Backup Destination screen displays.
Click  to the right of the File name field to display the Locate Database Files window.
The following screen displays.
Select the folder where the backup will be saved. Enter a filename and click OK.
As per the information at the beginning of this topic, IRIS recommends backing up the SQL database into the IRIS DATA folder, then using the normal backup regime to backup the DATA folder; ensuring a complete backup of all IRIS data.
Navigate to the IRIS programs folder, then into Data, then into the SQLBAK directory. In the file name: field, enter iris.bak.
Click OK.
On the left-hand side of the screen, click Options.
Select Overwrite all existing backup sets and click OK.
Click OK to instigate the backup.
A confirmation window will display once the backup has completed successfully: