 |
 |
|
|
This topic explains how to create and upload an e-checklist.
It explains how the e-checklist feature works from the client’s perspective and how the import process works.
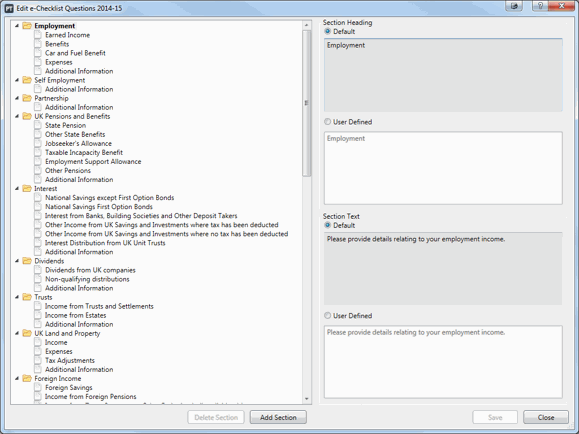
Before the e-checklist is created, you can tailor them by entering additional questions. All of the default questions will be based on the current entries the client already has from the previous tax year.
Editing the questions before creating the e-checklist affects every client. If only certain e-Checklists are to be tailored, carry this process out once it has been created (do not tick Upload immediately in this case).
Click the links below to jump to a particular section:
The following screen displays:
The following screen displays.
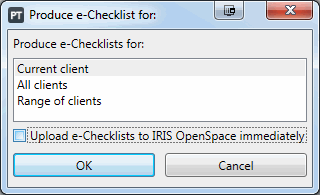
The e-Checklist can be created for one client, all clients or a range of clients using data mining. There is also the option to upload all e-Checklists immediately to OpenSpace at this point.
If uploading immediately it is strongly advised that prior to this all clients are checked to ensure their personal details including the email addresses are entered and appearing correctly in their client maintenance screen.
Not uploading immediately, once it has been created, gives the user the opportunity to review the e-checklist first and if required, amendments can be made.
Select Current Client and click OK. The e-Checklist will be created in the background.
The following screen displays.
This screen is used to filter all of the e-checklists created. They can be filtered by the different partners and managers and by using the status options on the right-hand side. The year can also be changed on the left-hand side.
The earliest year will be 2014, it is not possible to create an e-checklist for years prior.
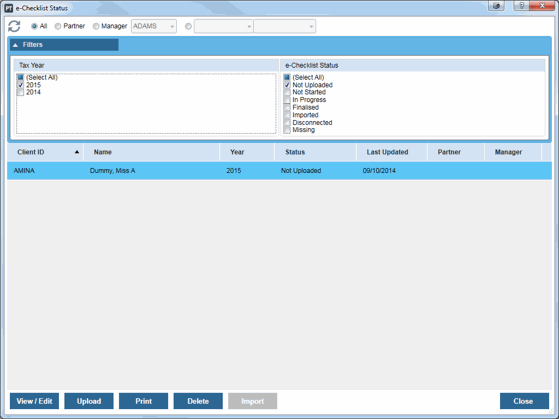
If a e-Checklist needs deleting, it should be deleted from this window. An uploaded e-Checklist should also be deleted from this screen rather than from OpenSpace directly.
The following screen displays, processing the upload.
Once complete click OK.
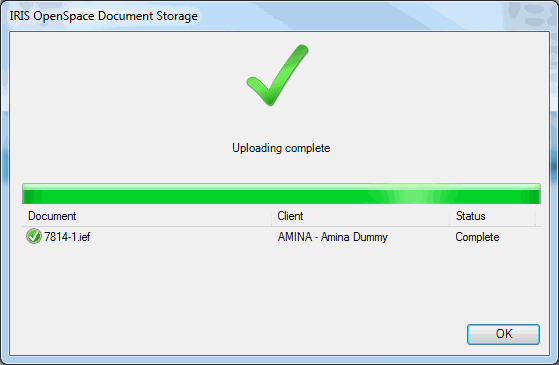
The e-Checklist has now been uploaded to the client’s account. The client
will receive a notification email informing them that an e-Checklist has
been uploaded to their OpenSpace account.
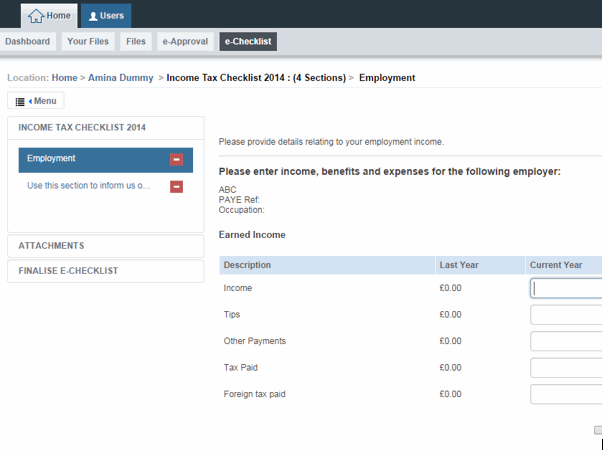
The client will need to log in to their OpenSpace account to access their e-Checklist. When they click into the e-Checklist they will see the screen below. It will always show the previous year’s details and income.
The client will need to complete the Current
Year fields for each section. They are able to save as they go
along so that they can complete it at another time if they wish to do
so. Once the e-Checklist has been completed in full, they need to click
Finalise e-Checklist on the left-hand
side of the screen.
When the client finalises the e-Checklist, the following screen displays.
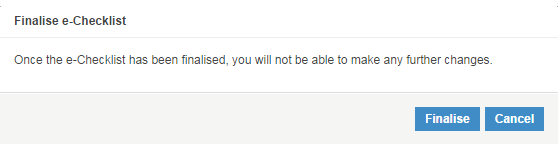
Once finalised, if the client realises they have made a mistake or forgot to make an entry, they will not be able to make any changes. It becomes a read-only document. The only person who will be able to make these changes is the accountant.
The reason for this is because once the e-Checklist has been finalised, it is automatically transferred back into Personal Tax, where it can be imported directly into the corresponding folders in the data entry, saving users from having to re-key in the figures again. The software is able to work out where the figures belong because previous tax data exists.
This is the key reason why the e-Checklist cannot be created for a new client in Personal Tax with no previous tax data.
The e-Checklist will now show a status of Finalised.
The following screen displays.
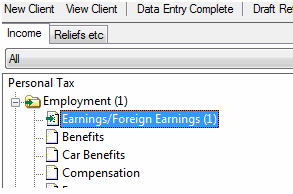
Each section will appear on the left-hand
side displaying whether the questions were answered and also whether they
have been reviewed and imported. On the right-hand side, each section
will have a tick box to Import.
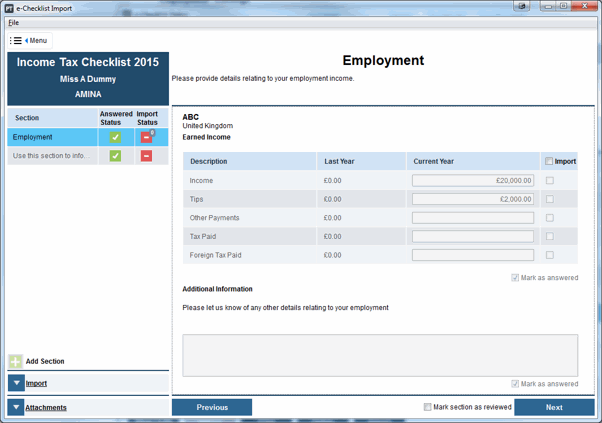
The Import status will turn green and display a tick once that section has been reviewed (there is a box at the bottom of the window Mark section as reviewed).
Select the tick box to Import the section. Repeat the steps as you review each section of the e-Checklist.
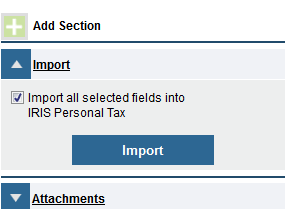
Select the arrow beside Import in the bottom left-hand corner of the window.
The following prompt displays.
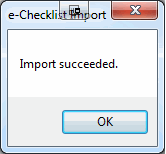
The following dialog displays.
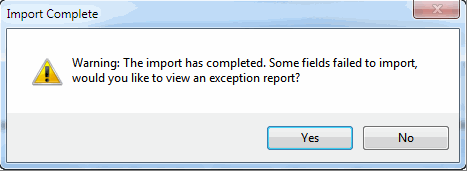
In some cases, the following may display.
The green arrow indicates that data has been imported:
Jointly Held entries - clients must enter the full amount. The full amount is imported and IRIS will continue to split the amounts.
Data can be re-imported - it will not duplicate entries. However, there is no connection between the e-Checklist and Dividends, so if a dividend is imported twice in error, it will duplicate the entry.
There are three sections that cannot be imported from the e-Checklists which are:
Partnerships
Sole Trades
Allowances