 |
 |
|
|
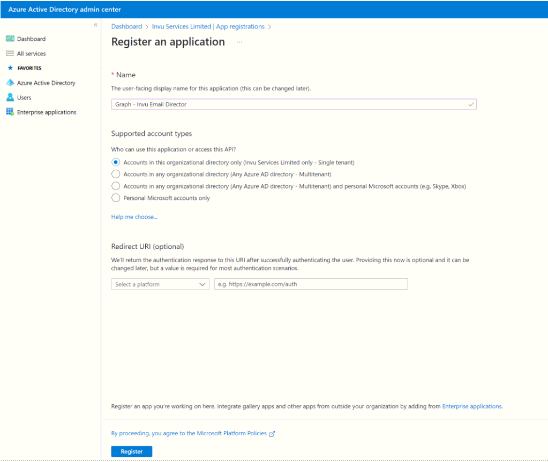
Log in to the Azure Portal for your tenancy.
View the Azure Active Directory.
Select App registrations.
Create a new registration.

Enter a name for the application.
Click register.
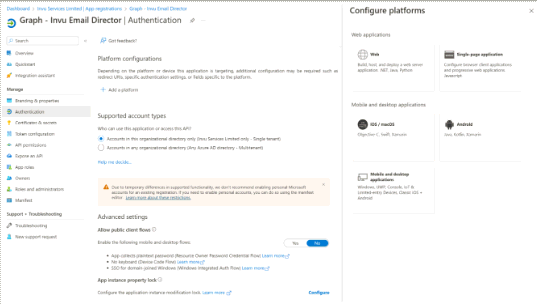
Select authentication.
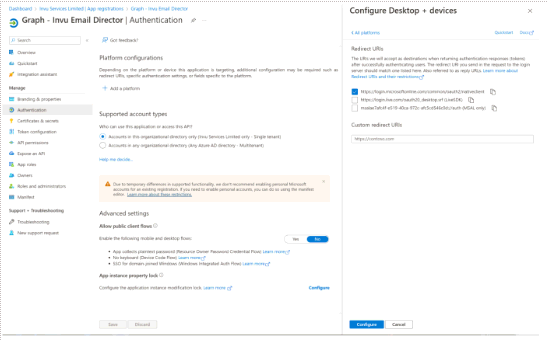
Click add a platform.
Select mobile and desktop applications.
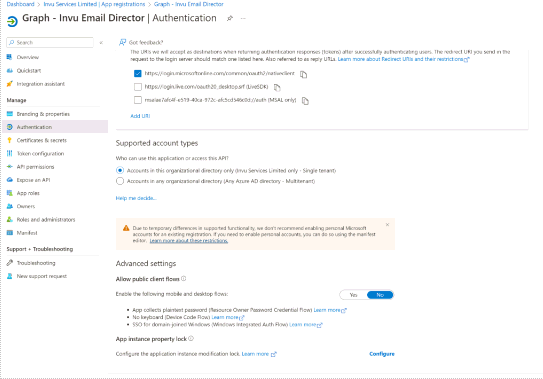
Check the option for https://login.microsoftonline.com/common/oauth2/nativeclient
Click Configure.
Under supported account types select the option for ‘Single tenant’.
Under advanced settings allow public client flows set to No.
Click Save if there are any changes.
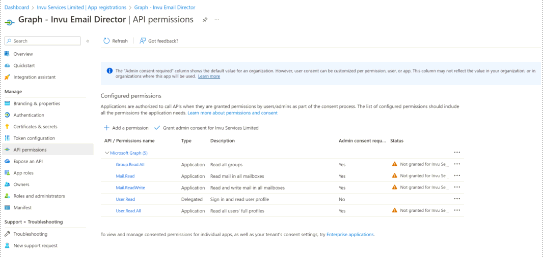
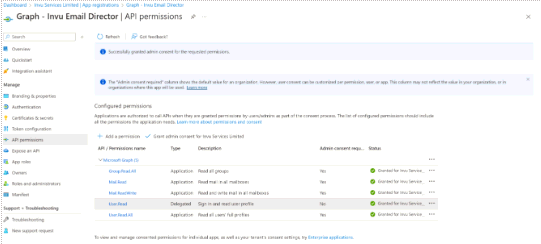
Select API permissions.
Click Add a permission.
Select Microsoft Graph.
Select Application permissions.
Search and select the following graph permissions:
Click the Grant admin consent option.
Click Yes.
Select Certificates & secrets.
Click New client secret.
Enter a description.
Set expires to your desired length – note maximum length is 2 years.
Click Add.
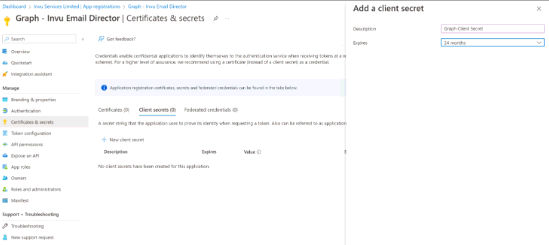
Once created, copy the client secret value before navigating away as it is only viewable just after it is created
Obtain the following IDs ready for configuration in IRIS Docs:
Client secret
Open IRIS Docs and browse to Administration > Global settings > Email
Enter the IDs into the Microsoft Graph fields.
Click OK.